- Qualcomm Launches Snapdragon 4 Gen 2 Mobile Platform
- AMD Launches Ryzen PRO 7000 Series Mobile & Desktop Platform
- Intel Launches Sleek Single-Slot Arc Pro A60 Workstation Graphics Card
- NVIDIA Announces Latest Ada Lovelace Additions: GeForce RTX 4060 Ti & RTX 4060
- Maxon Redshift With AMD Radeon GPU Rendering Support Now Available
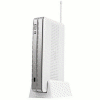
ASUS WL-700gE Wireless Router

There have been many feature-packed routers to come out of the ASUS shops in the past year, but the WL-700gE takes the cake thanks to its pre-installed 160GB hard drive. Is this NAS/Router hybrid worth your $200?
Page 2 – Features and Installation
|
|
The humble router no longer has to be boring, and ASUS is trying to make sure that consumers know this. Their WL-700gE is feature-packed, so much so that I will not be taking a look at every aspect. It would surely span a ten-page review! I will highlight here all of the important features and experiment with a few of the more interesting ones. Here is a list of notable features that I’ve thrown together, with the help of the back of the box.
- WL-700gE Primary Features
- 802.11g/b Connections
- 160GB Pre-Installed Harddrive (250GB Model Available)
- Download to the installed hard drive while your PC is off
- Share files off the hard drive via FTP:// or HTTP:// and locally
- Media-Center capable (iTunes server, UPnP)
- USB 2.0 Sharing… Webcam, Printer, Thumb Drive, Etcetera
- Create Website/Message board
- Ability to plug in external storage to back up hard drive
Needless to say, this is essentially a NAS and a router merged into one. It can act as a server for whatever you need. You could run your basic website off of it, or message boards. After some configuration, you could point your web domain to your IP address and the router would pick it up. That said, web pages you host on the router would all have to be database driven with text files, if you require a DB at all. The router is not a computer, so installing MySQL and PHP is out of the question.
When I saw this router at CES, I was immediately drawn to the admin system. On the previous ASUS routers we’ve reviewed, the admin has done the job it was set out to do, but it was generally ugly. Even the graphics were dithered… not a pretty site at all. The WL-700gE however, has a much far more intuitive admin system and should be easier to navigate and look at.
The Windows installation program was another I had a problem with on previous models, because it was clunky and would only work as it should 70% of the time. One issue I had with the previous model specifically, the WL-500W, was that I -had- to install the Windows program in order to get the wireless internet working properly. This was a problem with me, since I use Linux primarily. I’m happy to report that this was not the case with the WL-700gE at all. I set the security to WPA-PSK/TKIP and it worked immediately.
If you are experienced with wireless networks, then you will not need to install the software. All of the configuration you will need is on the router. First, I will show you the basic configuration screens, should you want to install the software to take care of setting up wireless and it’s security.
During the setup, you will have eight different screens to fly through. Some will be easier than others, especially if you are through a DHCP connection. It will take a bit longer if you have to manually input ISP information and/or passwords. The first screen shows you how to connect everything, and once you are ready to go, you need to push the “EZ Setup” button on the back and then push the button to continue.
This is one part of the setup I find somewhat odd, because this process has to be somewhat quick or I have found it won’t detect the router. If your router is on the opposite side of the house, you might have to huff it to get back to the PC on time, or get a family member to click it when ready.
Once the router is detected, it’s time to give your network a name and also a key. You can use the default key they provide (WEP) or input your own. You can also click to enable WPA instead, which is more secure, but not as compatible with certain products. The next slew of steps are ISP related. Since I am behind a DHCP connection, I was able to skip all of these.
Here is a screen completely unique to this router. Since there is a hard drive installed, they give you the option to set up a network drive on your desktop. This worked seamlessly, and input a Z: drive on both the desktop and in “My Computer”.
Once you finish up with that screen, you are good as finished.
With installation out of the way, let’s check out some of the main features on the router and then give our final thoughts.
|
|
Support our efforts! With ad revenue at an all-time low for written websites, we're relying more than ever on reader support to help us continue putting so much effort into this type of content. You can support us by becoming a Patron, or by using our Amazon shopping affiliate links listed through our articles. Thanks for your support!


