- Qualcomm Launches Snapdragon 4 Gen 2 Mobile Platform
- AMD Launches Ryzen PRO 7000 Series Mobile & Desktop Platform
- Intel Launches Sleek Single-Slot Arc Pro A60 Workstation Graphics Card
- NVIDIA Announces Latest Ada Lovelace Additions: GeForce RTX 4060 Ti & RTX 4060
- Maxon Redshift With AMD Radeon GPU Rendering Support Now Available
Social & RSS Feeds
Latest Videos


Latest News
Building an HTPC: Planning, Part Picking & Building
by Ryan Perry on November 8, 2013 in Editorials & Interviews
Today, most of us are always on the hunt for tools that can make our lives easier. Enter the HTPC. We have the Internet, movies and photos on our phones – why not on our TVs? Come along on a voyage of technological discovery that is fraught with peril, as we cover the good and potentially bad of building one of these handy systems.
Page 2 – The Build
Seeing how there are as many component combinations as there are computer users, I don’t want to get too deep into the installation process. What I do want to touch on again are some of the finer points of building an HTPC and hopefully help you avoid some of the pitfalls.
To start with, slapping the CPU onto the motherboard, installing the stock heatsink and pushing the memory into the slots isn’t that big of a deal, even for a novice – provided they take the time to read the instructions. The first hurdle will likely crop up when it comes time to install these components into the case.

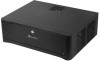
The Grandia GD06 is certainly what I would call a case for the advanced user in that some level of familiarity is needed due to the internal layout. Every mounting bracket needs to be removed in order to install the motherboard and power supply, and there are almost always limitations to the other components that can be used.
For example, only CPU coolers measuring 70 millimeters (mm) high can be used with an optical drive. If no optical drive is being used, the maximum height increases to 120mm. There’s also a limit to the length of the video card, power supply, the height of the memory, and even how much an optical drive can stick out from the front without affecting the flip-up cover. Luckily none of these restrictions will come into play, but this further helps to illustrate just how much planning should be done before parts are ordered.

After installing the motherboard, the power supply is next. The little pocket rocket of a PSU that I’ve used allows for a little extra room inside the case. Due to the small interior of some HTPC chassis, I’d suggest a modular PSU if your budget allows, since it’ll be easier to route what cables you do use, while allowing more air to circulate by cutting down on the unnecessary ones.

Next comes the hard drive, which is installed into one of the hot-swap bays after everything has been put back in its place; not every case allows for this, so again, there might be limitation on how many drives of a particular size can be installed and where. There are other areas to mount a hard drive in the GD06, but I chose a hot-swap bay simply out of ease of access.
For those who use an internal network card, you’ll obviously want to install it before you close up the system, but for me, it was as easy as sticking the external adaptor into a spare USB port. Something else to think about when it comes to network connectivity is whether you have a hardwire connection available or if you will go wireless. If wireless is your choice, there’s yet another potential pitfall – will your HTPC be within range of your wireless modem? If range is an issue, there are extenders that can be had for relatively cheap, but that’s just another piece of the puzzle.

Once all of the components have been installed, it’s time to connect the whole caboodle to the TV. This is another area where some folks might get into trouble because they either don’t know the limitations of the various interfaces or they don’t know what their TV supports.
HDMI works best for me since all cables are run through the wall and up to the TV. This single, thin cable carries both audio and video, and can display the video in high-definition. Not many video cards have HDMI ports, and many would need some sort of converter, but the motherboard does, which is why I’ve chosen a processor with an integrated GPU. The TV that I have could also handle DVI and VGA, but neither of these can carry audio, so an extra cable would be needed. Remember: Cables are the enemy!
So, finally! After all of this it’s now time to sit back enjoy the fruits of your labour, provided you have something to control the thing with.
This is something else that some folks might not think of. You’ll likely need a separate peripheral for your new system, whether it’s a special remote or a keyboard. The possibilities are nearly endless, but so are the problems that you could encounter if you don’t do proper research first.
There are more questions to ask yourself – do you mind being tied to the system with a cord, or will you go wireless? Will you always have line of sight to the HTPC? Will you be sitting more than 30 feet away from the system? Do you mind if there’s a keyboard lying around your living room? Will you need to do a fair bit of typing, or simply click around?
For me, this rig is for finding a local file or one on my network and some quick Netflix searching, all from a couch only 20 feet away. Also, cables are out of the question, meaning wireless is a necessity, and line of sight isn’t an issue, so an infrared peripheral will do the trick. If the HTPC is tucked away somewhere and you don’t have line of sight, a Bluetooth capable device is the way to go. To further complicate things, some Bluetooth devices don’t ship with the USB dongle that provides your HTPC with Bluetooth connectivity, so a separate one might be needed.

I knew there would be a lot to cover, and this is hardly the be all, end all guide on building an HTPC, but it shows just how much forethought goes into it. If you’re still reading this, you may be wondering if building a system like this even worth the effort. I can’t answer that for you, but for me, it all comes down to making my life easier.
Final Thoughts
Probably the most important thing to remember when building an HTPC is that for every part, there’s usually tons of alternatives. If one won’t work due to the restrictions of another, or due to environmental conditions, keep digging. There’s bound to be something out there that will do the trick. In the end, it all comes down to researching compatibility.
There’s nothing worse than happily building a system only to hit a road block because what you bought isn’t compatible. Measure twice, order once, to twist an old carpentry mantra into something relevant for system builders.
There are tons of resources such as review sites (I suggest *ahem* Techgage.com), or specifications straight from the manufacturer. Even customer reviews on retail websites could be useful, but I would take these with a grain of salt. Anybody can post anything online, and I’ve found that many people overstate their technical competence.
All in all, this build was pretty painless. Sure, there was a bit more work to be done due to the chassis that was chosen, and there were tweaks that could be made to a few of the components, such as a faster network adapter, more storage, or a Bluetooth remote, but what I chose works for my needs and keeps costs down.
Speaking of cost, if you were to build this system today using the same components, you’d end up with about $460 before tax. As I said before, you can make an HTPC as beefy as you want, depending on what you want to do on it, but for streaming videos, doing some light surfing, and maybe even some light gaming, it’s fantastic to know that you can get in the game for under $500, and still get a quality system.
Hopefully this has been helpful to some extent, and as always, feedback is welcome. Also feel free to pop onto the forums if you have questions about a possible HTPC build of your own, because there are loads of geeks that would be happy to help.
Now if you’ll excuse me, I need to pop some popcorn because it’s time for movie night!

Support our efforts! With ad revenue at an all-time low for written websites, we're relying more than ever on reader support to help us continue putting so much effort into this type of content. You can support us by becoming a Patron, or by using our Amazon shopping affiliate links listed through our articles. Thanks for your support!