- Qualcomm Launches Snapdragon 4 Gen 2 Mobile Platform
- AMD Launches Ryzen PRO 7000 Series Mobile & Desktop Platform
- Intel Launches Sleek Single-Slot Arc Pro A60 Workstation Graphics Card
- NVIDIA Announces Latest Ada Lovelace Additions: GeForce RTX 4060 Ti & RTX 4060
- Maxon Redshift With AMD Radeon GPU Rendering Support Now Available
Social & RSS Feeds
Latest Videos


Latest News
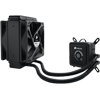
Corsair H80 Self-Contained Liquid CPU Cooler Review
by Ryan Perry on August 24, 2011 in Cooling
We mentioned in a recent chassis article that having the best of both worlds where cooling and noise is concerned is difficult, but as Corsair’s H80 proves, the same can’t be said about CPU coolers. In fact, for both those aforementioned reasons, the H80 might have just become the best CPU cooler we’ve ever tested.
Page 2 – Installation & Testing
Our H60 review showed how to install the cooler but I’ll go over it again because it’s so simple. AMD users will need to remove the Intel mounting system by removing two screws from each side of the block and pump. These are replaced by the AMD mounts and the screws fastened back into place.

Once the AMD mounts are on and some TIM is applied to the CPU, the two metal loops are threaded up through the holes in the mounts and the thumbscrews are threaded over them to be tightened down. To ensure the loops or thumbscrews don’t fall off during installation, it might be easier to put them in place first, but leave them loose to allow for some wiggle room before hooking them onto the mounts on the motherboard and securing the cooler.

Intel users are good to go out of the box. The back plate goes on the backside of the motherboard and the correct risers thread through each corner from the topside to hold it in place. With some TIM spread on the CPU the cooler goes on next, each corner threading over the risers and then the four thumbscrews tightened down to secure it in place.

One set of long, threaded bolts by themselves can be used to secure the inside fan to the radiator, and the bolts with washers thread through the holes in the case at a free fan opening, then through the fan and into the radiator.

Here’s what users can expect to see -it’s mighty impressive to look at simply on size alone. Powered on, it’s even nicer, with each level on the block and pump unit glowing white as it is selected.

Testing
Stock CPU settings were obtained by setting the AI Tweaker option within the BIOS to Auto. and the maximum stable overclock frequency of 3.85GHz was obtained after setting the base clock to 107 and the multiplier to 36. Our locked CPU was able to do this on stock voltage so the vcore was raised to 1.25V to generate additional heat.
All of our testing is performed in a near steady 20°C ambient environment with readings taken before and after with a standard room thermometer. AIDA64 Extreme Engineer is used for monitoring and recording all system temperatures throughout the testing process. All fans are run at 100% during testing and all coolers have any pre-applied thermal interface material replaced with Zalman’s ZM-STG1 Super Thermal Grease due its ease of application that virtually eliminates the possibility of skewed temperatures due to poor surface contact.
Windows is allowed to sit idle for 10 minutes after startup to ensure all services are loaded before recording the idle CPU temperature. CPU load temperatures are generated by performing a 20 minute run of OCCT LINPACK using 90% of the available memory.


The components used for testing are:
|
Component
|
Techgage Test System
|
| Processor |
Intel Core i5-2400 – Quad-Core (3.10GHz)
|
| Motherboard |
Asus P8P67 WS Revolution – P67-based
|
| Memory |
Corsair Dominator 1x2GB DDR3-1600 7-8-7-20-2T
|
| Graphics |
AMD Radeon 5450
|
| Audio |
On-Board Audio
|
| Storage |
Kingston/Intel SSDNow M Series 80GB SATA II SSD
|
| Power Supply |
Corsair HX650 650W
|
| Chassis |
Thermaltake Armor A90 Mid-Tower
|
| CPU Cooling |
Corsair H50
Corsair H60 Corsair H70 |
| Et cetera |
Windows 7 Ultimate 64-bit
|
And the results!


After stepping away for a bit and coming back to check the numbers once the overclocked load test had completed, my reaction was one that shouldn’t be repeated in a review. The H80 is an absolute monster and bested it’s dual fan cohort, the H70, by 6 degrees under full load. It goes without saying that we have a new champ!
When our test system is first started, the fans spin up to 100% and then settle down to the level selected on the pump and block. Even at the highest setting the fans still spin slower than the maximum RPMs, and I thought it was strange that selecting maximum performance didn’t make them top out.
While running the stock load test the fan speed didn’t increase, but during overclocked load testing I heard them ramp up a bit when the temperature hit 38 degrees – so it’s safe to say that they are set to spin up based on certain presets. Seeing how this cooler was developed by CoolIT, they could be governed by the temperature of the cooling fluid as the Vantage is.
This results in a bit of a trade-off. Without a separate fan controller or through the use of software, users lose the ability to run the fans at 100% all the time if needed.
To see just how well the H80 does based on hardware alone and not on fan speed, another load test was performed with the fan on the lowest setting, and I am happy to say that the temperature topped out at only 43 degrees. That’s right. It still managed to best the H70 by 1 degree while remaining dead silent. Mileage will vary if used with more aggressive overclocks.
Phew! I’m all hot and bothered. It’s a good thing that our CPU isn’t.

Support our efforts! With ad revenue at an all-time low for written websites, we're relying more than ever on reader support to help us continue putting so much effort into this type of content. You can support us by becoming a Patron, or by using our Amazon shopping affiliate links listed through our articles. Thanks for your support!