- Qualcomm Launches Snapdragon 4 Gen 2 Mobile Platform
- AMD Launches Ryzen PRO 7000 Series Mobile & Desktop Platform
- Intel Launches Sleek Single-Slot Arc Pro A60 Workstation Graphics Card
- NVIDIA Announces Latest Ada Lovelace Additions: GeForce RTX 4060 Ti & RTX 4060
- Maxon Redshift With AMD Radeon GPU Rendering Support Now Available
Corsair Obsidian 650D Mid-Tower Chassis Review
When Corsair released its Obsidian 800D full-tower nearly two years ago, it was the company’s first chassis, but still managed to set standards. For those who were hoping for much of the same aesthetic value and design features in a smaller package, Corsair delivers with its 650D, a premium-priced offering at $180.
Page 2 – Interior
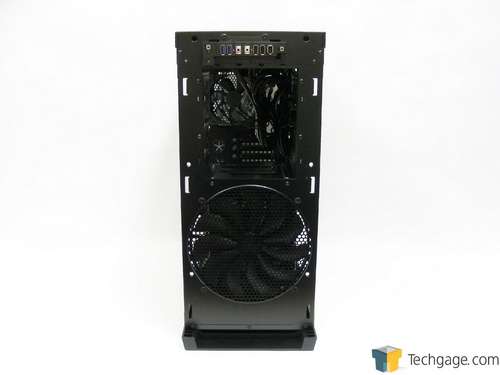
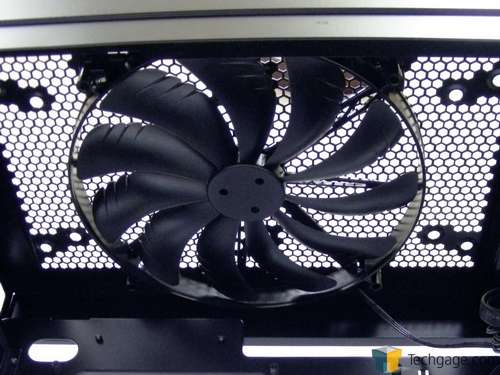
With those pesky panels out of the way, the front now shows off the huge 200mm fan and empty drive bays. The front panel comes off cleanly leaving all buttons and connections on the frame.
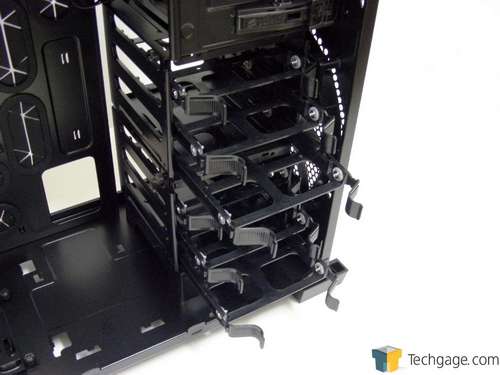
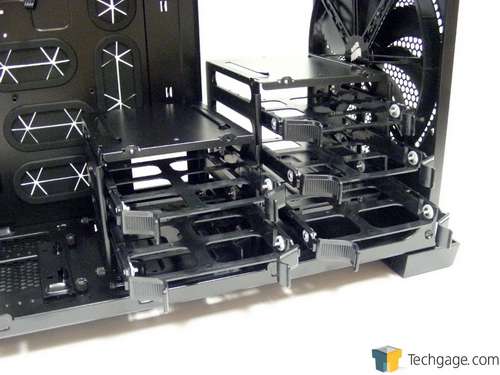
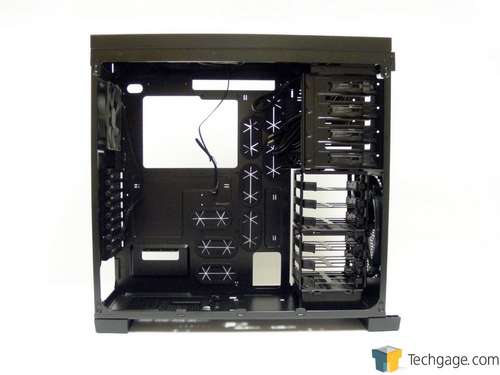
On the left side we see the business end and there is a fair bit to cover. The hard drive cage at the front bottom allows up to six 3.5″ or 2.5″ hard drives to be installed via the plastic trays. Any 3.5″ drives can be installed without tools thanks to the metal mounting pegs that are surrounded by rubber washers to absorb any vibration. Tools are required if installing 2.5″ drives since they secure with screws through the bottom of the tray once the metal pegs are removed from the washers on one side.
If extra room is needed or if the hard drives are restricting airflow more than the user would like, the top half of the drive cage can be removed by loosening two thumbscrews and sliding it out. If the drive bays are still required, the top half can be secured to the bottom of the case with the thumb screws just behind the original position so users with a large number of drives do not need to sacrifice storage capacity for the sake of space or temperatures.
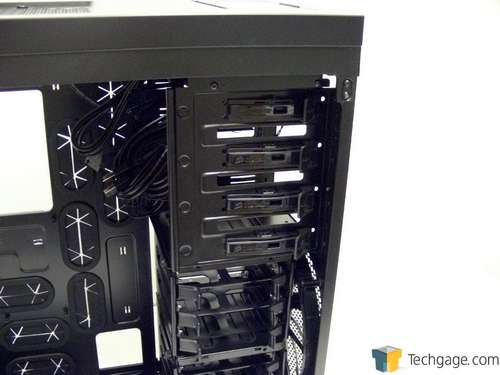
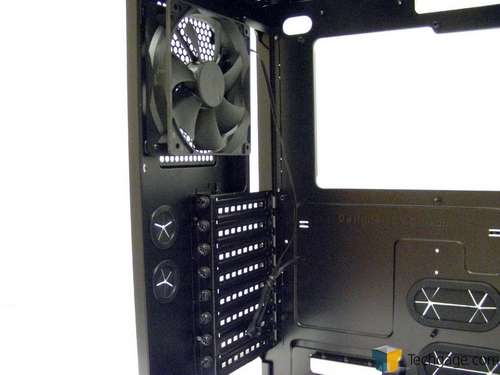
Above the drive cage are the locking mechanisms for the four 5.25″ drive bays. To install drives here, gently pull on the latch to disengage the pegs in the bay, slide the drive into place and let the latch spring into position to keep everything snug and secure.
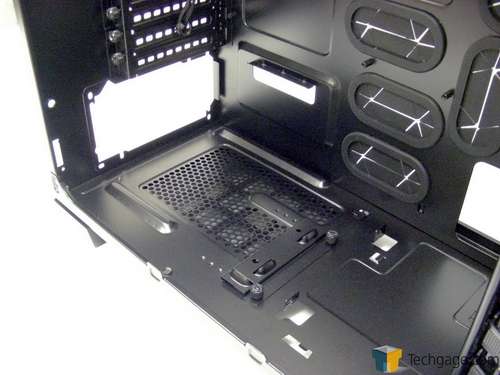
At the bottom of the case towards the rear is the ventilation area for the power supply. The power supply sits on two rails to lift it up and rests on an adjustable brace at the front. The brace can be sized in order to keep just about any power supply in place thanks to the two tabs on the top that stop any vertical or horizontal motion. This is done without tools thanks to the inclusion of two more thumbscrews.
The rear of the case shows off the vented PCI slots that are secured in place with thumbscrews to help keep tool usage to a minimum. Above it is the 120mm exhaust fan with the wire finally in the proper position in the top corner from the factory. Too many times I find myself removing, rotating and reinstalling this fan so that the power wire is in the proper place for cable management.
Now it’s time for the motherboard tray, which many will notice features Corsair’s characteristic everywhere-you-look cable management system. Down the right side are cable management areas, each with rubber grommets installed to keep everything looking clean no matter what your motherboard configuration may be, but also to hide wires from the 5.25″ drive bays. There are also some coming up from the bottom for running power supply leads or front panel connections to the bottom edge of a motherboard.
The large hole without the grommet is used to run wires from the top section of the hard drive cage if it has been moved to the bottom of the case. Up in the top-left corner is another small hole to run the 12v power connection up the back of the motherboard tray. Finally the tray has a gigantic cut-out in the CPU area to help with installation and removal of after-market heatsinks. All of this adds up to “no excuse” for having a mess of wires visible… ever.
At the top of the case there is tons of room to install a 240mm radiator by swapping out the 200mm fan.
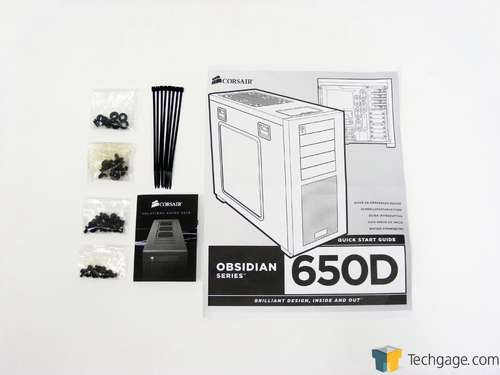
The bits and pieces that Corsair includes with the 650D consist of rubber washers, screws for installing additional fans, screws for securing the motherboard and drives and yet more screws for securing 2.5″ drives to the bottom of the trays. Also included are small zip ties for cable management, a product brochure showcasing some of Corsair’s other products and a quick-start guide that is more of a list of features than a guide. Oddly enough, the rubber washers are not mentioned in the parts on the back of the guide.
So now it’s time for my favorite part, the build. Here we separate the men from the boys. The wheat from the chaff. The cases from the… non-cases. Forget it. Let’s throw some gear in it!
Support our efforts! With ad revenue at an all-time low for written websites, we're relying more than ever on reader support to help us continue putting so much effort into this type of content. You can support us by becoming a Patron, or by using our Amazon shopping affiliate links listed through our articles. Thanks for your support!


