- Qualcomm Launches Snapdragon 4 Gen 2 Mobile Platform
- AMD Launches Ryzen PRO 7000 Series Mobile & Desktop Platform
- Intel Launches Sleek Single-Slot Arc Pro A60 Workstation Graphics Card
- NVIDIA Announces Latest Ada Lovelace Additions: GeForce RTX 4060 Ti & RTX 4060
- Maxon Redshift With AMD Radeon GPU Rendering Support Now Available
Social & RSS Feeds
Latest Videos


Latest News
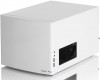
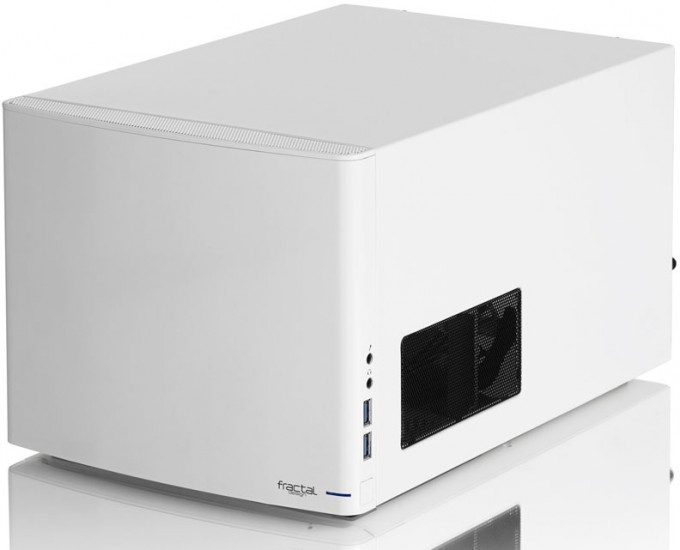
Fractal Design NODE 304 mini-ITX Chassis Review
by Ryan Perry on January 24, 2014 in Cases & PSUs
If you’re building a new PC and are aiming for the mITX form-factor, chances are good that you’ll be placing this PC out in the open, for everyone to see. That being the case (no pun, of course), you no doubt want it to look good, and be reasonably easy to install in. Fortunately, Fractal’s NODE 304 hits the mark on both accounts.
Page 2 – Installation, Testing & Final Thoughts
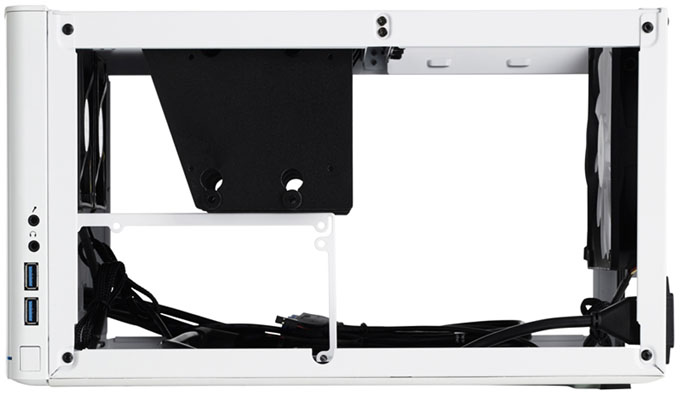
It goes without saying (but I’ll say it anyway), space is limited while working inside the NODE 304, but this is to be expected since it is a small form factor case. What should be noted is that all components installed cleanly with no issues. The case is very rigid, and the build quality is incredible.
That’s not to say that users won’t run into a few quirks here and there. One thing to keep in mind is when using a longer GPU as we did, it’s possible to create a clearance problem with the connections on a modular power supply. As shown in the shot below, the GPU slightly overlaps the left-most port, but thankfully it wasn’t required for our test system.

As mentioned earlier, the number of hard drive brackets will depend on the size of the GPU being used. Longer cards will take up the space used by the left-most drive bracket meaning the maximum number of drives that can be installed is reduced to 4. This is clearly noted on Fractal Design’s website and in the installation guide, so be sure to do your homework.
There’s enough room to stash cables in various locations, and fully-modular power supply users might have an easier time than we did. Not using a large GPU, or no GPU at all would help as well since it frees up that entire area where the metal loops on the bottom of the case and be used with zip ties to keep things neat and tidy. Regardless, here is our modified, albeit messy test system.


All of our testing is performed in a near steady 20°C ambient environment with readings taken before and after with a standard room thermometer. AIDA64 Extreme Engineer is used for monitoring and recording all system temperatures throughout the testing process.
Windows is allowed to sit idle for 10 minutes after startup to ensure all services are loaded before recording the idle CPU and GPU temperatures. CPU load temperatures are generated by performing a 20 minute run of OCCT LINPACK using 90% of the available memory, while GPU load temperatures are generated by OCCT’s built in test, also for 20 minutes.
Unlike our normal test system, the CPU remained at stock frequencies. The final clocks for the GPU are 760MHz on the core and 1000MHz QDR (4000MHz relative) for the memory with the voltage increased to 1.087V using MSI’s Afterburner overclocking utility. As always, testing was done prior to testing in order to ensure full system stability.
| Techgage Chassis Testing System | ||||
| Processor | AMD E-350N – Dual-Core (1.60GHz) | |||
| Motherboard | GIGABYTE E350N-USB3 mITX | |||
| Memory | Corsair Dominator 2x2GB DDR3-1600 | |||
| Graphics | EVGA GeForce GTX 470 | |||
| Storage | Kingston SSDNow 80GB SSD | |||
| Power Supply | Antec TP-750 Blue | |||
| Chassis | Fractal Design NODE 304 | |||
| CPU Cooling | Stock | |||
| Et cetera | Windows 7 Ultimate 64-bit | |||
| Idle | Load | |
| Processor | 69 | 71 |
| Graphics Card | 36 | 91 |
| Graphics Card (OC) | 37 | 91 |
Let’s start with a little explanation of the results, since the format differs from our usual stock versus overclocked format.
The E350 CPU wasn’t overclocked because it’s just not built for it, and we don’t expect many people to overclock it in the first place. Plus, any real world performance gains would be negligible, as would be the heat output due to the super low thermal design power (TDP) of 18 watts.
With that said, we saw things stay cool at stock frequencies while idle and under full load. The CPU readings may look high, but this is because it’s the internal core temperature (tj. max). Normally temperatures are read using a diode in the CPU socket and are much lower, but could be less accurate. This motherboard seems to be lacking that particular sensor, so we went with the tj. max, which is listed as 100 degrees Celsius by Core Temp. We used Core Temp to verify the readings by AIDA64, but no matter how the temperature is read, there’s still lots of room to breathe thanks to the robust cooling setup of the NODE 304.
We did decide to overclock the GPU though, and the temperatures we saw were nothing short of fantastic considering the fan was only spinning at only 80%. Normally the fan spins up into the 90s to keep the temperature at 91 degrees and in some instances the tests fail due to excess heat, but thanks to the venting on the left side of the NODE 304, our test GPU pulled cool air in directly from the outside meaning the fan didn’t have to spin as fast in order to keep temperatures down, in turn meaning less overall system noise.
As mentioned in the testing methodology, we always run case fans on high in order to get the best possible numbers. We also like to run them on the lowest setting if possible, in order to see a noise versus performance comparison. The system is very quiet with the fans running at full tilt, but while running nearly silent, the rush of air from the GPU fan is all that could be heard when left idle. Under load, we saw the CPU sitting at 74 degrees, and the GPU remained at 91 degrees.
Final Thoughts
Like always, whether a user finds a case appealing to the eye is based on their own preference, but for me, I love the look of the NODE 304 white. Even the original black version is still fantastic to look at. The exterior is clean and streamlined, and one would look right at home in the livingroom as a home theater PC.
The small footprint of the NODE 304 makes it a bit tougher to work in though. I found myself removing some components in order to make a few of the connections, but this is pretty much standard fare for cases like this. Planning out the installation beforehand will make things easier. Users with gigantic mitts like myself might find the installation goes a little slower than normal, but at no time did I feel frustrated by the small interior.
Cable management could be a problem however, depending on the power supply being used. Our test supply has the usual complements of hardwired power leads, so things were a bit cluttered when combined with the large GPU. Users running a system with more components might need to get creative with how the cables are routed in order to ensure maximum airflow. Our build severely restricted airflow from the left fan, but thankfully temperatures didn’t suffer much, if at all.
If cost is an issue, the NODE 304 series including the white version is available at major online retailers for a penny shy of $90 US. When comparing this to the features, performance, ultra-quiet cooling capabilities, and perfect build quality along with a flawless paint job, I’d say it’ll be hard to beat this case when building a home theater PC or a LAN box to take on the road.
This was my first time building a mini-ITX-based system, and I’m happy to say that thanks to the NODE 304, I wasn’t disappointed. It’s not hard to see why this case walks away with an Editor’s Choice award, so be sure to keep this case on the short list if a small form factor build is in the future.

Fractal Design NODE 304

Support our efforts! With ad revenue at an all-time low for written websites, we're relying more than ever on reader support to help us continue putting so much effort into this type of content. You can support us by becoming a Patron, or by using our Amazon shopping affiliate links listed through our articles. Thanks for your support!