- Qualcomm Launches Snapdragon 4 Gen 2 Mobile Platform
- AMD Launches Ryzen PRO 7000 Series Mobile & Desktop Platform
- Intel Launches Sleek Single-Slot Arc Pro A60 Workstation Graphics Card
- NVIDIA Announces Latest Ada Lovelace Additions: GeForce RTX 4060 Ti & RTX 4060
- Maxon Redshift With AMD Radeon GPU Rendering Support Now Available
Game Emulation In Linux

A common complaint about Linux is that there is a general lack of games. When emulation is brought into the picture though, it opens up a huge world of gaming possibilities. In this article, we will be looking into what emulation is, installing a gamepad and taking a look at a selection of emulators for different consoles.
Page 2 – Gamepads and Emulator Installation
Most emulators that you will download should support a gamepad. Lets face it. It’s much more comfortable to kick back with a gamepad than it is to be huddled around a keyboard. There are a few that don’t (as we will see), but thankfully they are an odd find. In this section, we will discuss how to get a gamepad installed and working under Linux, most notably the wired Xbox 360 Controller.
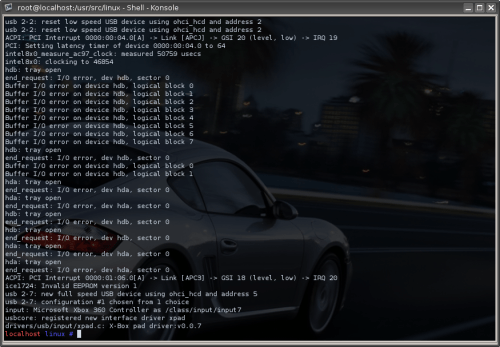
Before you begin any of these steps, you should first see if your distro of choice supports your gamepad right out of the box. To do this, plug it into an available USB port and then run dmesg. At the end of the list you should see the fact that it was picked up. If it’s working properly, it should be assigned a driver as well. Here is an example:
usb 2-7: new full speed USB device using ohci_hcd and address 5
usb 2-7: configuration #1 chosen from 1 choice
input: Microsoft Xbox 360 Controller as /class/input/input7
usbcore: registered new interface driver xpad
drivers/usb/input/xpad.c: X-Box pad driver:v0.0.7
 Gamepad properly detected. |
If you don’t see a driver assigned, first verify using a calibration utility. If that is a no go, then it’s time to recompile your kernel. Different distros may handle this task a different way, so turn first to Google or your distros website in search for tutorials on properly installing a gamepad, as most of it may be done automatically for you with a few simple commands.
Installing an Xbox 360 Controller
I won’t be giving a tutorial on how to get every gamepad working, but I feel the 360 controller will be one of the more popular choices for many reasons. It’s comfortable, has lots of buttons, and a lot of people already have one. Credit goes to Gentoo-Wiki, which is where I get these steps from. If you are running a distro other than Gentoo, you might need to first download the Linux source code and/or other utilities in order to compile the code properly. The most important tools are be gcc and ncurses, so that you can access menuconfig and then compile the kernel.
If you do not know how to compile a kernel, then this may be a little advanced, but don’t be worried. Once you have compiled one kernel, you’ve compiled them all. Erm… kind of.
For testing, I downloaded the latest 2.6.21 kernel and untar it into the /usr/src directory, as root of course. If you currently have kernel source code from another version on your computer, you might want to copy over your configuration file to the one you have just downloaded. This is done by copying the .config under the folder of your current kernel, into the new one (eg. cp /usr/src/linux-2.6.19/.config /usr/src/linux-2.6.21.1/. I don’t recommend this if you are using an older kernel because you could run into a few odd errors.
Prior to running menuconfig, you should download this patch:
http://kamikaze.waninkoko.info/misc/xpad-360-support-2.6.21.patch
With that in your kernel source directory, you will need to patch the xpad driver:
cat xpad-360-support-2.6.21.patch | patch -p1
If all goes well, it will tell you so. If you receive an error of some sort, chances are you are using the wrong kernel version. As noted, I performed all of this testing on a Gentoo and Ubuntu system using the 2.6.21.1 kernel. The reason for this is that I was unable to find an older version of the patch linked to above. If you are able to find an older version, you could match the kernel and stick with it. Once patched, you can run your make menuconfig.
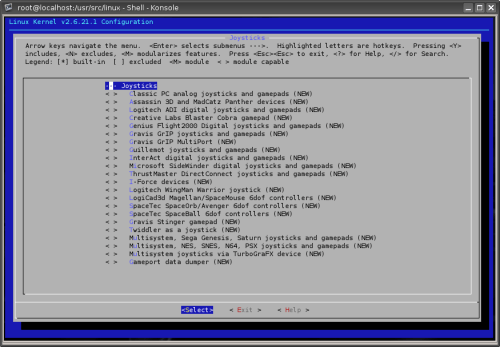
For the Microsoft Xbox 360 controller, it’s usually as simple as making sure you have USB HID support enabled in your kernel, which it likely already is. Under the Device Drivers > USB support menu, you will (or should) see the X-Box gamepad support, which when compiled as a module will be loaded as xpad. Then under Device Drivers > Input device support, you can enable Joystick interface so that the joydev module will be loadable into the kernel.
You can exit the kernel, saving the new config along the way. Run make ; make modules_install to compile the kernel. After copying your new kernel to the boot partition and editing your GRUB, you will want to reboot and enter the kernel you just compiled. Until you do this, the joydev module will not be loaded. Once inside your new kernel, you will need to modprobe usbhid, joydev and xpad. You can do all three at once with modprobe usbhid joydev xpad. It’s important to modprobe joydev prior to xpad, as xpad relies on it to function. Plug in your controller again and run dmesg and see if it’s now assigned a driver.
For more a more in-depth installation method, you can head over to Google or your favorite distros website. I believe I pretty much covered everything here though, so if you are familiar with compiling your kernel, it should not be much of a problem. I just covered one gamepad here, but chances are if you compile joydev into your kernel, most of what you plug in will function. If not, you can check out the Device Drivers > Input Devices > Joysticks menu in the kernel to see if your peripheral is listed there. If it is, compiling it into the kernel and modprobing it should be all that you need to do.
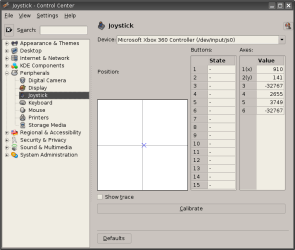
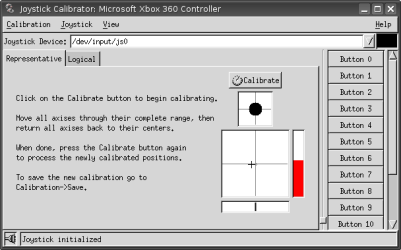
For calibration and testing of the gamepad, you can use either the Joysticks tab in the KDE Control Center or download jscalibrator if you are a GNOME user.
There is one thing to note though. I personally do not recommend analog sticks for playing 2D games, such as platformers, top-down games, or any early console games. The D-pad is a far better choice for the sake of accuracy.
Installing An Emulator
Depending on the distro you use, the emulators you are looking for might be included in the package repository, so check there first. If that’s the case, it should be as simple as apt-get install emulator or something to that effect. I emphasize the use of Google here, because there are many, many tutorials out there for getting an emulator installed.
If it’s not available through a repository, you will need to download the available version, extract it and then figure out from there how you need to go about installing it. Gentoo offers a lot of the emulators through Portage, so I got off very easy more often than not. Installing some manually may require you to compile them, run a script for installation or manually copy folders and files to the proper places. Some are more difficult than others, so take that as a warning. It’s important to pay attention to whatever is said in the INSTALL or README files, or in the documention found on the emulators website.
With all of that out of the way, it’s finally time to move right into the emulators themselves. First up: FCE Ultra and ZSNES.
Support our efforts! With ad revenue at an all-time low for written websites, we're relying more than ever on reader support to help us continue putting so much effort into this type of content. You can support us by becoming a Patron, or by using our Amazon shopping affiliate links listed through our articles. Thanks for your support!


