- Qualcomm Launches Snapdragon 4 Gen 2 Mobile Platform
- AMD Launches Ryzen PRO 7000 Series Mobile & Desktop Platform
- Intel Launches Sleek Single-Slot Arc Pro A60 Workstation Graphics Card
- NVIDIA Announces Latest Ada Lovelace Additions: GeForce RTX 4060 Ti & RTX 4060
- Maxon Redshift With AMD Radeon GPU Rendering Support Now Available
Gigabyte GA-P35C-DS3R
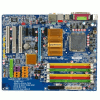
Gigabyte, like others, released a slew of motherboards utilizing Intel’s P35 chipset when it was first announced. The P35C-DS3R is unique to their line-up though, since it will accept both DDR2 and DDR3 memory. We pit the boards performance using both types of memory against our recently reviewed ASUS P5K and P5K3.
Page 3 – P35C-DS3R BIOS
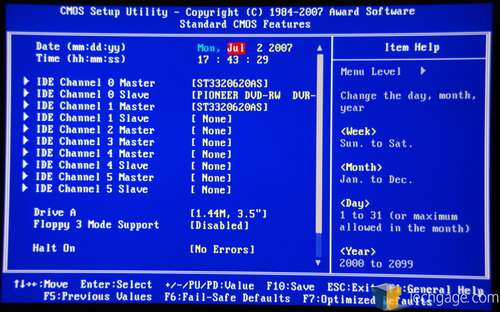
On this page, we will take a quick walk through the BIOS to see what’s being offered. First up is the main page, which won’t be much of a stranger to anyone.
The first page offers many of the basic options you’d expect, such as time, date and hard drive configuration. Two options I normally disable here are the Floppy 3.5″ and the Halt On > No Errors. That way, it won’t stall at boot time because I don’t have a CPU fan plugged in (due to water cooling).
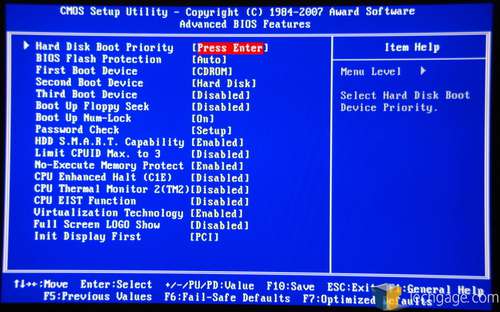
Under Advanced BIOS Features we can arrange our boot sequence, disable the full screen logo, disable EIST, enable SMART and more.
Integrated Peripherals offers USB-related options, audio and LAN enable/disable and also the RAID configuration.
The following screens represent the power and PnP/PCI options, as well as system health.
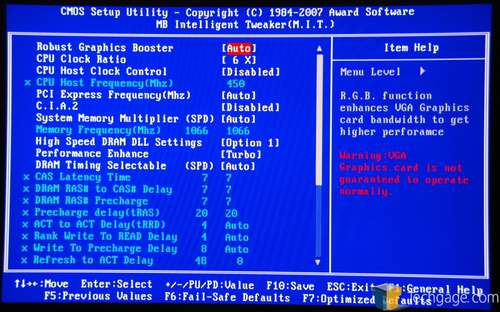
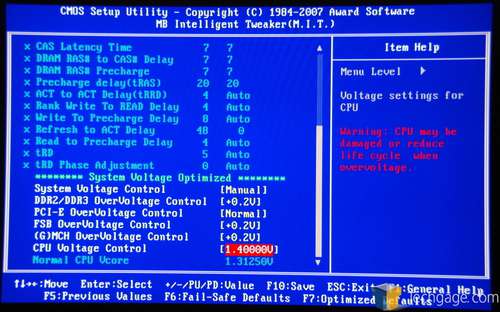
Of most interest to enthusiasts will be the MB Intelligent Tweaker section, which has every overclocking related option you will need. Here’s where things became interesting for me though. It’s been quite a while since I’ve used a Gigabyte motherboard, so I had forgotten about the CTRL+F1 trick at the BIOS main menu. For those unaware, what that does is unlock more than the usual options in the tweaking section, such as memory timings. Without pressing CTRL+F1, the selection is lacking.
Everything here is pretty self-explanatory, except for the DDR2/DDR3 OverVoltage Control. The options within range between +0.1v up through +0.7v. Depending on whether you have DDR2 or DDR3 installed, the BIOS will set a different base voltage. For DDR2, it’s 1.8v and for DDR3, it’s 1.5v. So, by using the +0.7v option, you will be able to use 2.5v for DDR2 and 2.2v for DDR3, both of which are within the limits of sanity.
Overall the BIOS isn’t exploding at the seams with features, but everything important is there.
|
|
Support our efforts! With ad revenue at an all-time low for written websites, we're relying more than ever on reader support to help us continue putting so much effort into this type of content. You can support us by becoming a Patron, or by using our Amazon shopping affiliate links listed through our articles. Thanks for your support!


