- Qualcomm Launches Snapdragon 4 Gen 2 Mobile Platform
- AMD Launches Ryzen PRO 7000 Series Mobile & Desktop Platform
- Intel Launches Sleek Single-Slot Arc Pro A60 Workstation Graphics Card
- NVIDIA Announces Latest Ada Lovelace Additions: GeForce RTX 4060 Ti & RTX 4060
- Maxon Redshift With AMD Radeon GPU Rendering Support Now Available
NZXT Zero

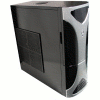
Building a PC requires several considerations. What’s in it? What’s powering it? What case do I use? How do I cool it? For using air cooling there’s a wide world of cases open to you but if you’re using aftermarket water cooling your options start to narrow. Today we look at a new case from NZXT that lends itself to both air and water cooling.
Page 3 – Installation
Along with the standard power header mobo connectors there are also firewire, USB and audio port connectors. a Couple of weeks ago I was saying I’d like to see standard 10 pin header plugs for the audio and firewire, looks like the good folks at NZXT were on the same page. Not only does the audio wires feature 1-10 pin header plug but 2. One for Intel’s new HD audio and another for AC’97 audio plus both the audio plug and firewire both feature individual wires with small plugs for non-standard headers. w00t!
The drive rails are all the same with the exception of size so for redundancy’s sake, I’m only covering the HDD versions. The rail is plastic and has holes where you’d normally use a screw but instead they feature a press fit metal stud that fits into the screw holes. just line the studs up with the screw holes and slide them in and it’s ready to pop the drive in. Simple as that and all the bays are screw-less.
Here’s where the fun begins, I found that with all the 5.25" bays in use that I had nowhere to put the reservoir aside from the bottom of the case. With the res in the bottom of the case I then had nowhere to put the pump so into the drive bay with it. Fortunately for me the holes in the drive bay are just the right size for 5/8" OD tubing to pass through. This left room for one HDD in the HDD bay above the pump.
I mounted the Radbox on the top fan and cut two 7/8" holes for the tubing to route through to the rad. Now, this wouldn’t be a big deal normally but I had to be mindful of the tool-less PCI mechanism. It uses an inverted "L" shaped piece of flat aluminum on a hinge to hold the PCI devices in place. The top of the lever can be seen under the bottom fan right next to the tubing from the rad, I’ve got a shot of the rest of the mechanism in a bit. Anyway, I had to make certain to allow enough room for the lever to fit in the closed position.
Here you see how I ran the tubing through the rear wall of the case to the radiator and back from the radiator to the CPU water block.
The bottom pic shows the tool-less PCI lock with it pivoted away from the PCI slot covers. To lock the slots down you simply move the top part over the PCI slots and latch it in place, the part with the little nubs sticking up off of it rotates up against the slots and the nubs lock the PCI covers into place.
The first pic shows the setup during leak testing, the second shows the gob of spaghetti from the PSU tied to the upper rail brace and the third shows everything in place and wired. Due to the design of this case it’s nearly impossible to hide wiring behind the mobo tray. They ran the tray the entire width of the opening, it runs from the rear of the case to the front on that side of the case. This prevents the wiring from routing behind the drive bays since the mobo tray is right up against the bays. If the tray ended right before the bays you could run the wiring behind the bays and mount your HDD’s with the connectors facing the off side of the case. This would make for an extremely sanitary look.
As you can see, once everything is in place the inside of the case is quite cluttered. Yeah, I know my cable shui sucks but I tried, believe me. Every area in the case that’s hidden has at least one cable stuffed up in it. Unfortunately though, the case just doesn’t have many nooks and crannies to hide cables. If you’ve got a modular PSU you’re in business though. Unfortunately, I used a standard fixed cable PSU so I’m a bit limited as to options.
|
|
Support our efforts! With ad revenue at an all-time low for written websites, we're relying more than ever on reader support to help us continue putting so much effort into this type of content. You can support us by becoming a Patron, or by using our Amazon shopping affiliate links listed through our articles. Thanks for your support!


