- Qualcomm Launches Snapdragon 4 Gen 2 Mobile Platform
- AMD Launches Ryzen PRO 7000 Series Mobile & Desktop Platform
- Intel Launches Sleek Single-Slot Arc Pro A60 Workstation Graphics Card
- NVIDIA Announces Latest Ada Lovelace Additions: GeForce RTX 4060 Ti & RTX 4060
- Maxon Redshift With AMD Radeon GPU Rendering Support Now Available
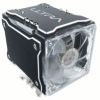
Ultra ChillTEC CPU Cooler

With the summer heat right around the corner, you need to figure out a good way to keep your CPU cool. Has Ultra come to the rescue with their ChillTEC cooler? As the name suggests, it uses a Thermo-electric Chip to help moderate the temperature of your CPU. The big question is though: Is this Totally-Enormous-Cooler worth your $130?
Page 3 – Installation
If you have ever installed an after market CPU cooler, the installation process for the ChillTEC should be simple and to the point. If you haven’t, never fear as the ChillTEC can be installed in little to no time at all. It all starts with the back plate. In this review, the cooler will sit atop an Intel E6600. With the E6600 being a socket 775 CPU, we will use the appropriate back plate and start from there.
With the plate being made of metal, and the motherboard having solder points on the back, there must be an insulating material to prevent the plate and the circuits from shorting out. To do this, there is a pair of layers that must be installed. Starting with the 775 plate, we first install the clear plastic. In all honesty, we have no idea what purpose this serves but it’s in the manual so we will use it.
Next, we place the black foam layer. This is the actual piece that will provide an insulating layer to prevent and hot metal on metal action. Perhaps this is where the plastic piece comes into play. The only thing I can think of is that if the solder points on the back of the motherboard are long enough, they could press through the foam and ground out on the metal plate. Maybe. Anyway, when the foam is installed, is should look like this.
The next step is to place the four mounting posts through the holes on the motherboard and prepare the motherboard to accept the cooler.
With the motherboard ready, we turn our attention to the cooler itself. In our case, we will be using this cooler to cool an Intel socket 775 E6600. To allow the ChillTEC to work with this setup, we will need to install a few bits of hardware. These basically expand the holes outward to meet up with the posts sticking up through the mounting holes. These “extenders†are held on with a small screw.
Once the thermal paste is applies, it’s time to mount the cooler. Please note that we will not be using the included thermal paste. Instead, we are going to use our personal favorite, the Zalman ZM-STG1 thermal interface material. Once applied, the ChillTEC slides down on the posts and is held in place with the included thumb screws. While cramped, and that is more the fault of the motherboard, installation of the ChillTEC was simple and painless. It honestly took less than 15 minutes. When everything is secured, we hook up the cables and get down to business.
With everything in place, we take a look at the control module. Coming with the option of selecting many different colors, the display provides us with the total time the unit has been used, the temperature of the TEC unit and an animation of a person digging in the ground. Yeah, it’s actually a person digging. I have no idea.
With everything on the board, it should look like so.
On to testing and our conclusion!
|
|
Support our efforts! With ad revenue at an all-time low for written websites, we're relying more than ever on reader support to help us continue putting so much effort into this type of content. You can support us by becoming a Patron, or by using our Amazon shopping affiliate links listed through our articles. Thanks for your support!


