- Qualcomm Launches Snapdragon 4 Gen 2 Mobile Platform
- AMD Launches Ryzen PRO 7000 Series Mobile & Desktop Platform
- Intel Launches Sleek Single-Slot Arc Pro A60 Workstation Graphics Card
- NVIDIA Announces Latest Ada Lovelace Additions: GeForce RTX 4060 Ti & RTX 4060
- Maxon Redshift With AMD Radeon GPU Rendering Support Now Available
Zalman CNPS8000 CPU Cooler

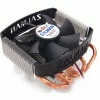
Zalman recently launched a new low-profile cooler by the name of CNPS8000. Physically it looks to have a lot of potential; It’s a great looking product overall. Included is a fan speed controller for when you feel the need for an extra punch. Sadly, in our testing we have found even with that extra cooling ability, this cooler falls short.
Page 2 – Installation
Here you can see a better view of how the heat travels along the pipes and also the general design of the cooler itself. It’s pretty unique looking.
One thing I always worry about is how difficult CPU coolers will be to install. This is because I must un-hook my previous water cooling in order to install it and normally this means I have to remove the entire motherboard. This proved true this time around.
Regardless of whether your board has a back bracket pre-installed, you should be ready to haul out the motherboard to install the one Zalman provided. It has holes specifically long enough to go through the front of the board so the opposite side can attach itself. This is speaking on behalf of the 775 installation; the 939/940 may be a little different.
For the 775 installation, you will need to install the bracket like so. It consists of two parts that slide together and it attaches right underneath the copper base. The gold screws are not meant to come out of this bracket.
This is the proper mounting, with the protruding heatpipes facing the right side of the case. The cooler couldn’t be mounted any other way, thanks to random objects blocking the way on the motherboard. You can also see my lazy way of using the fan controller, which I kept inside the case for the sake of being simple. This controller is designed to be attached to the back of the case with the cable running through. This allows quick access to increasing the fan speed simply be reaching in towards the back of the case.
While the installation was a relative breeze, there was one thing that I disliked about the un-installation. When you apply the bracket to the back, there is a strip you are to remove so that it properly affixes to the back of the board. Well, trying to remove this proves to be a pain in the ass and will result in left over residue that’s impossible to remove. As far as I can tell, this strip would not necessarily need to be removed at all but seriously, this should not be the result of removing the bracket. Nobody wants this on the back of their motherboard.
Now that we have this out of the way, let’s take a look at the specifications and finally the performance testing.
|
|
Support our efforts! With ad revenue at an all-time low for written websites, we're relying more than ever on reader support to help us continue putting so much effort into this type of content. You can support us by becoming a Patron, or by using our Amazon shopping affiliate links listed through our articles. Thanks for your support!


