- Qualcomm Launches Snapdragon 4 Gen 2 Mobile Platform
- AMD Launches Ryzen PRO 7000 Series Mobile & Desktop Platform
- Intel Launches Sleek Single-Slot Arc Pro A60 Workstation Graphics Card
- NVIDIA Announces Latest Ada Lovelace Additions: GeForce RTX 4060 Ti & RTX 4060
- Maxon Redshift With AMD Radeon GPU Rendering Support Now Available
Social & RSS Feeds
Latest Videos


Latest News
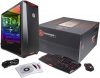
A Look At CyberPowerPC’s GUA2400BST AMD VR Gaming PC
by Rob Williams on February 19, 2017 in Systems
Can an affordable AMD-powered PC handle VR? With CyberPowerPC’s help, we find out that the answer is “yes”. Despite being priced at $700 USD, this PC looks anything but budget. It sports a beautiful Phantek’s chassis, glows with RGB lighting, and even includes a mouse and keyboard. Did we mention it can also handle VR?
Page 1 – Introduction, A Look At The Hardware & Software
A handful of months ago, AMD teamed up with the folks at CyberPowerPC to debut a $499 gaming rig that could endure the ultimate test: VR. A couple of months later, an upscaled version of that build arrived at our doorstep so that we could put its promises to the test.
The reason this build is so inexpensive is thanks to the inclusion of the $200 Radeon RX 480, and also the affordable 970 platform. We were sent a $699 version of the build, and due to light information surrounding the $499 one, I’m not quite sure what this adds for that extra $200. What I do know is that there is a lot of PC crammed into this $700 package.

That’s so much the case that I admit I was quite surprised when I hauled this PC out of its box. It’s been a long, long time since I’ve taken a look at a PC of this price-point, so to see it include a gorgeous LED-lit chassis and even a keyboard and mouse; I’m left impressed.
A Look At The Hardware
Before going further, I should say that this review comes at an odd time, as AMD’s first Ryzen chips are expected to launch in a couple of weeks. For that reason, I can’t recommend this exact model by default because Ryzen is going to be worth the short wait. That’s even without knowing its true potential; there’s just no question that it’s going to be better than the Piledriver chip found in this build.
That all said, if you like what you see here, I’d encourage you to scour CyberPowerPC’s website once Ryzen launches, as it will have a collection of new builds designed around it.
| CyberPowerPC AMD VR Gaming PC | |
| Processor | AMD FX-8350 8-Core @ 4.0GHz 4.2GHz Turbo; 8MB L3 Cache; 2x4MB L2 Cache |
| Motherboard | ASUS M5A97 R2.0 (AMD 970) |
| Memory | 8GB (4GBx2) (11-11-11-29 @ DDR3-1600) RamosTek EWB4GB681PAE-16IC |
| Graphics | AMD Radeon RX 480 4GB |
| Display | Not Included |
| Storage | 1TB Toshiba DT01ACA100 (7200RPM) |
| Optical | Not Included |
| Audio | ASUS IXP SB600 (Realtek Codec) |
| Ethernet | Realtek PCIe GBE |
| Wireless | Intel Dual-band Wireless-AC 3165 & Bluetooth 4.2 |
| Chassis | Phanteks Eclipse P400S Tempered Glass |
| Connectivity | Back: 2x USB 3.0 (ASMedia), 6x USB 2.0, PS/2 Keyboard & Mouse, Ethernet, 6x Audio Jacks, S/PDIF, Wi-Fi (ac), HDMI, DisplayPort x3 Top: 2x USB 3.0 (ASMedia), Audio In, Audio Out |
| Et cetera | 18.3 (H) x 8.3 (W) x 18.5 (D) inches 32 lbs Includes gaming mouse and keyboard |
| Price | ~$699.99 USD |
In order to keep the price of this build as low as possible, a 4GB version of the Radeon RX 480 is included, rather than the more common 8GB model. That admittedly shouldn’t matter a great deal, unless you ever plan to go the CrossFire route and run 4K resolution, or ultra high-end settings at 1440p. By itself, the 4GB RX 480 can deliver great 1080p gaming and good 1440p gaming, as well as a solid VR experience.
Other key specs include the 4GHz FX-8350 processor, ASUS’ M5A97 R2.0 motherboard, and a glaring flaw: the OS installed to a 1TB mechanical hard drive.
It’s entirely understandable why CyberPowerPC didn’t include an SSD in this build, but I truly believe we’re at the point where an SSD should be a non-option. Either the HDD should be sacrificed, or some extra bucks should be splurged in order to keep the important stuff, like the OS, on an SSD.
I took a look at an ASUS gaming PC a couple of years ago that shipped without an SDD, and it was evident to me from the moment I started up the rig. The same applies here. Not long after I booted this PC up, I took a screenshot of the desktop and tried to open Microsoft Paint to paste it in. The lag at that point was so bad that I thought the keyboard had died while I was typing “Paint” into the Start menu. Fortunately, that wasn’t the case; it was just mechanical storage rearing its ugly, slow head.
That said, if you’re looking for a build like this and don’t want to go over its initial pricepoint, I’d recommend upgrading to an SSD as soon as you can later on, because you will notice the difference.

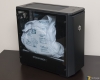

Overall, CyberPowerPC did a great job of packaging this PC. Inside its box, it was protected with a plastic bag, and held in place by two thick pieces of styrofoam. The tempered glass on the chassis was also protected with plastic, and included a note to explain how you should continue your unboxing effort.
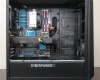
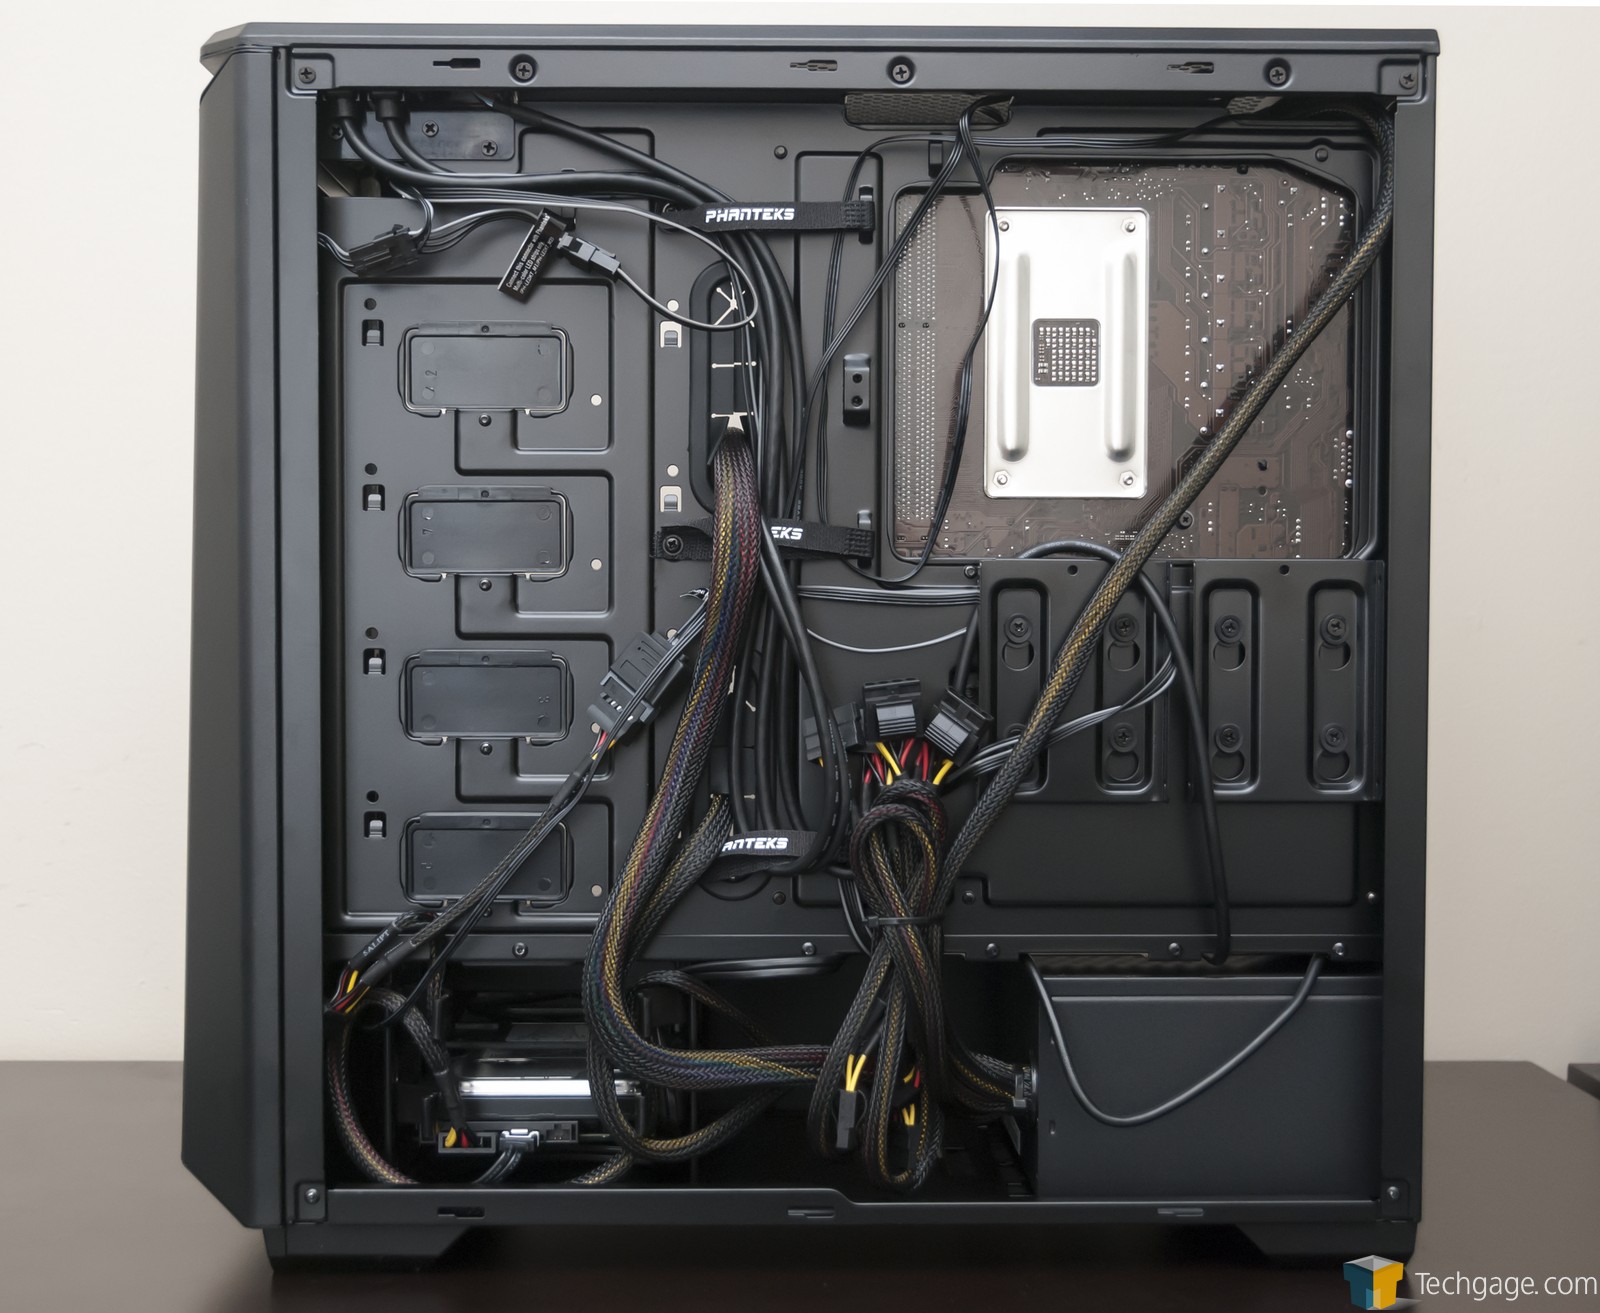
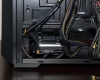
After the plastic and note were removed from the door, I was left with what’s seen in the first shot above. After removing four thumbscrews (the top two are different from the bottom two) and removing the door, the huge clump of disfigured foam padding can be removed from the interior. This foam kept everything in place very well; there were no issues caused by shipping at all, as seen in the second pic.
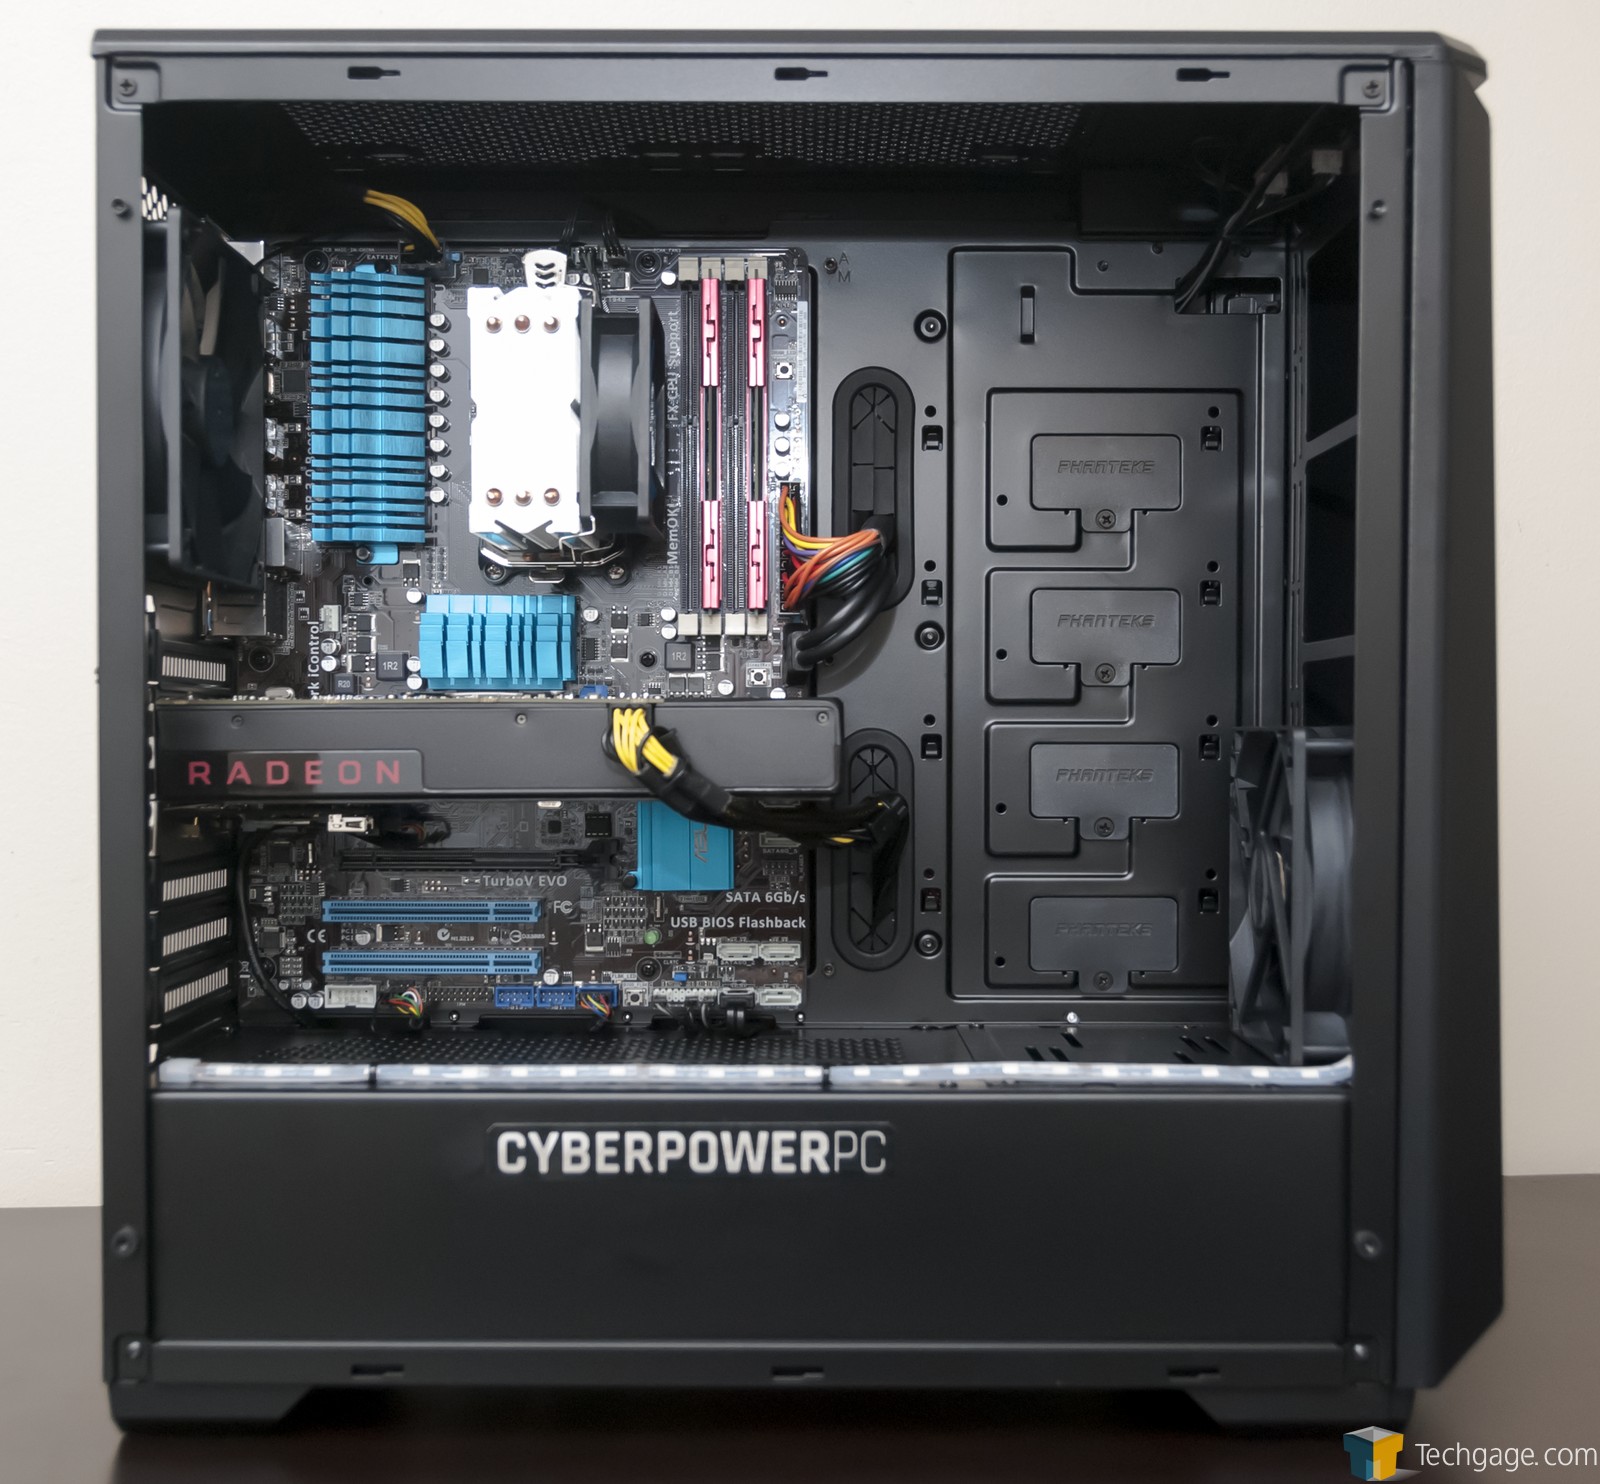
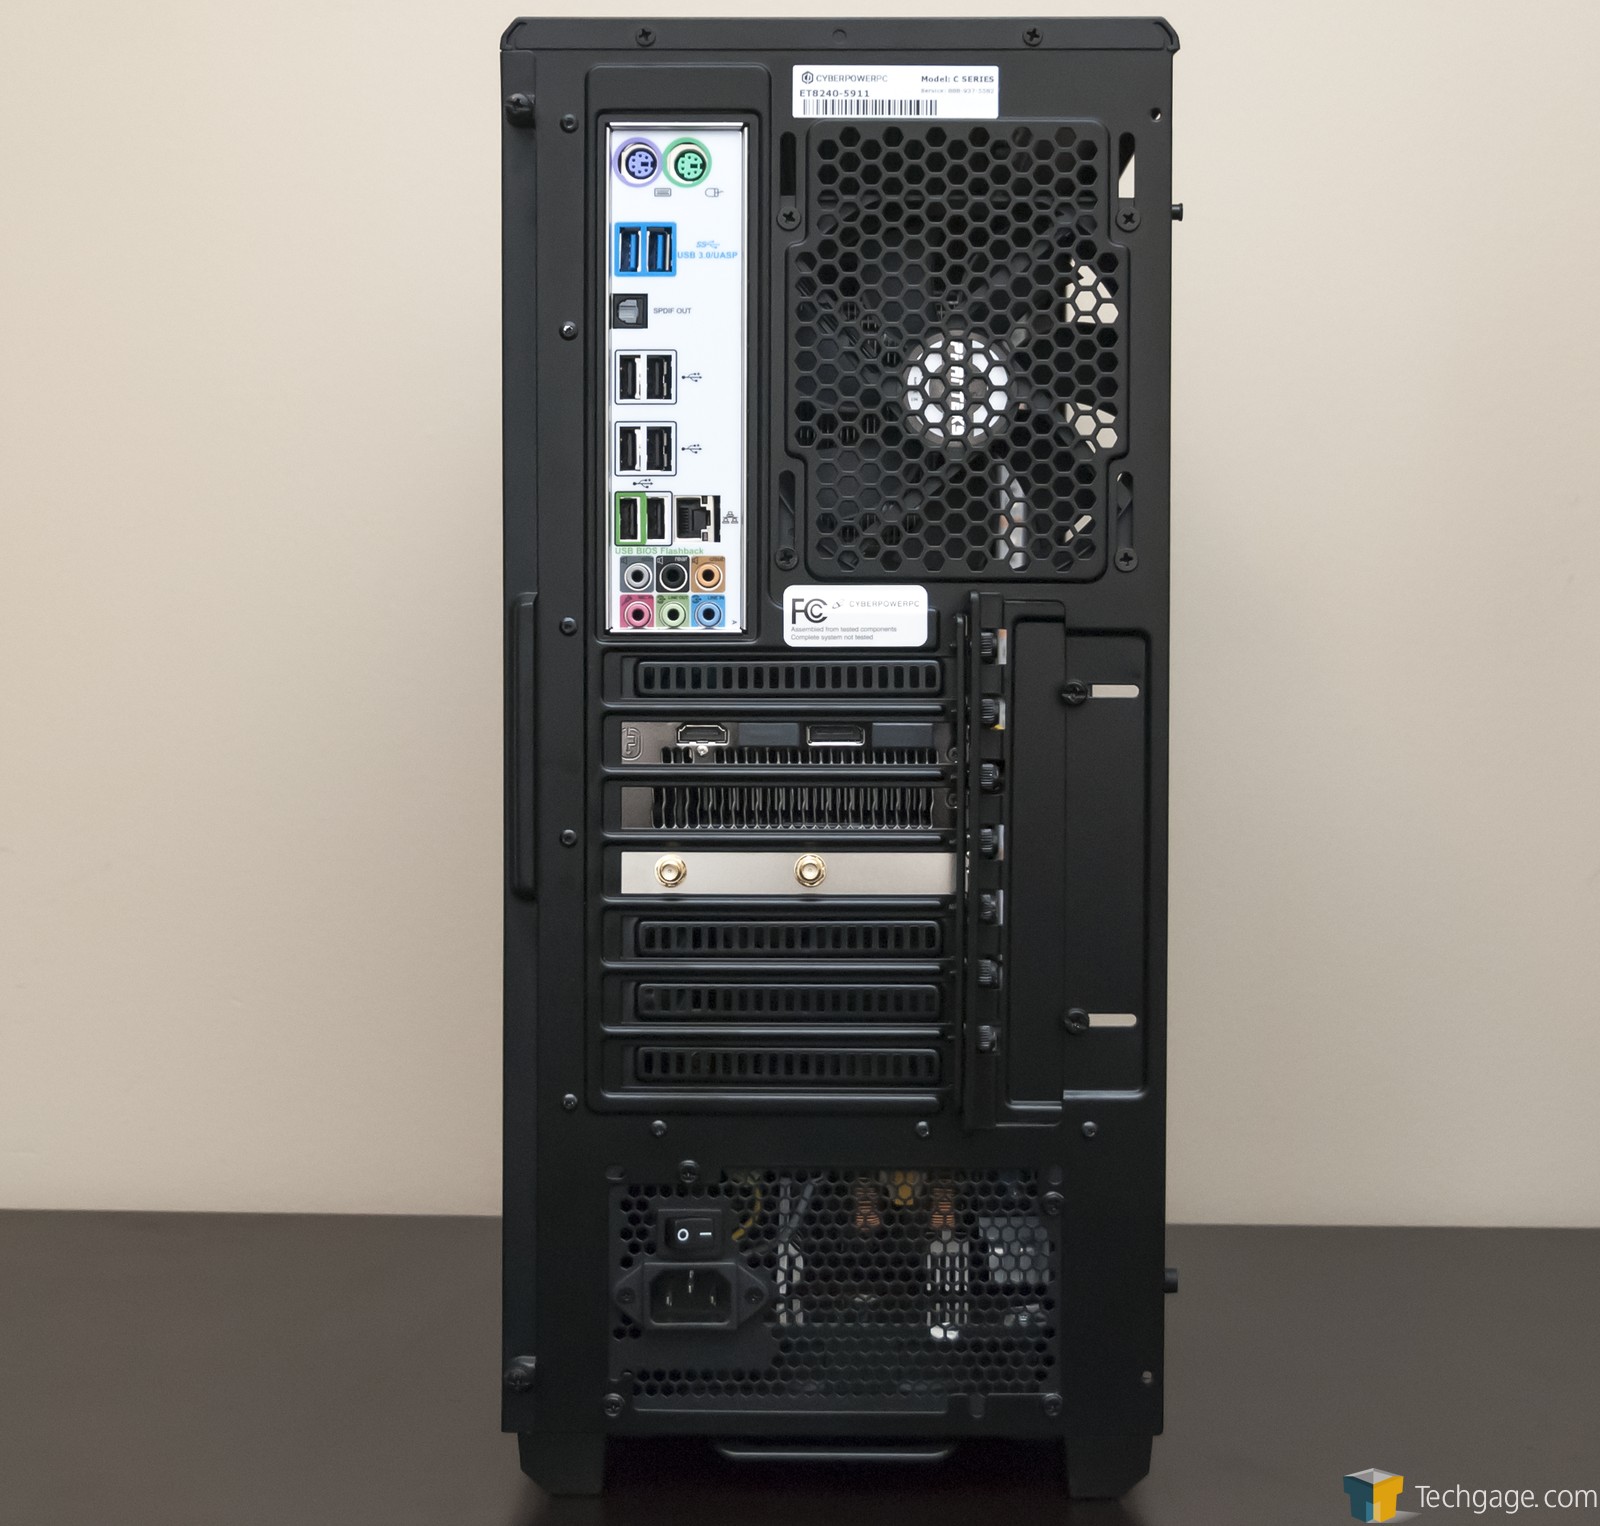
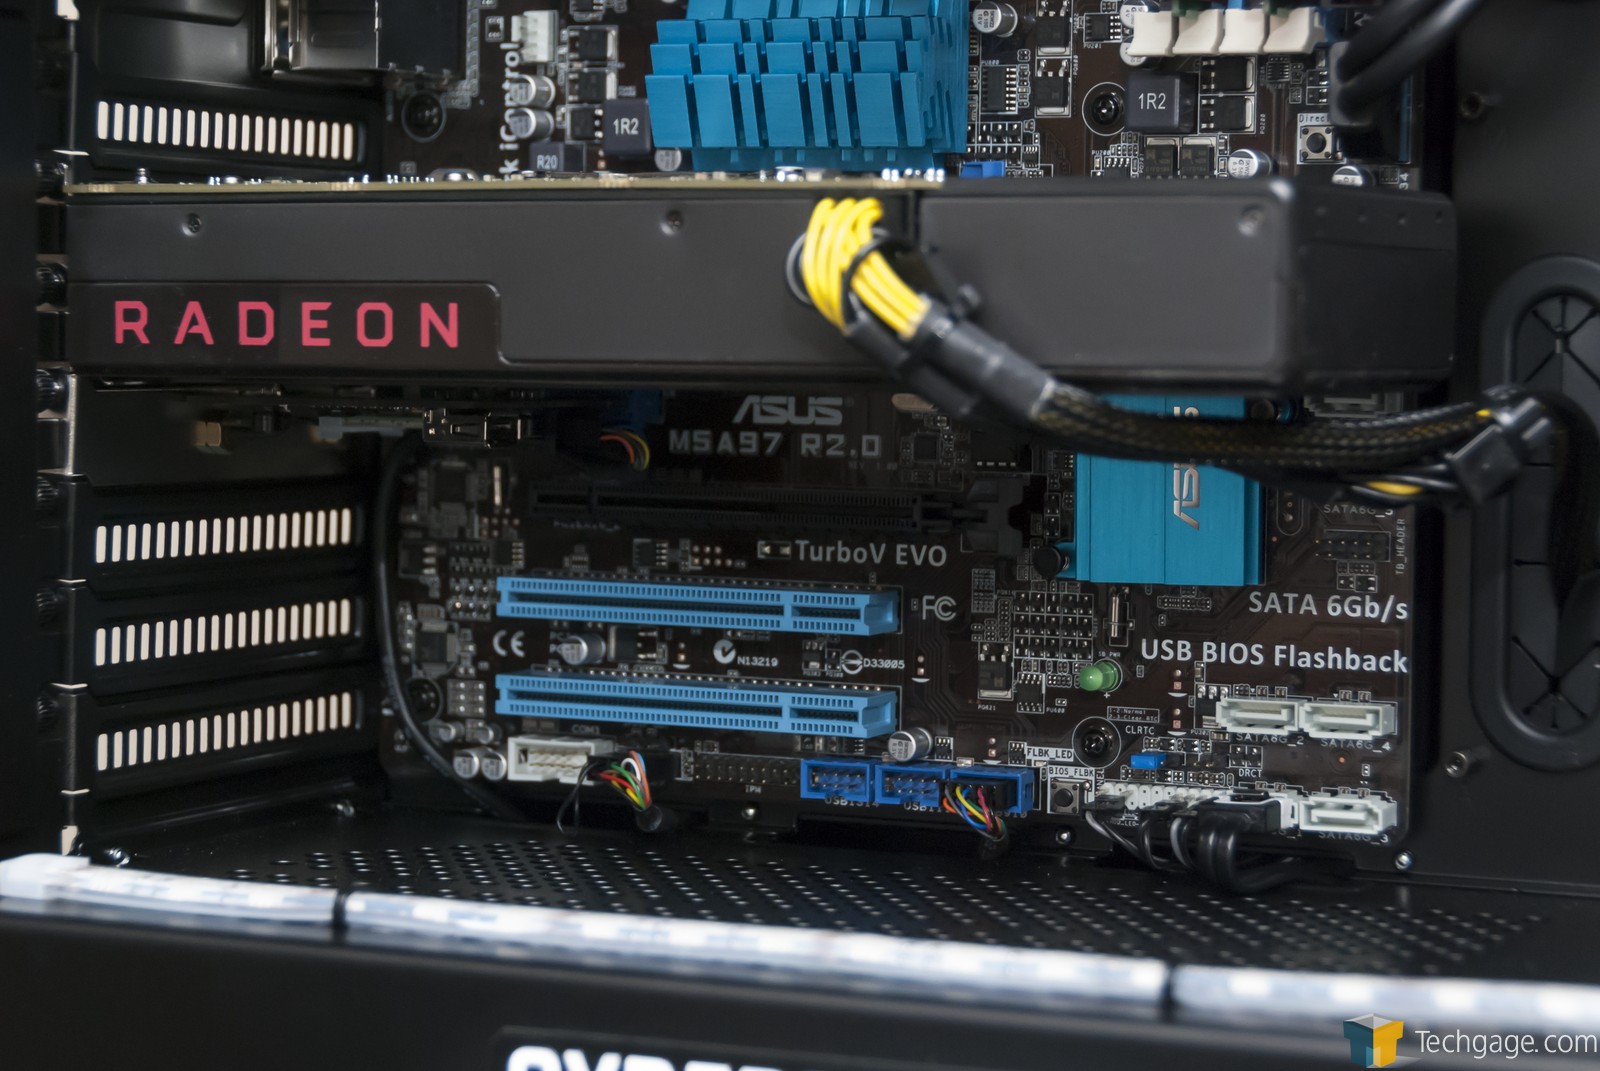
Taking a look at the back of the PC with its side panel off, we can see the care that went into keeping the build as clean as possible cord-wise. Cables that were needed (eg: molex) are tied up, and the rest are routed in an efficient way, ultimately leading to a seriously clean-looking interior (important considering the large tempered glass side will let you see everything in action).
This particular build uses Phantek’s beautiful Eclipse P400S chassis, and includes both a fan at the back, next to the I/O panel, and another in the front, bottom, to help draw in some cool air and blow it towards the GPU. Cooling could be improved down-the-road with a couple of more fans installed at the top, although you’d need to use a splitter, as the motherboard has only a single fan header open (towards the left middle), for a total of four total across the board. As long as the chassis is kept clean, though, extra fans are not necessary.
At the back of the PC, 2x USB 3.0 ports can be found in addition to 6x USB 2.0 ports. Also available are separate PS/2 ports for the mouse and keyboard, Ethernet, S/PDIF, audio, DisplayPort x3, HDMI, and also Wi-Fi. The wireless capabilities are provided by an Intel add-in card, delivering both 802.11ac and Bluetooth 4.2.
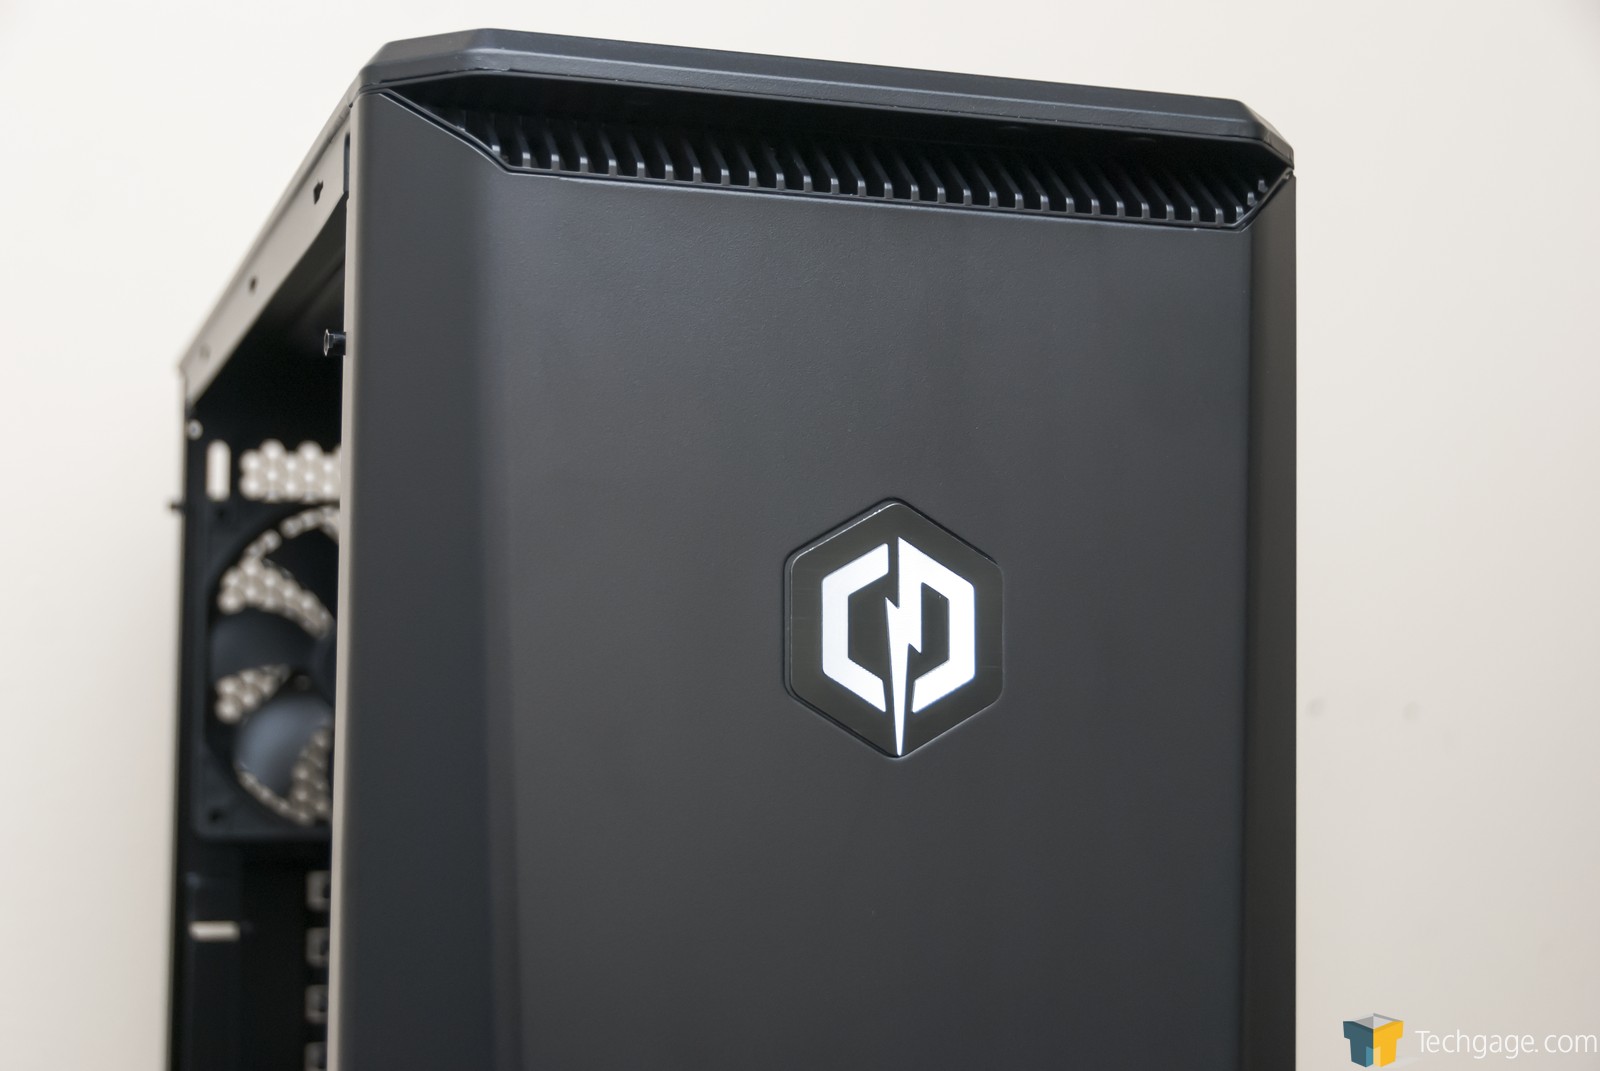


The front of the Phantek’s chassis chosen is very clean; it’s not a door, so internal optical drives are a no-go. Towards the top of the front is a CyberPowerPC logo, and above that is ventilation for cool air to enter (or hot air to escape; it’s an open border policy).
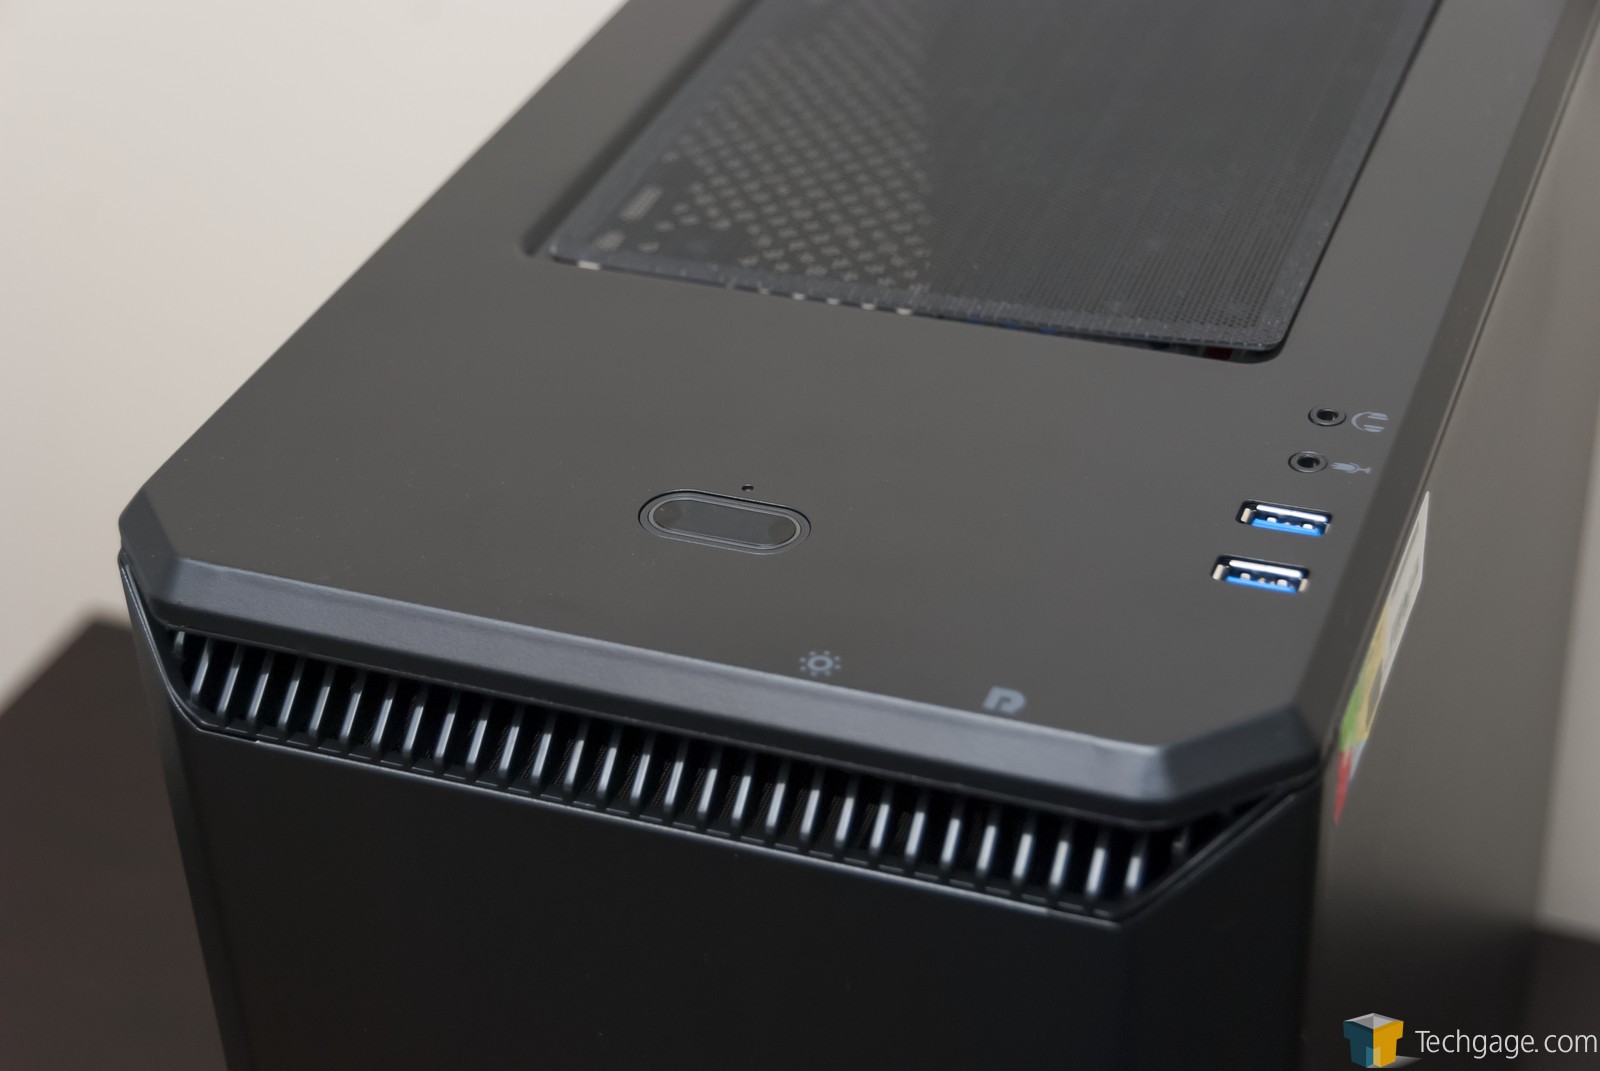
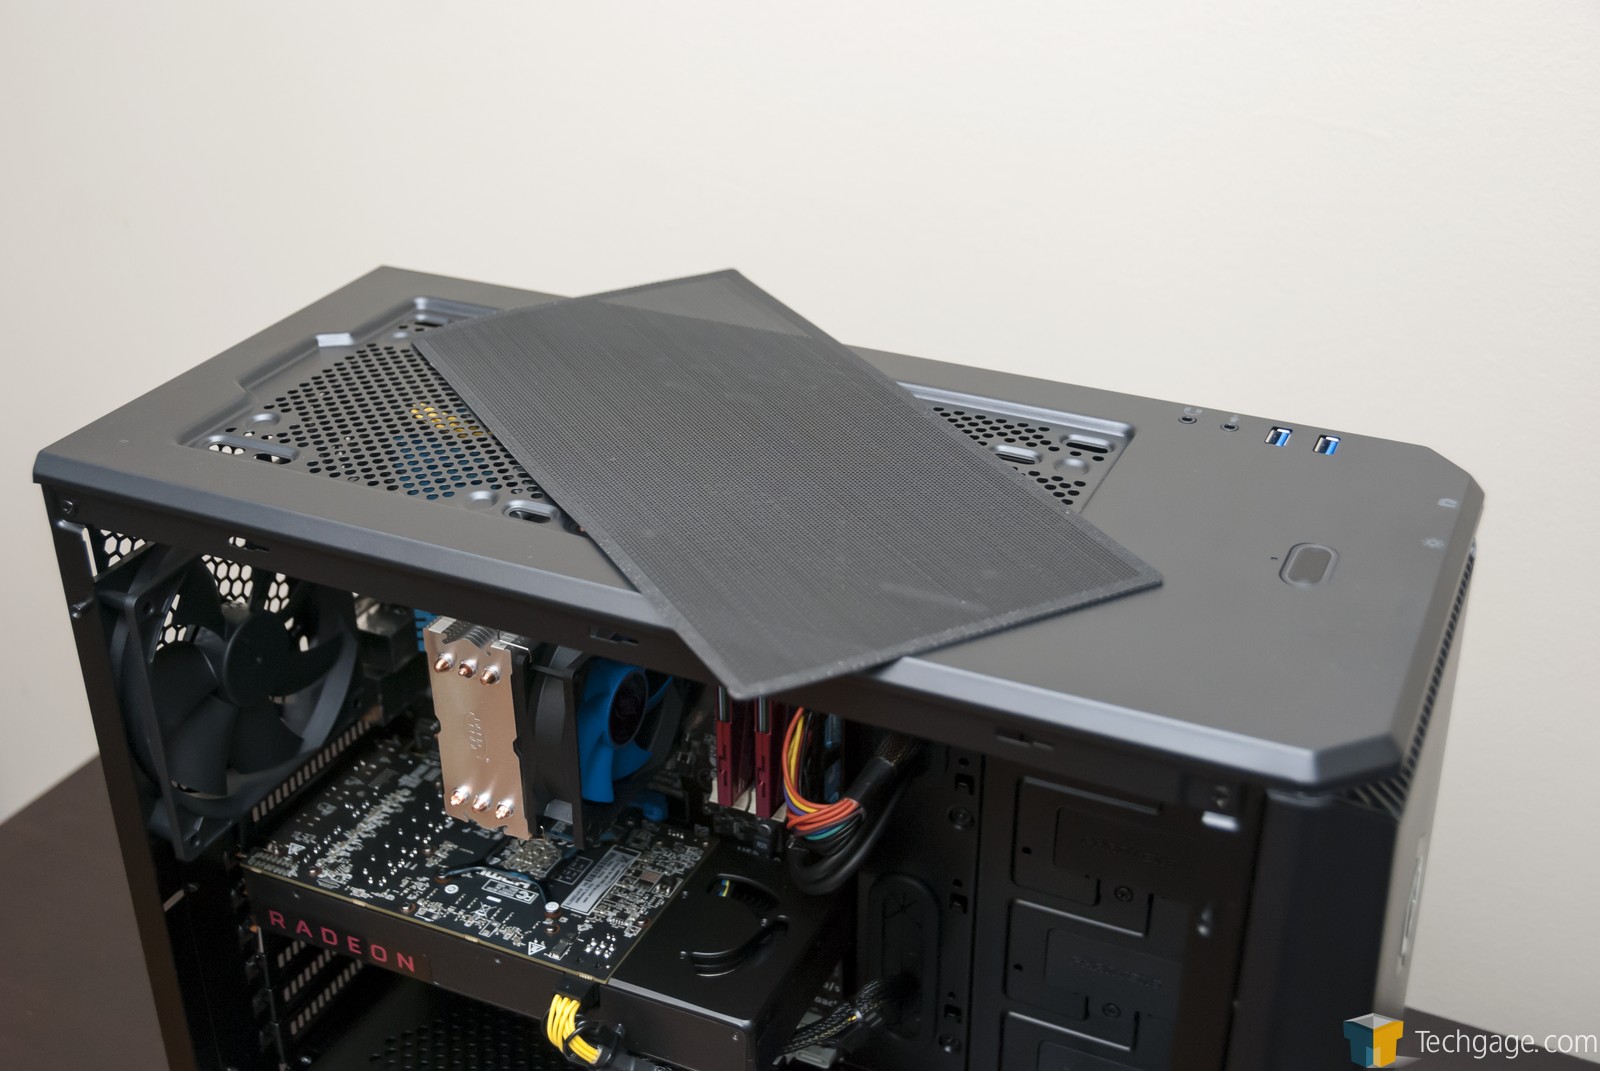
At the top, we see two USB 3.0 ports, audio in and out ports, and also the power button. The reset button is hidden underneath the top flap, along with the LED strip color change button. For most of testing, I thought that the PC was stuck in its red mode, but that’s not the case at all. Hitting this secret button will cycle through a handful of common colors.
Also at the top is a magnetic air filter that can be easily removed for cleaning. This can remain in place if you install two top fans down-the-road, although if you’re not married to the aesthetics, it could be removed for improved air exhaust/intake.
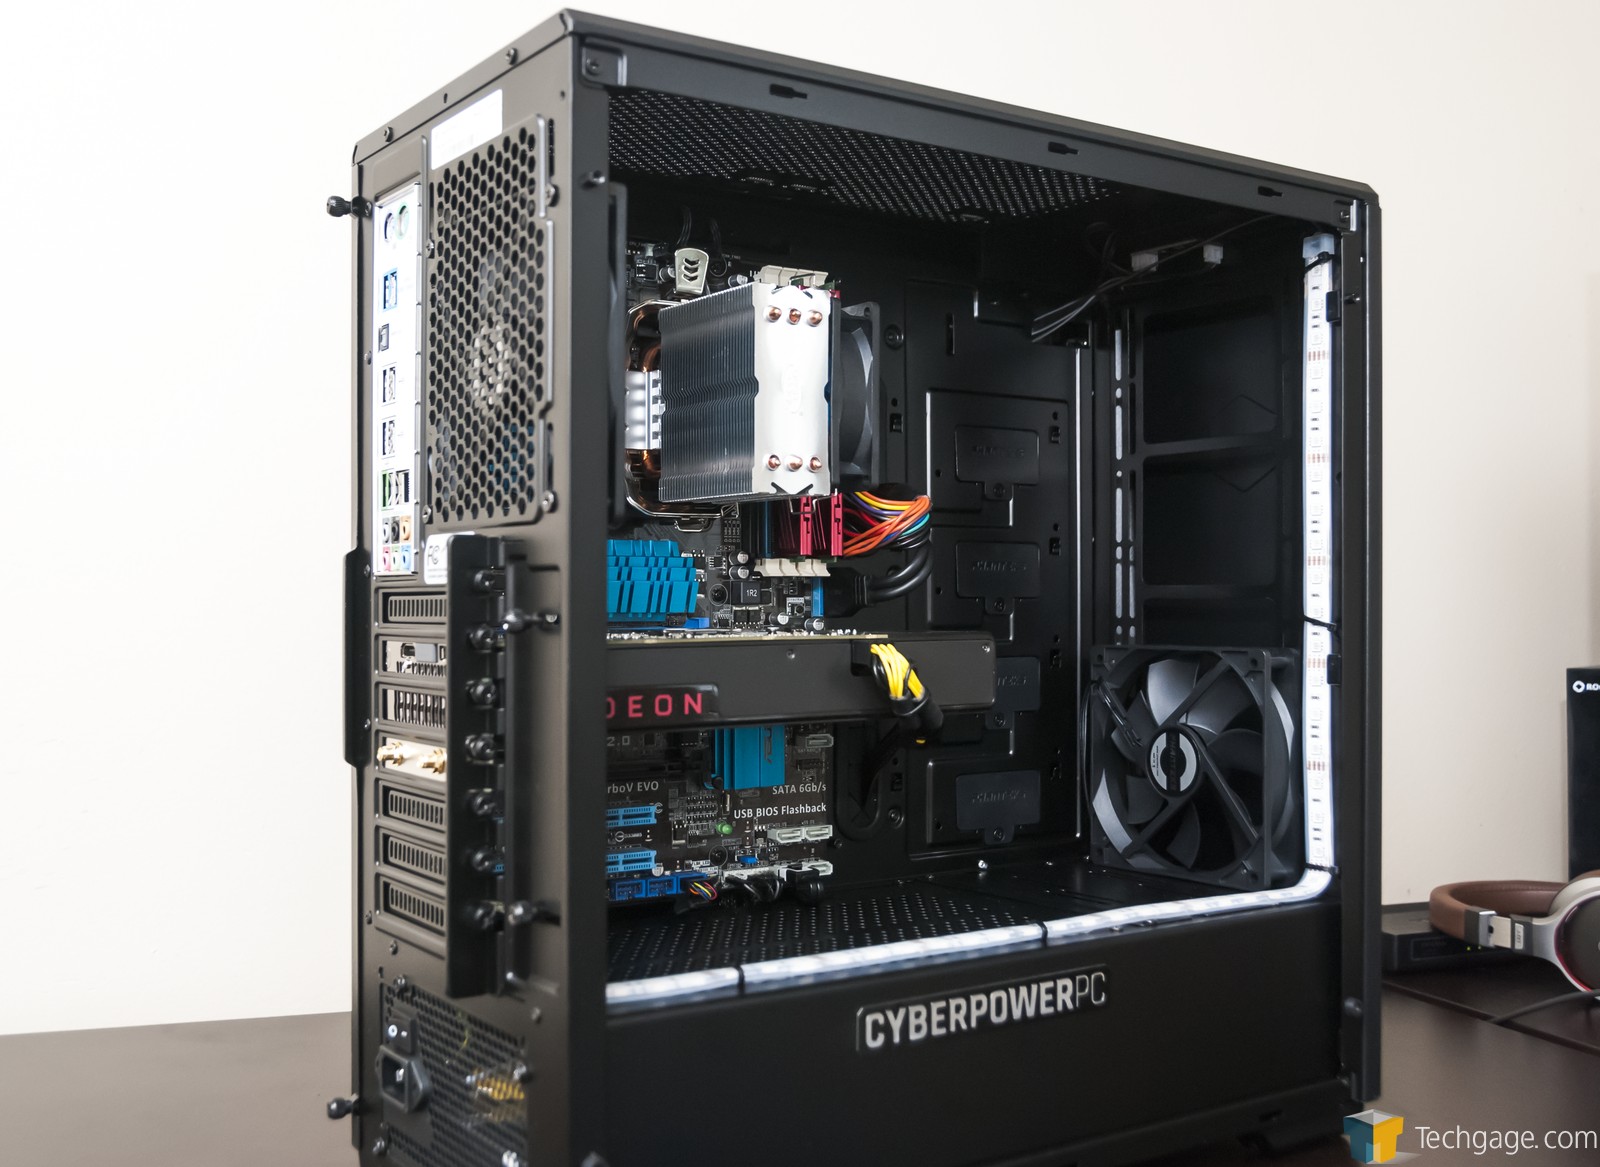
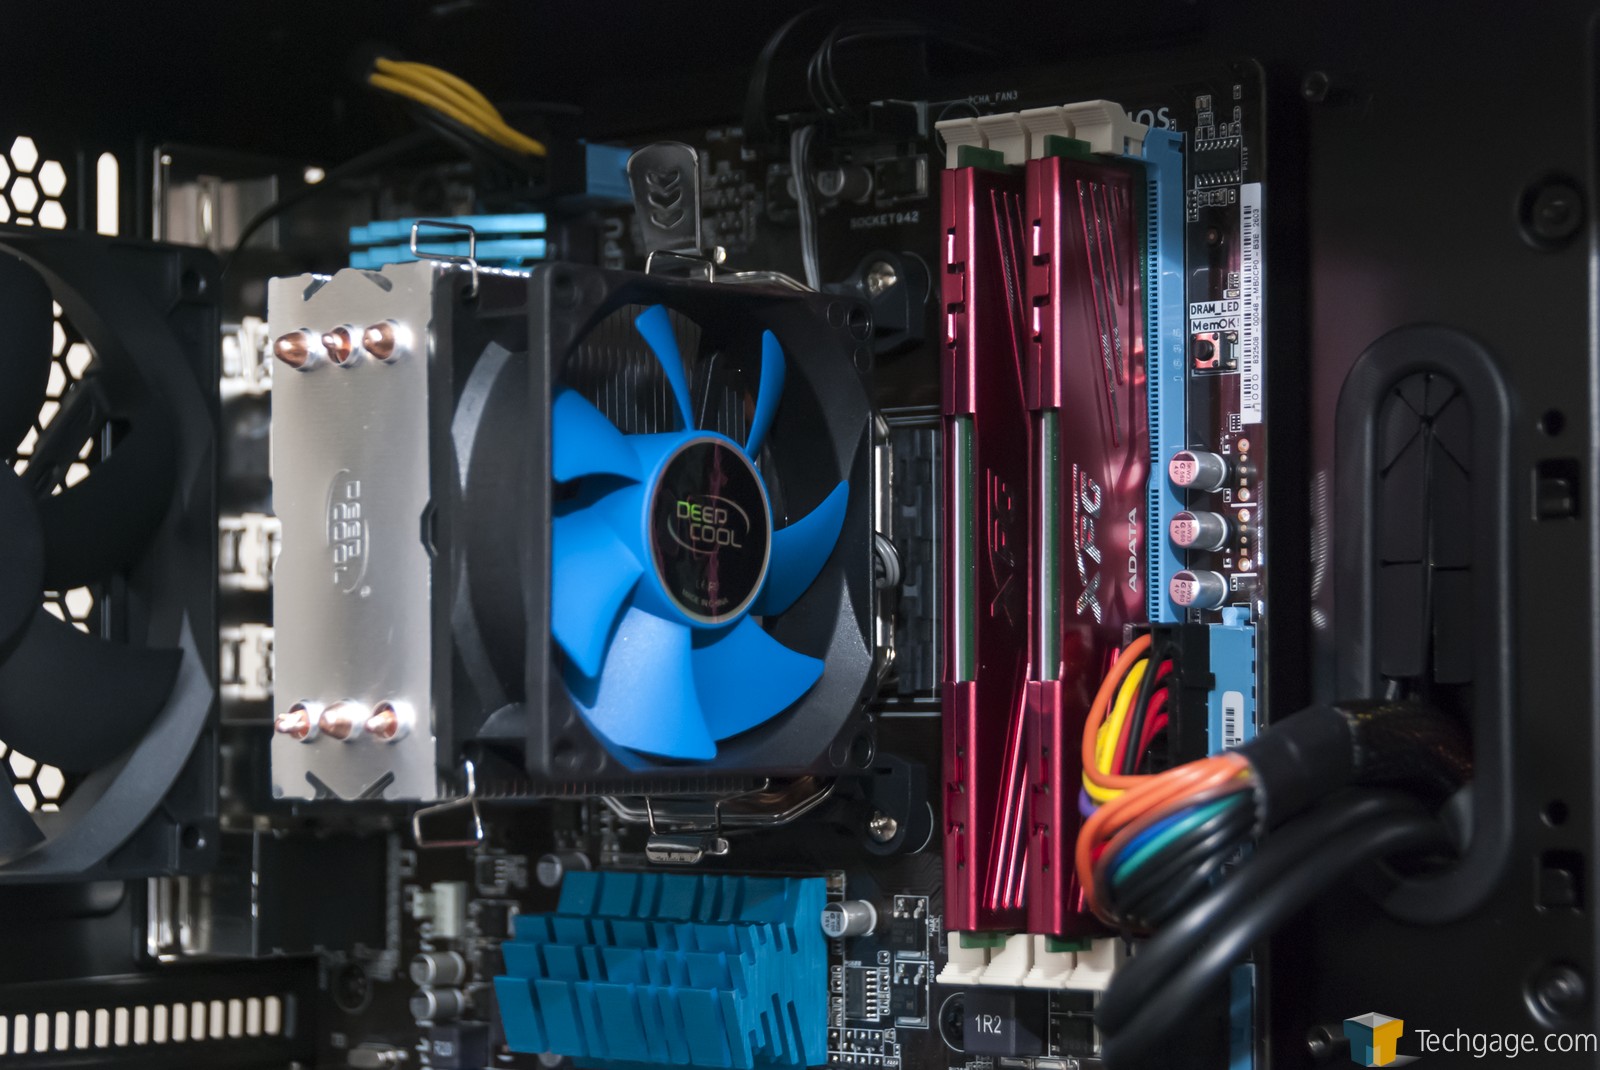
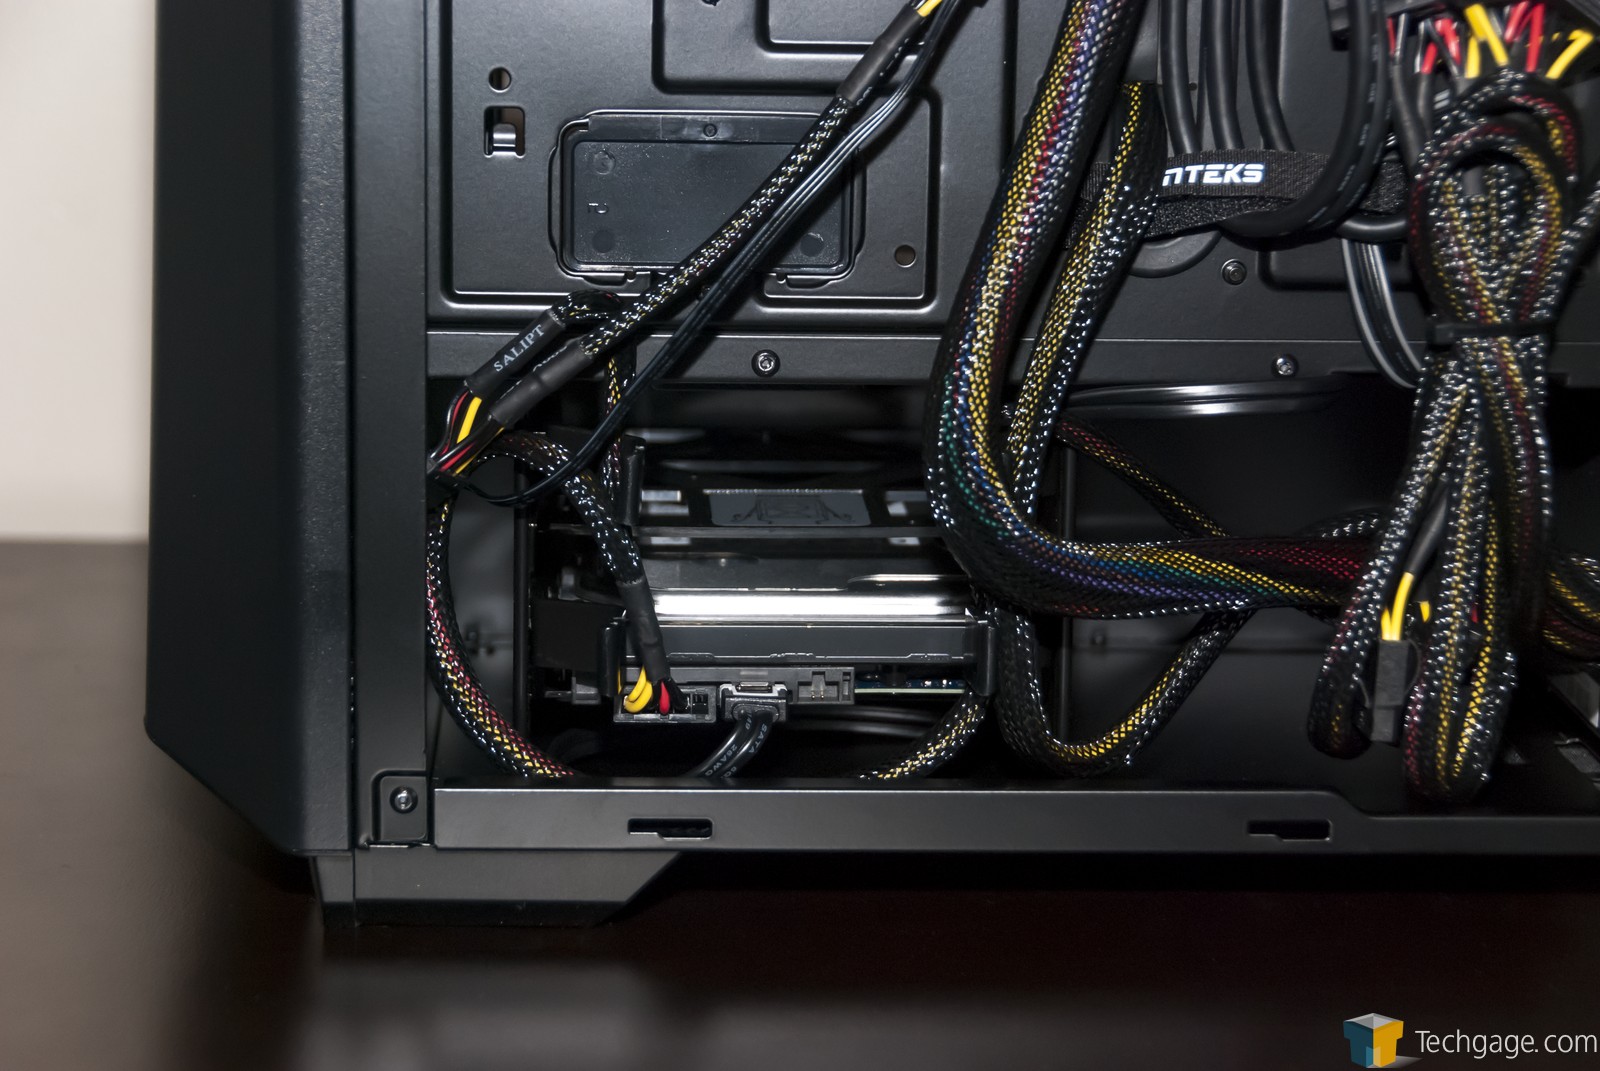
Peeking inside, we can see that CyberPowerPC opted to use a DeepCool air cooler to keep the FX-8350 chip under control, as well as ADATA DDR3. If the preinstalled 8GB becomes a little too limiting as time goes on, you can easily upgrade to a maximum of 32GB. Along the same expandability lines, users can also install some extra storage drives on their own, with three SATA ports available towards the bottom of the board.
To help keep costs down even further, CyberPowerPC doesn’t include spare SATA cables, so any storage expansion will require you to source your own. The same applies to the screws required to install a secondary storage drive in the primary bay underneath (can be seen in the final shot in the above slider), or the dual SSD holders at the back of the motherboard.
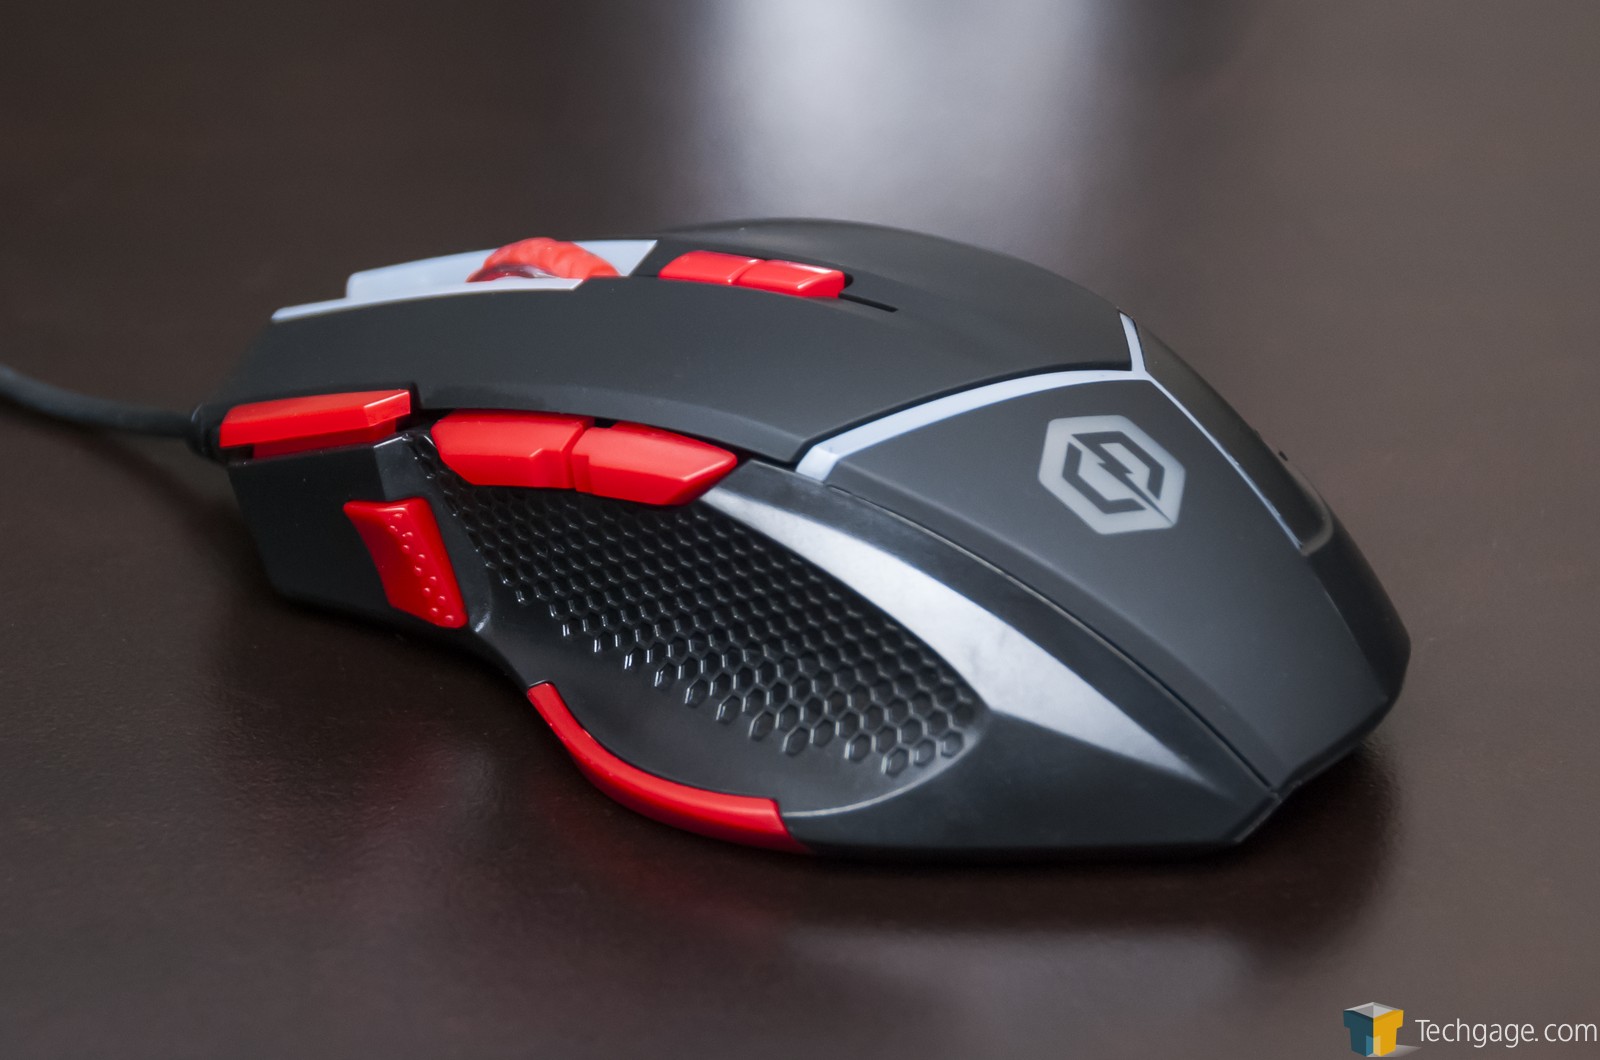

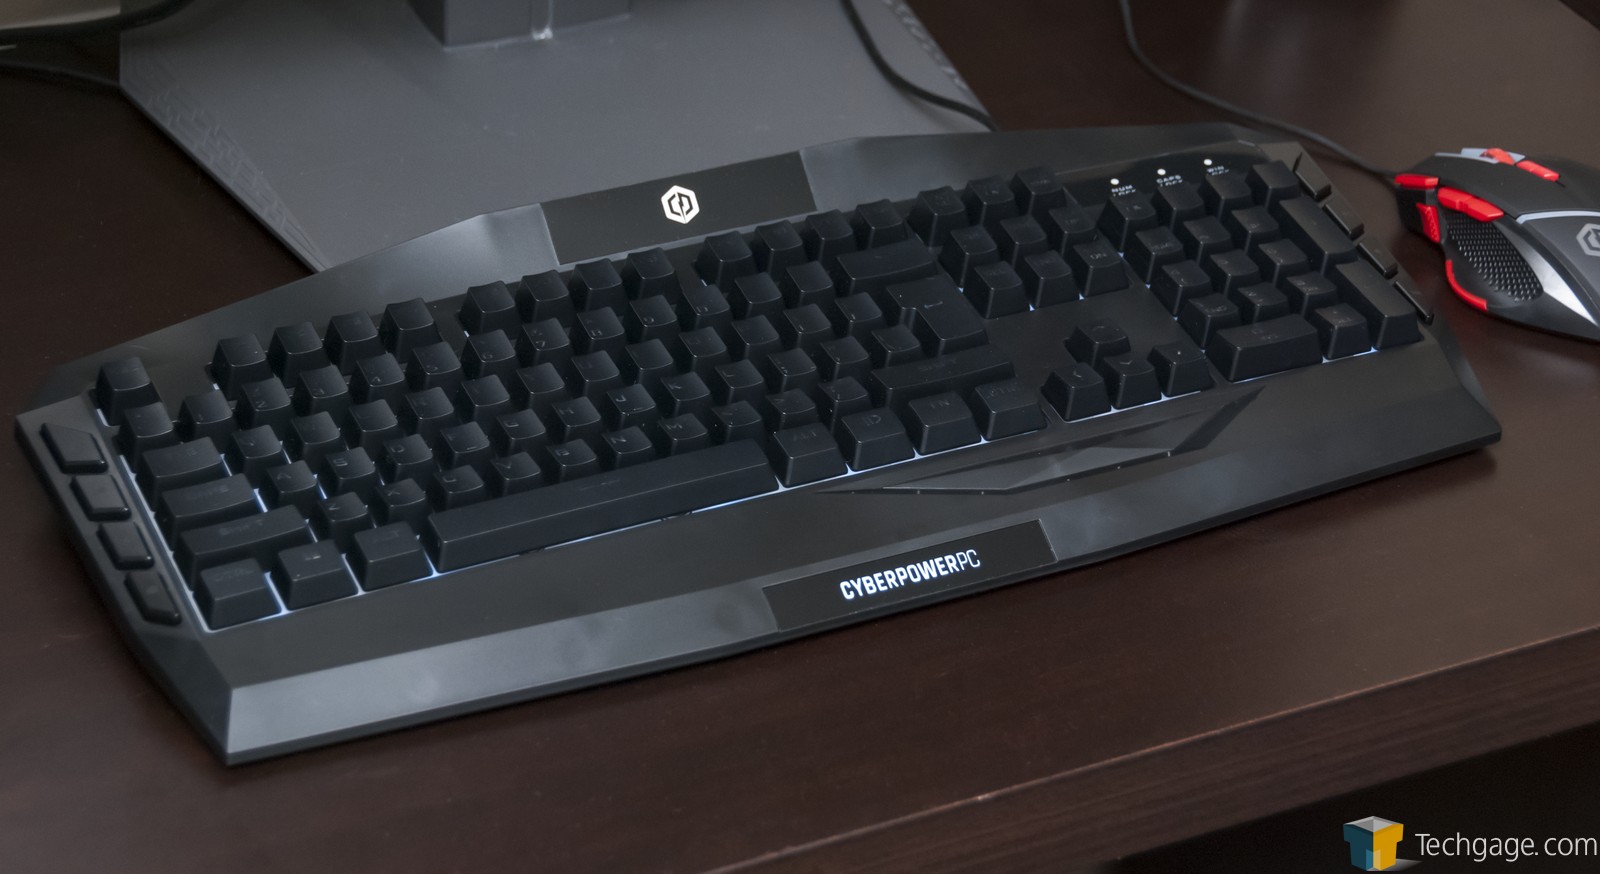

One of the reasons I was surprised by the value of this build owed some thanks to the fact that CyberPowerPC included a gaming keyboard and mouse in the box. These are not high-end peripherals; they’re budget, but as good as budget could be. Both peripherals served me very well throughout all testing, and I honestly wouldn’t be too bothered to have to use them for the long haul.
For the life of me, I couldn’t find out what switches the keyboard used, but for the most part, they felt pretty good to use. They’re linear in design, so there’s no modest bump with a halfway press, but they require more force than the super-loose CHERRY MX red or black. Overall, no complaints here for a budget keyboard included with an affordable build. Just don’t expect perfect LED backlighting or the most durable keycaps.
As far as I can tell, no software solution is available for these peripherals. To change the LED lighting on the keyboard, a special key on the right side of the space bar needs to be pressed. Don’t fret: if you hate LED backlighting, you can turn it off.
With the hardware covered, let’s tackle software – although there’s not too much to tackle. Windows 10 Home comes preinstalled, and after typing off some basic information after the first boot, a clean desktop awaits:

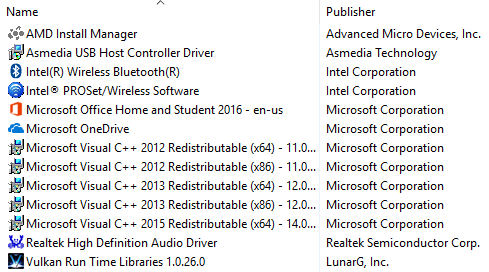
In terms of bloatware, the absolutely only piece preinstalled is Microsoft Office, which might prove convenient if you already have a license. Beyond that, only drivers are preinstalled:
In the Start menu, there are also two special tiles: one links directly to CyberPowerPC’s website, and the other brings you straight to the download page for Oculus’ Rift software.
I did encounter one bizarre issue with the software that must be mentioned, although I don’t think it’s a big deal. The Windows key used for the preinstalled Windows 10 Home failed, leaving me with an unactivated Windows. The final five characters of the key Windows revealed to me didn’t match what was on the side of the chassis, so I am not sure how this happened, but the fix was easy.
There’s not much to report on software-wise outside of that, which is a good thing, so let’s get a move on and check out the rig’s performance.

Support our efforts! With ad revenue at an all-time low for written websites, we're relying more than ever on reader support to help us continue putting so much effort into this type of content. You can support us by becoming a Patron, or by using our Amazon shopping affiliate links listed through our articles. Thanks for your support!

Rob Williams
Rob founded Techgage in 2005 to be an 'Advocate of the consumer', focusing on fair reviews and keeping people apprised of news in the tech world. Catering to both enthusiasts and businesses alike; from desktop gaming to professional workstations, and all the supporting software.


