- Qualcomm Launches Snapdragon 4 Gen 2 Mobile Platform
- AMD Launches Ryzen PRO 7000 Series Mobile & Desktop Platform
- Intel Launches Sleek Single-Slot Arc Pro A60 Workstation Graphics Card
- NVIDIA Announces Latest Ada Lovelace Additions: GeForce RTX 4060 Ti & RTX 4060
- Maxon Redshift With AMD Radeon GPU Rendering Support Now Available
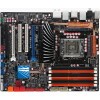
ASUS P6T Deluxe OC Palm Edition

Need a solid motherboard offering for that brand-new Core i7 processor? ASUS’ first “mainstream” X58 board proves to be a true winner, offering a feature-packed and well-thought-out design, support for both CrossFireX and SLI, plentiful accessories and overclocking potential to keep even the most hardcore enthusiast pleased.
Page 2 – Checking Out the BIOS
Over the past few years, we’ve reviewed numerous ASUS motherboards, and if there’s one thing we’ve come to find out, it’s that almost every single one of them have had overclockers in mind. This one is no exception, as we’ll see in the BIOS shots below. This board is a little different than any we’ve previously taken a look at though, and I’ll tell you why.
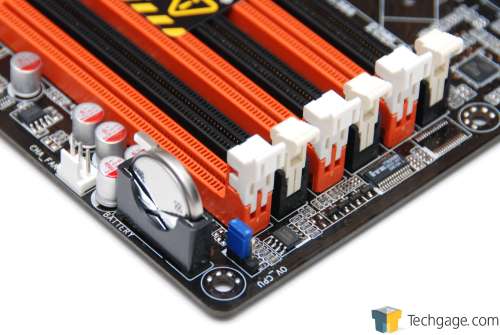
At both the top and bottom of the board, you’ll find extra jumper switches, like the one in the photo below. With these left in their default places, voltages in the BIOS will only go so high. For those who want even more headroom, these can be switched to allow much higher voltages… heights that should be considered very dangerous regardless of whether or not you know what you are doing.
Let’s dive right into the tweaking section, because overall, the rest of the BIOS isn’t any different than what we are used to. There is so much tweaking-ability in this BIOS, that we had to split them all across four pictures, which is the first time to my knowledge that we’ve had to do that. Luckily, modest overclockers won’t need to pay attention to most of it, but for those dedicated enthusiasts, this BIOS doesn’t hold back.
Unlike Intel’s DX580SO motherboard, which hides a lot of the real overclocking information from you, the BIOS here keeps everything clear so you really know what you are overclocking. Rather than deal with raw multipliers, the actual frequencies that will be equipped are shown instead… making overclocking a rather simple procedure.
For Core 2, we mainly had to worry about the Front-Side Bus, but here, we have the Uncore Clock, QPI Frequency and of course, the Base Clock. Each one of these figures are displayed in such a way that there is no chance for confusion, and it’s appreciated. It’s important to bear in mind stock figures though, so that when overclocking, you have a good baseline.
On all three new processors, the base Uncore Clock (UCLK) is 2666MHz, while the QPI is 2400MHz on the 920 and 940, and 3200MHz on the Extreme 965. The multipliers for these values, though hidden, are 18x for the 4.8GT/s processors and 24x for the Extreme 965, at 6.4GT/s. The Uncore Clock multiplier can be adjusted to a certain degree on all three processors, but that frequency has to be at least twice the DRAM frequency.
It might seem complicated, but as long as you keep the Uncore Clock and QPI clocks near their stock clocks, you will be fine. There seems to be very, very little performance benefits seen when increasing either of these clocks, so keeping them as close to stock as possible might be a good idea.
Exhaustive, to say the least. Here are the voltage ranges:
- CPU Voltage: 0.85v – 2.10v (Increments of 0.00625v)
- CPU PLL Voltage: 1.80v – 2.50v (Increments of 0.02v)
- QPI/DRAM Voltage: 1.20v – 1.90v (Increments of 0.00625v)
- IOH Voltage: 1.10v – 1.70v (Increments of 0.02v)
- IOH PCI-E Voltage: 1.50v – 2.76v (Increments of 0.02v)
- ICH Voltage: 1.10v – 1.40v (Increments of 0.10v)
- ICH PCI-E Voltage: 1.50v – 1.80v (Increments of 0.10v)
- DRAM Bus: 1.50v – 2.46v (Increments of 0.02v)
As always, it’s good to see such tweaking-ability where the voltages are concerned, but as always, the top-end voltages are not there for just anyone to touch. But, if you have the cooling system capable of handling such voltages, you already know this.
Because Core i7 brings an integrated memory controller to the table, DRAM voltages are quite limited compared to the previous generation. The standard voltage for DDR3 is 1.50v, but with Core i7, Intel highly recommends sticking within 1.65v. Why? Because anything higher increases the chance of killing your CPU. How? No one seems to know. The good thing though, is that faster RAM doesn’t really mean much, as we found out in our article last week, so extremely tight timings and high frequencies aren’t quite as important as they once were.
With that all said, I’ll let the remaining images speak for themselves, since nothing is really out of the ordinary.
Finally, let’s move right into a look at our test system and methodology, which we highly recommend you take a look at if you are unfamiliar with how we handle things. Following that, we’ll jump right into our test results.
Support our efforts! With ad revenue at an all-time low for written websites, we're relying more than ever on reader support to help us continue putting so much effort into this type of content. You can support us by becoming a Patron, or by using our Amazon shopping affiliate links listed through our articles. Thanks for your support!


