- Qualcomm Launches Snapdragon 4 Gen 2 Mobile Platform
- AMD Launches Ryzen PRO 7000 Series Mobile & Desktop Platform
- Intel Launches Sleek Single-Slot Arc Pro A60 Workstation Graphics Card
- NVIDIA Announces Latest Ada Lovelace Additions: GeForce RTX 4060 Ti & RTX 4060
- Maxon Redshift With AMD Radeon GPU Rendering Support Now Available
Cooler Master CM 690
Gamers on a budget don’t want to be forced to sacrifice quality, and Cooler Master realizes this. Their latest case, the CM 690, can be found online for $70 and under and has enough features to please most everyone.
Page 2 – Inside The Case, Final Thoughts
This has been mentioned in earlier reviews, but I can’t quite stress it enough. The side panel is really hard to take off. I can’t even fathom why they bothered to include thumb screws. You’ll spend at least five minutes wondering if you’re doing something wrong, and another five minutes actually trying to pry the thing off (and the holes dotted right next to the “handle†doesn’t help either – I suggest gloves).
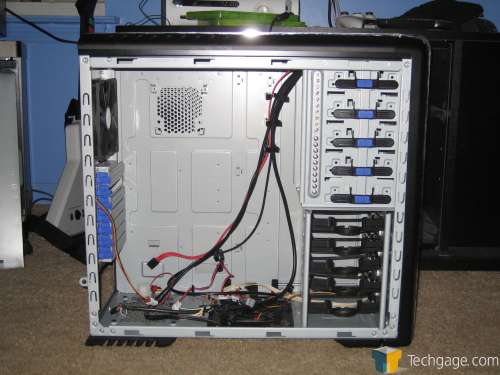
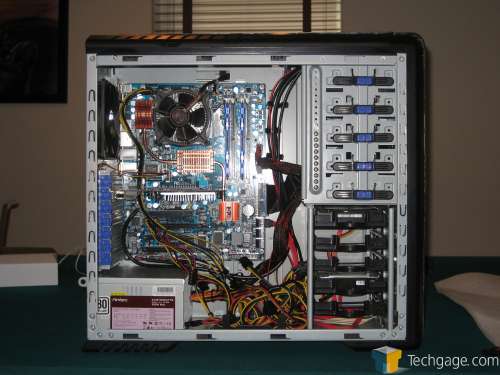
Once you’ve struggled to get the side off, you’ll finally get a glimpse of the roomy interior. For a mid-tower, there’s a generous amount of space to play with.
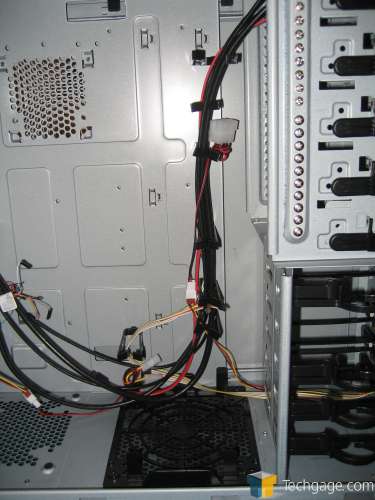
The cable management feature is probably the most unique. It allows anyone to neatly manage their cables as they build, improving airflow. Fortunately, they can be taken out just by unscrewing them if there are obscurities or if you prefer your own method.
The tool-less expansion slot system is pretty easy to use. Covers and cards can be removed by merely pulling the locks away from the case. They require a bit of force compared to Thermaltake’s method for example, so you shouldn’t find yourself accidentally unlocking one.
I have a sort of love-hate relationship with the front panel. I love the fact that it can be removed by pulling it (no keys or screws to deal with here), but it feels incredibly cheap. Obviously with a sub-$100 product, Cooler Master had to cut corners somewhere, but it shows way too much.
As I was unboxing the review sample, I didn’t realize I was holding it by the front because of the opaque bag covering it. Sliding it out, I managed to push one of the drive covers in, preventing me from sliding it back into place. When I took the front panel off soon afterward, I noticed plastic clips holding the covers into place. “Greatâ€, I thought, “I’ll just slide it back in, problem solved.†But there was one problem – the clips had broken.
I would normally fault this as human error and ignore the flaw in my review. The thing that perked my interest was the glue that was already put on holding that specific slot into place. This could have been a â€feature†of my sample, but the coincidence makes me seriously doubt the workmanship put into the product. I was able to repair it a bottle of super glue later, but I still can’t touch that slot.
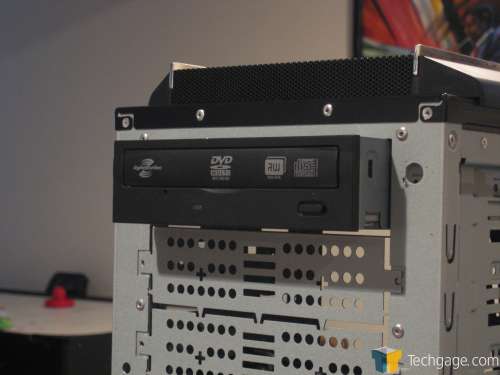
The tool-less optical drive installation is a pretty nice feature. With the front panel off, drives can be slid into place and locked with a latch – that’s it.
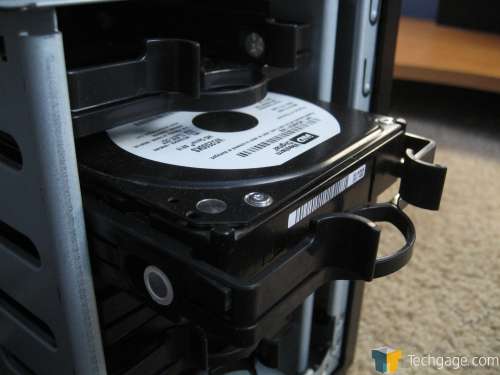
The hard drive installation is another feature that caught my eye. Keeping with the tool-less design, no screws are needed, but some are included if you rather use them over the standard parts. The hard drive is put in and kept into place with four plastic pegs that should do a decent job at minimizing noise. It may be hard to get the drive in at first, but it’ll fit.
Here’s a list of the hardware that was used for testing the case:
- CPU: Intel E6300 @ 3.2 GHz
- Motherboard: Abit IP35 Pro
- Memory: Kingston HyperX 800 at DDR2-1100 5-5-5-15 2T
- Video: Gigabyte 7200GS
- Sound: Onboard HD Audio
- Storage: Seagate 320GB 7200.10 and Western Digital 250GB 7200.9
- PSU: Antec Earthwatt 500
- Etcetera: Windows Vista
To get started, I placed the motherboard standoffs in the case. There were no standoffs preinstalled with the 690, so you’ll have to pull out every one the old fashioned way.
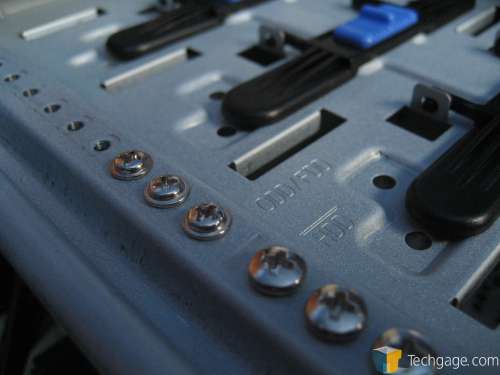
A nice feature is the screws that are kept inside the case. At the back of the drive cage in the top right corner of the case, screws for the motherboard and hard drives are kept for safe keeping (on both sides if you run out). So instead of digging through a bag, the mounting was made into a hunt-and-peck operation that was pretty nice to deal with.
The power supply was installed at the bottom, with no surprises. Fortunately, the PSU that was used fit without any problems, but those with bigger units will have to remove the dust filter and deal with their crushed dreams of filling the case up with fans.
Both the hard drives and optical drive were installed without much issue (once I got used to the unorthodox methods). Without the front covering the case, the optical drive will look like it’s sticking out quite a bit, but it should be a pretty flush fit. The hard drives were installed by bending the plastic shell and pushing it in. The cases feel a bit flimsy by themselves, so it may be awkward putting them in, but they shouldn’t break.
There was plenty of room to work with and I had no problems installing anything. A very big negative is that the case is very much incompatible with the IP35 Pro. Two of the cable management hooks were in the way of the side SATA and IDE ports, so they had to be taken out. The power LED is also a two-pin cable instead of a three-pin cable, which means the power LED couldn’t work without a converter.
The one thing I didn’t like about the cable management feature was that there is simply no way to move it. They can be kept into place when installing the motherboard, but it will be a close fit regardless. So while they can still be removed, Cooler Master should have thought to move the hooks a few centimeters to about a half an inch away.
The front mounted fan has a blue LED which gives off a subtle (that is, not too bright) glow. The power LED is a faint blue and the hard drive activity LED is a faint red color. There’s a significant amount of bleed, so they don’t look too attractive. That said, everything seems to be using blue now. What gives?
Here’s the finished product.
|
|
Idle
|
Load
|
| CPU Temperature | 44°C | 58°C |
| GPU Temperature | 65°C | 75°C |
The GPU we’ve using this time around happens to be a lower end model, but it is fanless, so temperatures will be higher. The CPU was cooled with another manufacturer’s heatsink, but the temperatures are close enough to stock that it doesn’t make a huge difference.
The 690 certainly meets my expectations for its price point and what I expected from Cooler Master, but it wasn’t overly impressive. The bottom line is there are some neat features that will guarantee a few buyers, but that doesn’t mean it immediately rules out products with higher price tags like the Antec 900 and P182 or SilverStone TJ07 or TJ09, to name a few.
I loved the tool-less installation. It’s come closest to letting me keep my screw driver put away more than any other case I’ve come across.
I already voiced my concerns about the build quality earlier in the review. The one place I wouldn’t have wanted Cooler Master to cut corners was the front and top panel. Simply put, any part of this body that has plastic feels like a cheap mess. The steel adds some heft to it, but weight isn’t necessarily a good thing. If the entire outer frame had been replaced with metal, the case would be near-perfect.
My other beefs include the top port placement and the cheap feeling buttons. There’s just no excuse for them. It goes without mentioning that the case is pretty loud, but that’s not all. With the stock fans installed, I had dust covering the mesh and side in about a week. There are filters, but even then, it won’t exactly be a joy cleaning them out.
Honestly, the 690 is a hard case to rate. On one hand, given the option of having so many fans is hard to complain about, let along being able to install a water cooling kit in an $80 case out of the box. Having the wire management feature is a nice addition even it’s a bit useless in some circumstances. It shows that there was an incredible amount of effort put into this product, but I can’t help feeling it would have done better if it was priced a few dollars more. Cooler Master has an OK case on their hands, but it could have been so much more with a solid build quality and some of the other nagging issues ironed out.
At the end of the day, I’m going to say it’s an option, but it’s in no way the best option. You get your money’s worth in the end, so if it has features you’re looking for and you’re not afraid of going through some inconveniences, it’s worth picking up. But after seeing it in person and using it, it’s not riot it’s been made out to be.
- Pros
- Did someone say fans?
- Water cooling possibilities
- Wire management
- Tool-less installation
- Cons
- Cheap build quality
- Flimsy front panel
- Poor port and button placement
If you have a comment you wish to make on this review, feel free to head on into our forums! There is no need to register in order to reply to such threads.

|
Support our efforts! With ad revenue at an all-time low for written websites, we're relying more than ever on reader support to help us continue putting so much effort into this type of content. You can support us by becoming a Patron, or by using our Amazon shopping affiliate links listed through our articles. Thanks for your support! |


