- Qualcomm Launches Snapdragon 4 Gen 2 Mobile Platform
- AMD Launches Ryzen PRO 7000 Series Mobile & Desktop Platform
- Intel Launches Sleek Single-Slot Arc Pro A60 Workstation Graphics Card
- NVIDIA Announces Latest Ada Lovelace Additions: GeForce RTX 4060 Ti & RTX 4060
- Maxon Redshift With AMD Radeon GPU Rendering Support Now Available
Social & RSS Feeds
Latest Videos


Latest News
CrystalFontz CFA-635
by Matthew Harris on April 11, 2006 in Peripherals
With the cornucopia of fan controllers and temperature monitors on the market today it’s not very often that you run across one that brings a whole lot more to the table. Today we’re taking a look at one that brings more than just fan speed control and simple temp reporting.
Page 3 – Installation and Software
Once installed, if you’re replacing an existing fan controller with the CFA-635, you have a minimal amount of added spaghetti to your PC. As the picture shows I was forced to use masking tape to attach the temp sensors to the various points in my system. I put sensor 1 on my D: drive, sensor 2 on the heat spreader of one of my sticks of Patriot PDC2G3200LLK ram, sensor 3 on the side of my D-Tek TC-4 water block and sensor 4 on my Rainbow Lifeguard Quiet One 1200.
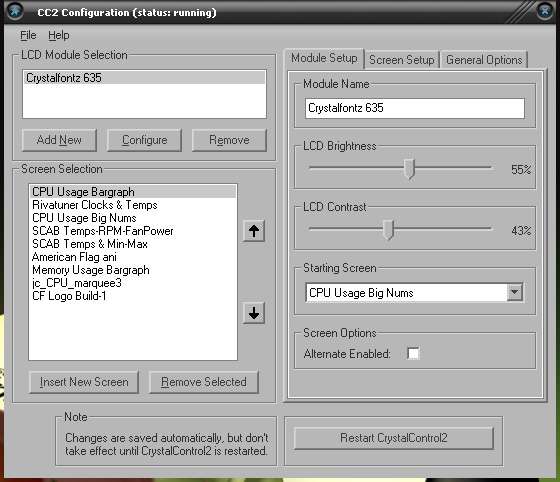
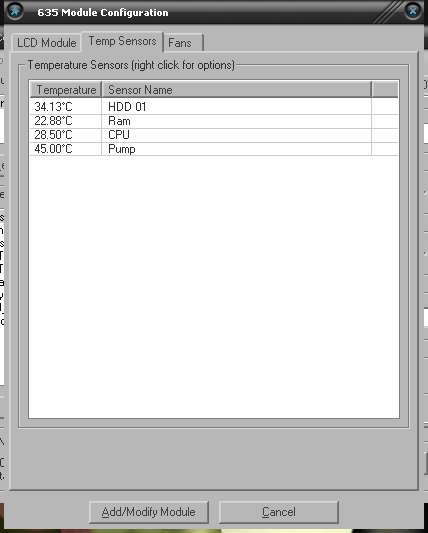
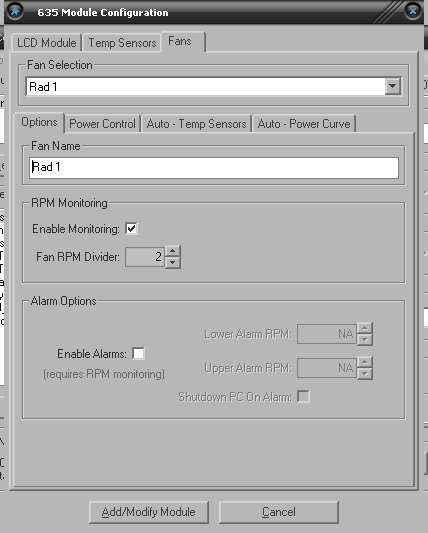
In the main screen you see the screens that are displayed on the module while it’s in operation. You can choose the screens from a rather sizable library of screens available in the CrystalControl 2 directory that is created when you install the software. You can also find user created screens in the Crystalfontz forums so adding something that might be more to your liking is easily accomplished. Sadly at this time there is no GUI for creating user created screens. Instead you have to program them by writing them in what (To me at least) looks to be some cryptic fashion. If you’ve got programming skills of any merit you’ll likely think I’m stupid but hey, I’m old and I’ve never claimed to be a software guru. Computers are mainly about hardware to me. In the temp sensor screen you can customize the sensors by naming them so you can tell what they represent at a glance. Since I only have 3 fans that need regulation in my rig I ran them to the module. I’ve got the radiator fans running to headers 1 & 2 and the 120mm blowhole fan running to header 3.
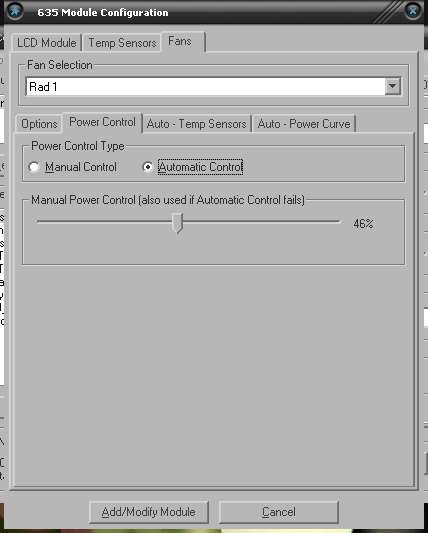
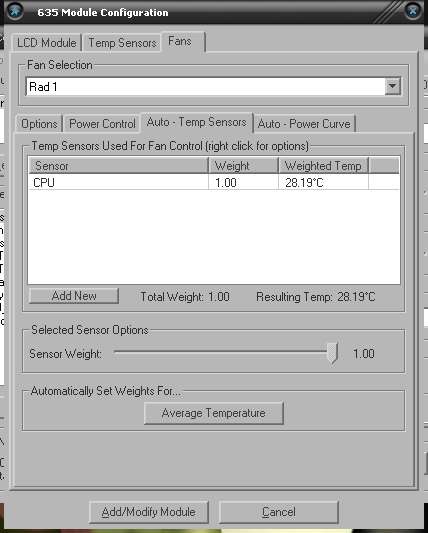
In the fan control software you can run the fans manually or set them to automatic control. In automatic control you can marry the fans to any sensor you choose (Or combination of sensors) and set the weight that the sensor carries with the fan. For a single sensor you’d obviously set it to 1 but if you marry it to 2 sensors you can set the sensor that has the biggest impact with a higher number (Say .90) and the sensor that’s incidental with a lower number (In this case .10) or if you want one sensor as the starting point set it as -1 and the other as the control point set it to 1. Now that’s nifty as hell.
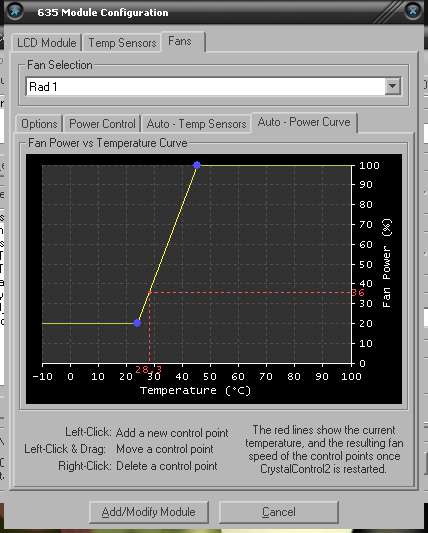

As I had stated earlier you can plot a curve to the fans and set the minimum speed percentage and maximum. To create more points along the curve simply left click the curve at the desired point to place a marker there. After that left click the marker and drag it wherever you want in the curve, up, down and side to side. Naturally you can’t pull it even with the starting temp but you can get it within a couple of degrees for a rapid increase. This is good if you’ve got something that has a narrow temperature increase, say you’re using the CFA-635 to power a fan over your ram.
As I’ve seen from having mine connected to my ram, my ram generally fluctuates by 4-5C so I’d want to set the fan to start at the nominal operating temp for the ram (Ex. 24.4C) and run at, say, 30% of full speed. I’d then plot the curve to reach full power at 30C. Now since I’d personally plot the curve with no cooling chances are good that the fan would keep the ram below 24.4C so the speed would stay at 30% but in the event that something happened to increase the temps (Environmental temp increase or heavy usage by memory intensive app’s) the fan would quickly spool up to full speed and my ram would remain nice and cool.
There’s something I forgot to mention (And show in the driver shots) that’s worth a mention. You can set the software to sound an alarm when a set temp point is reached and to shut down the PC upon the alarm to prevent damage. These can be done independently for each sensor so you can have the PC shutdown when the CPU sensor hits X temp and just put out an alarm when the case temp reaches Y temp. A very useful feature to say the least. It would be nice if the temp sensors weren’t quite so bulky so as to allow you to attach the diode to the side of your CPU HIS or core if you’ve "Flipped your lid".


The CFA-635 lights up in a very eye pleasing blue when powered up while the text is white. You can set the "Contrast" and brightness of the module in the software on the fly by left clicking the CF icon in the task bar and also set them globally upon startup. I say "Contrast" since the level of contrast is proportional to your position to the module. In other words if you’re to the extreme right or left of the module you can change the contrast to suit your position so you can see the module clearly but looking at the module from straight on will yield different results. The buttons allow you to scroll through the screens on the fly from the unit itself.

Support our efforts! With ad revenue at an all-time low for written websites, we're relying more than ever on reader support to help us continue putting so much effort into this type of content. You can support us by becoming a Patron, or by using our Amazon shopping affiliate links listed through our articles. Thanks for your support!