- Qualcomm Launches Snapdragon 4 Gen 2 Mobile Platform
- AMD Launches Ryzen PRO 7000 Series Mobile & Desktop Platform
- Intel Launches Sleek Single-Slot Arc Pro A60 Workstation Graphics Card
- NVIDIA Announces Latest Ada Lovelace Additions: GeForce RTX 4060 Ti & RTX 4060
- Maxon Redshift With AMD Radeon GPU Rendering Support Now Available
GIGABYTE Force M9 ICE Wireless Mouse Review
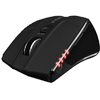
GIGABYTE is an industry giant, offering a countless number of products in multiple categories. The Force M9 ICE is one of its latest wireless mice, and endowed with “gaming mouse” styling, it seems to promise much. As you might have guessed, we put one through its paces to see just what it can deliver.
Page 2 – Software
The Force M9 ICE works perfectly well with Windows out of the box, with all but the button on the mouse’s right-front flank functional as you would intuitively expect. Additionally, the mouse is limited to 1600 DPI if you don’t install the Sim software.
As mentioned earlier, Sim is very lightweight, so users who are reluctant to install typically bloated software associated with many peripherals should have no complaints.
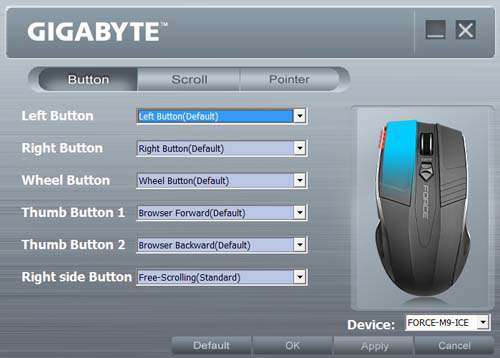
Basically, Sim has three main sections: Button, Scroll, and Pointer. Selecting a section allows you to designate specific functions relevant to that particular section.
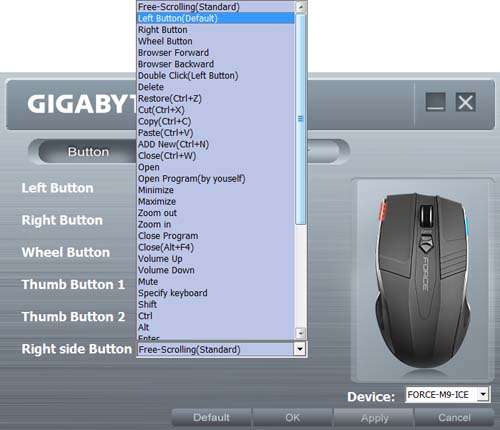
The Button section, quite obviously, is where you can assign what each button will do, including that neutered right flank button. Let’s say you wanted to have that button mute your PC’s audio output. You do that by moving your cursor to the Wheel Button’s drop down menu; this will reveal a bunch of selectable options for that button. Simply point your cursor to Mute, then click Apply. The right flank button will now mute your audio whenever you press it. Then click OK to close the Sim software.
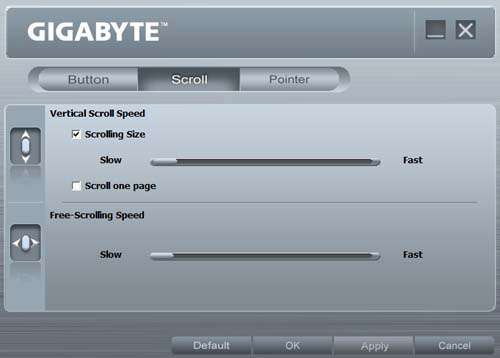
The Scroll section is where you can change the mouse’s Vertical Scroll and Free-Scroll speeds. There are two sliders arrayed horizontally on the page. To change either scroll speed property simply move and drag your cursor across the slider until you find the settings you like, then click Apply. As before, clicking OK will close Sim.
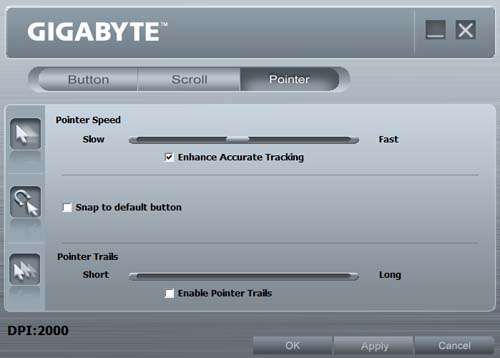
The Pointer section deals with three settings: Pointer Speed, Snap to Default, and Pointer Trails. Pointer Speed is much like the Vertical/Free-Scroll Speed settings in that it is manipulated via a horizontal slider. Additionally, there is also a check box which would enable the Enhance Accurate Tracking feature. Just below the Pointer Speed slider is an on/off Snap to Default check box; by default this is left off. And below this is the Pointer Trails control, with an on/off check box for Enable Pointer Trails. By default, the box is unchecked. Enabling the check box, though, turns on Pointer Trails, and you can then lengthen or shorten them via the horizontal slider.
The Pointer section also displays the current DPI settings for the Force M9 ICE. The mouse has four DPI settings: 800/1200/1600/2000. As mentioned earlier, the maximum 2000 DPI setting is available only if you install Sim.
Support our efforts! With ad revenue at an all-time low for written websites, we're relying more than ever on reader support to help us continue putting so much effort into this type of content. You can support us by becoming a Patron, or by using our Amazon shopping affiliate links listed through our articles. Thanks for your support!


