- Qualcomm Launches Snapdragon 4 Gen 2 Mobile Platform
- AMD Launches Ryzen PRO 7000 Series Mobile & Desktop Platform
- Intel Launches Sleek Single-Slot Arc Pro A60 Workstation Graphics Card
- NVIDIA Announces Latest Ada Lovelace Additions: GeForce RTX 4060 Ti & RTX 4060
- Maxon Redshift With AMD Radeon GPU Rendering Support Now Available
Social & RSS Feeds
Latest Videos


Latest News
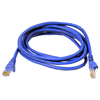
How to Make Your Own Cat5e Network Cable
by Greg King on August 8, 2012 in Editorials & Interviews
Despite their simplicity, pre-made networking cables are expensive – especially if you’re in need of outfitting your entire house. Luckily, making your own cables isn’t only far less expensive, but easy, and perhaps even a little bit fun. If you’re still unsure, read on as we explain the entire process from start to finish.
Page 2 – Building the Cable; Final Thoughts
Use your scissors, or your crimping tool if it has a blade build into it, to cut the outer sheathing of the cable, exposing the four pairs of wires protected underneath. I generally cut the outer sheathing about 4 inches down the cable but you will find out what best works for you. The more you cut, the more you end up wasting but I have found that leaving a little extra of the wires can be far more forgiving if a bad cut is made than if you leave them too short. As with most steps like this, your mileage may vary

Untwist the wires and straighten them out. They will retain some of their twist but most wires are malleable enough to straighten out with just your fingers. If you still have trouble, press the wire up against the dull edge of your scissors with your thumb and pull them straight. Straight wires are much easier to work with than curvy ones.

With the wires straight, arrange them in the order that you need them to be in. We will be creating this cable using the EIA 568A standard. This is an industry standard and something that you would serve yourself well by memorizing. Technically you can wire your cables in whatever order you wish but keep in mind, for the patch cable to work, you
For this picture, they have been arranged in the EIA 568A pattern.

With the wires straight and in the correct order, use your scissors to cut off the excess wire, leaving approximately one inch of the wire exposed. Take care to cut the wires straight on the end, as close to a 90 degree cut as possible. This matters greatly when you install the RJ45 on the end.

When cut, the wires should line up. Take care to keep them in the same order as before you made your cut. This is very important and depending on your cables, can take some significant finger strength to keep them in order when they are that short.

Carefully place the RJ45 on the end of the cable and push the wires into the module as far as possible. This ensures that the 8 gold prongs inside of the RJ45 cut into the wires and make a good connection. When the RJ45 is in place and the cables all look good, insert the module into your crimpers and squeeze the handles together. Many crimpers will make a clicking sound when you have applied the correct amount of pressure. This is an easy way to avoid squeezing too hard and risk damaging the RJ45.

Once crimped, take a second to look over your creation and marvel at its simple beauty. When admiring, make sure to look closely at two areas. On the top of the RJ45, you should observe all eight ends of the wires sitting against the inside of the RJ45. If this is not the case, you will more than likely need to cut that module off and start back over at step 1. The cold pins inside the RJ45 cut into the wires and make the necessary connection. If the wires are not completely up to the end, the connection might not be made, rendering your cable useless.

You can also look at the side of the RJ45. This will give you a clear view of the outside most wire. In this case, the green and white wire is visible from the end. Another thing that you need to keep an eye on is the sheathing. It needs to be far enough toward the end that the wedge inside the RJ45 comes down and traps it inside the module. This isn’t overly important from a functionality perspective but you should always try to be as professional as possible and over time, after many connections and unhooking, your cable should last longer with the sheathing locked firmly in place.

Testing and Conclusion
Now that we have our cable made, we need to test it. There are a couple of ways to go about this, one of which is free and common sense. Simply plug one end of your cable into your router/switch and the other end into your computer. If you have full speed connectivity, you have successfully made a patch cable. If you do not, examine your ordering and RJ45 before completely starting over. Another method of testing, and one that is technically more thorough than simply plugging it into your network, is using a Ethernet tester. Many companies make these devices, including our friends at TRENDnet. This type of tool will check every wire for connectivity and is a very simple way to ensure a correctly built cable.

If all was done correctly, you should now have a working patch cable, made to the length that was needed. This will allow you to avoid purchasing a cable that is either too long or too short, as well as spending more than necessary. While I am a strong supporter of all things DIY, making your own cables makes zero economic sense if you are only going to make a couple. However, if you are looking to retrofit your house with Cat5 by running cables through your walls, or you see yourself needing more than a dozen or so, it never hurts to purchase a spool of cable (at whatever length you need) and the tools needed to use it. I have, on multiple occasions, split the cost with forum member and personal friend BlackAndy. This keeps the cost down and allows us both to benefit from the cable, while halving costs in the process.
It’s taken me a long time to get the process down. It’s simple but does take some practice. After building close to a thousand cables over the last 10 years, I can almost do it blind folded but it took me a while to become comfortable enough with the process to go at it without the help of Google (try Bing… seriously).
Professional tip. Keep this page bookmarked. It will serve you well as you continue to build more and more patch cables. It took forever to memorize the patterns but realistically, you won’t ever have to do such a thing.
Discuss this article in our forums!
Have a comment you wish to make on this article? Recommendations? Criticism? Feel free to head over to our related thread and put your words to our virtual paper! There is no requirement to register in order to respond to these threads, but it sure doesn’t hurt!

Support our efforts! With ad revenue at an all-time low for written websites, we're relying more than ever on reader support to help us continue putting so much effort into this type of content. You can support us by becoming a Patron, or by using our Amazon shopping affiliate links listed through our articles. Thanks for your support!