- Qualcomm Launches Snapdragon 4 Gen 2 Mobile Platform
- AMD Launches Ryzen PRO 7000 Series Mobile & Desktop Platform
- Intel Launches Sleek Single-Slot Arc Pro A60 Workstation Graphics Card
- NVIDIA Announces Latest Ada Lovelace Additions: GeForce RTX 4060 Ti & RTX 4060
- Maxon Redshift With AMD Radeon GPU Rendering Support Now Available
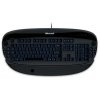
Microsoft Reclusa Gaming Keyboard

We took a look at Microsoft and Razer’s first team effort a few weeks ago with our Habu review. Overall, we were left very impressed. Will we receive the same reaction from the new Reclusa gamers keyboard?
Page 3 – Installation, Testing
The instruction booklet is about 5 pages and guides you through the process of getting the keyboard up and running. This process consists of plugging in the keyboard, and then inserting the CD and installing the drivers. Installation went without a problem. I’ll note that if you’re using multiple operating systems, you’ll need to have legacy USB support enabled in order to select your OS with the Reclusa. (Owners of the Razer Copperhead and other finicky peripherals will know why I mention this. The Habu works with legacy support enabled.)
Once the drivers are installed, you can access the configuration menu, which is laid out in a fairly intuitive manner, very similar to the Razer Barracuda drivers. The drivers and firmware I’m using are both version 1.00, and are the latest available at the time of review.
This main window is where you can select profiles to edit, keys to program, and the media player program that you want to control. There are also two checkboxes on the lower left, which enable/disable automatic switching between profiles, and enable/disable the onscreen message that is displayed when a profile is changed.
Clicking on the profile selection box opens the lower left window, where you can name up to five profiles and, if you want, tie them to specific .exe files via the navigation window on the lower right. Auto Switching loads the profile for a given .exe when that .exe is started.
The instructions aren’t very clear (read: do not exist) on exactly how some of this works. In order to name a profile or select an .exe to associate it with, you need to highlight the profile (I’ve highlighted profile 2, above) and then double click under ‘Profile Name’ and ‘.Exe’ – you can see that I’ve done this for Profile 1.
This menu also allows users to save profiles to an external source (as a ‘.conf’ file) and load profiles from external sources. This feature is particularly useful for the Reclusa because unlike the Razer Tarantula, the Reclusa doesn’t have any onboard memory – all active profiles are stored in the driver software. There is no limit to the number of profiles you can save externally.
You can program each of the ten keys and two knobs using the menu on the bottom left, which is opened by clicking one of the programmable buttons. This allows you to assign a macro, assign a command from one of two lists (lists shown at bottom center and bottom left), load a saved profile, or launch an .exe file.
One very important thing that I discovered is that no macro can be longer than eight commands, INCLUDING pauses. Some will consider this to be a huge limitation, and I hope that future firmware (if there is upgradeable firmware) and drivers will allow for longer macros.
Each jog dial acts like two of the other programmable keys – one function each for clockwise and counter-clockwise rotation. The right dial defaults to volume control, while the left dial defaults to scroll-up/scroll-down. I found no other quirks with the macro keys and verified that all the keys and knobs worked.
Each profile can also be set to control a media program (selected from the drop-down menu). Since the programmable keys feature defaults for opening a music player, play/pause, etc, this may be useful. I had no trouble with Winamp, WMP or iTunes responding to the keyboard. The jog dials are defaulted to volume control with the media players. The left jog dial controls the media player program volume, while the right jog dial controls overall system volume.
I made profiles for a few different games and tried them out. The only trouble I ran into was with using multiple profiles with multiple STEAM games; specifically, I created a profile for CS:Source (profile 1) and another profile for Dark Messiah (profile 4). Every time I ran either CS:Source or Dark Messiah (or any other program that starts STEAM, for that matter) I’d get a notification that profile 1 was loaded, and about one second later, a notification that profile 4 was loaded. During the game it was always clear that profile 4 was always being used for STEAM games.
The easiest was around this is to disable auto-switching a just select the profile you want before starting a STEAM game. You can also use the hot keys to load specific profiles (more details below), so another trick would be to program the left jog dial (for instance) to load the previous/next profile – in all 5 profiles. That way you could disable auto-switching and dial in profile you want any time.
The only trouble with this is that the onscreen notification doesn’t show up during games (at least, not during the ones that I played) so if you switch profiles during a game, you’ll need to pay a little extra attention. Other than that there weren’t any problems with the auto-switch feature, and the onscreen notification is useful outside of games.
|
|
Support our efforts! With ad revenue at an all-time low for written websites, we're relying more than ever on reader support to help us continue putting so much effort into this type of content. You can support us by becoming a Patron, or by using our Amazon shopping affiliate links listed through our articles. Thanks for your support!


