- Qualcomm Launches Snapdragon 4 Gen 2 Mobile Platform
- AMD Launches Ryzen PRO 7000 Series Mobile & Desktop Platform
- Intel Launches Sleek Single-Slot Arc Pro A60 Workstation Graphics Card
- NVIDIA Announces Latest Ada Lovelace Additions: GeForce RTX 4060 Ti & RTX 4060
- Maxon Redshift With AMD Radeon GPU Rendering Support Now Available
Social & RSS Feeds
Latest Videos


Latest News
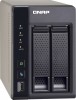
QNAP TS-269L Dual-bay NAS Review
by Rob Williams on April 24, 2014 in Networking, Storage
In the world of NAS appliances, competition is fierce, and the choice is amazing – so amazing, in fact, that choosing the right one requires some real effort. QNAP’s TS-269L, which found its way to our test bench, is designed for those who like everything from a home or SOHO NAS. Let’s find out if it delivers.
Page 2 – A Look at the Software, Performance & Final Thoughts
An archive including all of the screenshots on this page and more can be downloaded here (.ZIP, 7.3MB). An official QNAP QTS live demo can be accessed here.
As I mentioned earlier, NAS companies have ramped-up their efforts in recent years to produce more welcoming, elegant Web interfaces, and when looking back, it’s almost jaw-dropping to see the differences. It’s even more of a leap than moving from Windows XP to Windows 7, because at least Windows XP still had lots of color!
After connecting the TS-269L to a router and booting it up, it can be found on the network with an official QNAP tool (available for Windows, OS X, and Linux), or through other OS methods. For me, the NAS settled on 192.168.X.152. It’s important to note that by default, the NAS is configured for port 8080, not 80. I at one point thought I couldn’t access the NAS through a new Web browser because of that small detail.

The first time QTS is accessed, it’ll give the option of configuring the NAS for business or home use. If business is chosen, all of the entertainment apps will be disabled, and in effect, performance will be higher. Choosing home will keep all of that enabled. It’s important to note though that not everything is enabled by default, and in fact, not every app that QNAP advertises is installed. An example would be with the “Video Station” – a lot of people will not use this like Photo Station or Music Station, so it’s left uninstalled, requiring just a short download to add it.
After choosing to set the NAS up for home or business use, a quick setup can be opted for, or a manual one. A manual setup would be recommended for those who want a little more control over their volumes, while quick setup should prove suitable for most people.
One thing I find a little odd with the setup is that QNAP doesn’t give you the option of file system or cluster size, and for that matter, it’s hard to figure out what is used. But based on the fact that I found a reference to ext4 somewhere in the UI, I’d imagine that’s it, and likewise, since 4K cluster sizes are a common-sense option when there are no others, that’s what it is. I don’t have a beef this limitation since the default is good, but at the same time, I appreciate choice.
Once the setup is complete, you’ll find yourself at the login screen, one which will show personal photos once it’s setup inside of QTS. After logging in, you’ll be greeted by the main QTS interface. Note that all of these screenshots are based on the 4.1 beta, so some might look a little different from what the TS-269L or other QNAP NASes will ship with at the current time.

QTS acts and behaves much like a desktop environment; so much so that there were times I almost hit Alt+Tab to switch windows. Once an icon is clicked, the window is raised and can be minimized, maximized, and closed. If minimized, the window will appear in the top taskbar. Yup – multi-tasking on a NAS. You’ve gotta love that.
At any given time, the icon at the top-left corner can be clicked to reveal an overall menu (useful if the rest of the “desktop” is full of maximized apps), while another pane on the right side can slide out to give you quick information about drive health, storage usage, scheduled tasks, and QNAP news.

All of the TS-269L’s configuration options can be found in “Control Panel”, which as the below screenshot shows, has many icons to look over. Due to the sheer number of features a NAS like this has, I’m not going to go through each and every section here. For those who might want to browse through most of them, the Zip file I included at the top of this page can help with that.

Some of these “programs” will open up inside of the Control Panel, whereas others might require their own window. An example of this is with the storage manager; because a number of sub-menus are required, it’s just easier to dedicate that section to its own window. Because the initial setup would have taken care of the disk setup, the first place to stop might be Users and User Groups, and then Shared Folders.
Because a number of features are enabled by default in QTS, I’d recommend going through them all and disabling the ones that are not needed, so as to eke as much performance out of the NAS as possible. Don’t use Music Station? You might as well disable it. Don’t use SSH? While its footprint is foolishly small, I’m of the mind that things I don’t use should be disabled.
One feature that might catch some off-guard is the Network Recycle Bin, which is also enabled by default. It retains all deleted data until a certain date threshold is reached (default is 180 days), so for those with smaller hard drives, or the need for as much free space as possible, this could also be disabled. I of course have to stress, though, that this feature exists for a reason: It could save your day.
With “cloud storage” all the rage, companies like QNAP are often touting the fact that their NASes are the perfect “home cloud” solution. Making that possible with QTS is “Qsync“, a feature that’s heavily integrated into QNAP’s various “Station” apps, like Photo Station, seen below.

After choosing files, whether it be music, a video, or a collection of pictures, they can be dragged into the right sharing pane. Afterwards, a URL can be created at the bottom which will allow others to access the data right off the NAS itself. Taking advantage of this feature would require a good upload speed, so I wouldn’t recommend using it unless you have at least 5Mbps upstream, and even greater if your intent is sharing video.
Overall, I have no complaints about how Qsync works; it required about five minutes of getting a grasp of how it all functioned, but afterwards, creating share links was an easy task. One rather impressive feature is that you can bind Facebook accounts with sharing, so friends would log into your NAS with their Facebook accounts. It’s a rather interesting consumer feature, that’s for sure.
For mobile access / sharing, QNAP offers Qfile, an app available for Android, iOS, and Windows Phone 8. After enabling Qsync on the NAS, its IP address, as well as login and password, can be added through the app. From that point on, you’ll be able to explore the files just as you’d expect to with a file manager. Qfile has a built-in picture viewer and music player, but video use will require an external app, like the one built into Android.

The best part about Qfile is that shares can be created from within this app. Create the share, generate a URL, and give that URL to someone – all while on-the-go.
As I mentioned earlier, the TS-269L has an enormous number of features, and it’s impossible to cover them all. If something I didn’t talk about is important to you, I’d recommend going to the software specs page on the official site for a huge rundown.
I can’t end this page without talking about the NAS’ fantastic backup capabilities, however. For the most part, its backup schemes revolve around backing up data to the NAS, but there are options to push data out, as well. Some options for that include external storage, cloud storage like Amazon S3, another NAS, and an rsync server.

One thing worth noting is that to use the One-touch Backup feature, the front USB port must be used. This is so that when a storage device is plugged-in, pushing the button at the front will queue the NAS to begin its backup process (NAS to the external device, or vice versa).
I’m sure it’s obvious at this point, but QTS is feature-packed, and as long as this page turned out to be, I still couldn’t do it justice. For an overview of QTS that’ll tackle some things I didn’t, look no further than the official site.
Up next, performance and final thoughts.

Support our efforts! With ad revenue at an all-time low for written websites, we're relying more than ever on reader support to help us continue putting so much effort into this type of content. You can support us by becoming a Patron, or by using our Amazon shopping affiliate links listed through our articles. Thanks for your support!

Rob Williams
Rob founded Techgage in 2005 to be an 'Advocate of the consumer', focusing on fair reviews and keeping people apprised of news in the tech world. Catering to both enthusiasts and businesses alike; from desktop gaming to professional workstations, and all the supporting software.


