- Qualcomm Launches Snapdragon 4 Gen 2 Mobile Platform
- AMD Launches Ryzen PRO 7000 Series Mobile & Desktop Platform
- Intel Launches Sleek Single-Slot Arc Pro A60 Workstation Graphics Card
- NVIDIA Announces Latest Ada Lovelace Additions: GeForce RTX 4060 Ti & RTX 4060
- Maxon Redshift With AMD Radeon GPU Rendering Support Now Available
Social & RSS Feeds
Latest Videos


Latest News
Rooting, Flashing & ROMming ASUS’ ZenFone 2

by Rob Williams on July 17, 2015 in Mobile
With its ZenFone 2, ASUS delivers an excellent Android smartphone. It looks great, is genuinely feature-packed, and best of all, is priced well. But, as with so many other Android phones, a lot of fun can be had if you want to get down and dirty. We’re talking rooting, flashing, and ROMming.
ASUS’ ZenFone 2 is one of the hottest Android phones out right now, and it’s for a couple of good reasons: ASUS packs a lot of features into the $199 (16GB) price point, and the device sports the great styling ASUS’ Zen series has become known for.
As great as the phone is (I’ll be posting a full review soon), there is one aspect of it that many users seem to agree on: it has a lot of bloat. This could be one thing that helps keep the device’s cost affordable, but that doesn’t mean you have to endure it forever.
Fortunately, fixing things up is a relative breeze. I haven’t spent a lot of time in the past rooting devices, as I never felt much of a need, but with the ZenFone 2 – despite being as fast as it is – I wanted to slim things down. I don’t like pre-installed software on my notebook, and I don’t think different about a mobile phone.

One thing I feel compelled to stress is that ASUS doesn’t bloat the ZenFone 2 to the gills with useless software. Almost all of the ASUS-developed apps are useful, and in some cases have saved me from having to download apps I normally do from Google Play. The most notable bloat can be found in the device’s “Apps4U” folder, which includes Clean Master, Dr. Safety, Amazon Kindle, Zinio, 50+ Games, and TripAdvisor.
If you want to get rid of those apps, and don’t mind driving down the path of rooting, the process is simple overall. If you want to go even further and replace the device’s entire ROM with a customized one that removes most of the pre-installed software (about 700MB worth), you can do that as well. Whatever path you want to take, I’ll be covering the steps in this article.
- Quick Navigation
- Enabling USB Debugging & Downloading ADB
- Rooting ASUS’ ZenFone 2
- Using Titanium Backup To Freeze Apps
- Unlocking The Bootloader
- Swapping The ROM With SuperZen
- Restoring A Stock ROM
- Changing The Default Storage To microSD
Note: Reference URLs can be found at the bottom of the article.
Enabling USB Debugging & Downloading ADB
For backend tweaks to happen on Android, it’s imperative that the “USB debugging” option is enabled. In order to access this setting, you’ll need to go to the system menu and travel to About > Software information. Here, you’ll see some version information; click on the Build number seven times, and you’ll enable the Developer options menu.

As seen in the shot above, the USB debugging option can be enabled inside of this menu. Note that anytime your phone is connected via USB to a unique machine, your phone will require permission to grant access, which is required.
Also required is an official Android app for Windows, OS X, and Linux called ‘adb’, which stands for Android Debug Bridge. You can download a recent Windows version from our servers here (right-click, save as), or from the official source (big download, and has a slight learning-curve).
After installing / downloading / extracting adb and its related files, you need to go to the folder where it’s located in Windows’ file manager, hold the Shift key on your keyboard, right-click anywhere inside the folder, and choose “Open command window here”. In OS X and Linux, you can open a terminal and manually navigate to the folder (eg: cd /home/username/Downloads/platform-tools/).
With the phone connected to your PC, you should now be able to run ‘adb devices’ and get a message back that reports your phone as connected:
C:\Users\Rob\Desktop\platform-tools> adb devices
* daemon not running. starting it now on port 5037 *
* daemon started successfully *
List of devices attached
F4AZFG249589 device
If you see multiple results, it can cause complications. If one is emulated, that could be the result of an actual Android emulator being installed, such as BlueStacks. You might be able to select a specific device with the ‘adb -s‘ command, but I haven’t had luck with it. If you have multiple devices, you may wish to try these tweaks on another PC, or temporarily uninstall the Android emulator.
Lastly, if you encounter an issue with any of these tweaks (adb-based) and no straight-forward error is given, you may wish to kill the process in the background and start over. To do this, you can load up Task Manager (right-click taskbar > Task Manager) and go down the list until you see it listed, then kill it. In OS X and Linux, type ‘killall adb’ into the terminal. Once you run an adb command afterwards, it will automatically begin the server again.
Rooting ASUS’ ZenFone 2
Rooting the ZenFone 2 couldn’t be much simpler. As long as the phone is plugged into the PC and ‘adb devices’ picks it up, the available one-click root tool will get the job done quick. To double-check that your phone is prepped for rooting, you can double-click the ‘CheckBeforeAction’ after the phone is plugged in. After hitting a key when it prompts you to, it will reboot your phone to its bootloader. You’ll then need to press another key which will spit back a result similar to “F4AZFG249589 fastboot”. Hitting another key on your keyboard will boot the phone back up.
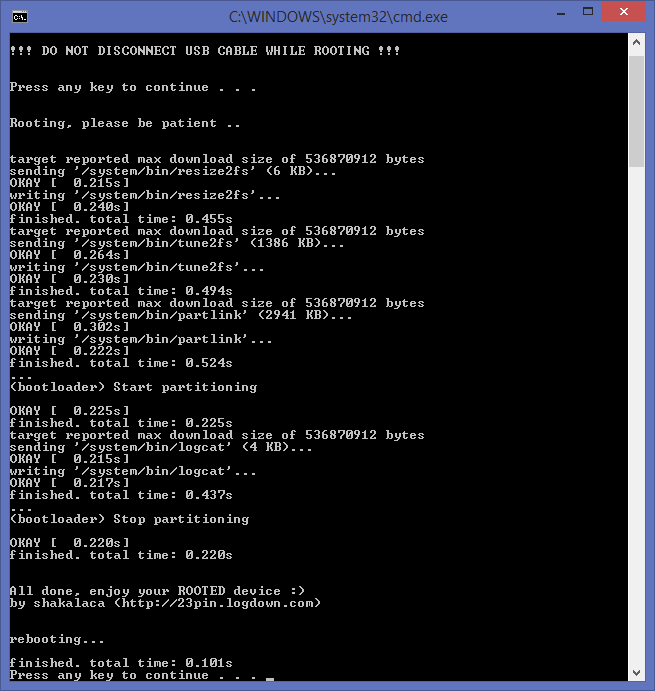
Once the phone is booted back up and is detectable by the PC, you can double-click the ‘Root’ file. The entire process can be seen in the below screenshot. It firsts reboots the phone into its bootloader, then applies the root, and then boots it back up. After multiple rootings, I’ve found the entire process to take about 30 seconds.
At this point, I’d recommend going to the Google Play store to search for and install a terminal emulator. With one open, you’ll want to type in “su” (it might try to auto-correct you, so take note), and then hit Enter. Doing so should pop an option up asking you to grant access to the app; if so, the root was successful.
Using Titanium Backup To Freeze Apps
Important: I’d recommend backing up your phone via one of the methods listed on the official Titanium site. This way, if you regret deleting an app, you can restore it later without having to reset the entire device.
If a root is as far as you want to go with your ZenFone 2, you’ll want to use an app like Titanium Backup to freeze or uninstall apps. I am not sure how much can be done with the free version of the app, but if you’re a power user, the Pro version is well-worth the $6 or $7 it costs.

From within Titanium, you can surf through the long list of apps and click on any you don’t want. In the shot above, you can see I’ve selected ASUS’ Splendid video profiler. From here, I can freeze the app, which means it still hogs space on the device, but isn’t active. This is useful if you might want to re-enable it in the future. You can hit uninstall to do just that, or wipe data to remove the app from the system’s ROM. The latter means that even if the phone is factory reset, the app will still be gone. However, as soon as ASUS releases a new major update, the app could be put back.
Unlocking The Bootloader
If you want to go the same route I did and attain as fresh an Android OS as possible, you’ll need to unlock your bootloader in order to install a custom ROM. This is not for the faint of heart, and I’d recommend most people just spend the time freezing or uninstalling apps with Titanium Backup to achieve a similar effect.
Note: If you choose to use a custom ROM, you’ll want to ignore the updates ASUS tries to push through to the phone, else you’ll revert back to the stock ROM. Using a custom ROM is a committed affair; you’ll have to manually update anytime a new major release comes out.
The guide for unlocking the bootloader can be found at the bottom of this article. The process will not work with all official ZenFone 2 ROMs, which includes the latest 2.19.40.22. In order to unlock the bootloader on my phone, I had to source a recovery.img file for the 2.19.40.20 build, flash that over, and then sideload from the official ROM file. I’ll talk about this more in a later section.
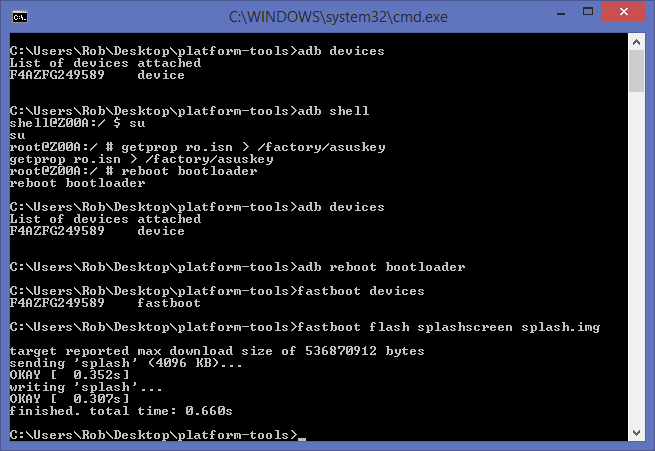
As seen in the shot above, the steps are:
adb devices (to see if the device is picked up)
adb shell (to enter the phone)
su (to gain root access)
getprop ro.isn > /factory/asuskey (to unlock the bootloader)
reboot bootloader (to reboot into the bootloader)
At this point, the phone will reboot into the bootloader, and then reboot a few moments later. If the unlock was successful, the boot screen background color will become white, rather than the standard black. If you want to get that black screen back, you can download the .img file at the respective URL at the bottom of this article, and then run these commands once the phone is booted up and connected to your PC:
adb reboot bootloader (to reboot the phone to is bootloader)
fastboot devices (type at bootloader to see if the device is picked up in this state)
fastboot flash splashscreen splashscreen.img (to apply the original splash screen)
Fin! Bootloader unlocked, and unlocked forever until a re-locker tool is released.
Swapping The ROM With SuperZen
Important: BACKUP YOUR DATA. Depending on how you go through with the ROM install, it will either update the system (and thus delete the affected apps), or treat the device as reset. Use Titanium Backup to back up your entire phone before going through with this.
In order to flash the SuperZen ROM over to the ZenFone 2, the device’s recovery software needs to be replaced with TWRP’s. You can either download the official TWRP app from Google Play and search/install for the proper version that way, or go here, click the primary download link, and download the latest version. You’ll want to place the .img file in the same folder as adb. Then, with the phone booted up and connected to your PC:
adb devices (to see if the device is picked up)
adb reboot bootloader (to reboot into the bootloader)
fastboot devices (type at bootloader to see if the device is picked up in this state)
fastboot flash recovery twrp-2.8.7.0-fhd.img (to flash the new recovery software)
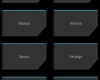
Once this process is done, you should still be at the bootloader screen, which could say “Normal Boot” at the top. From here, you can hit the volume down button until you see “Recovery Mode”. Once selected, hit the power button to enter. You should then see this interface:


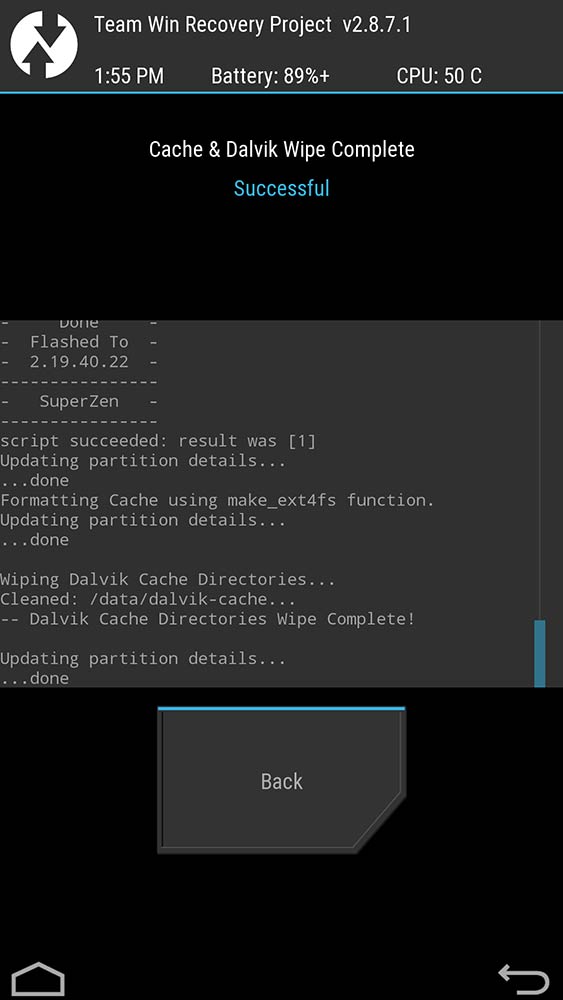
With the phone still connected to your PC, you can then copy over the SuperZen ROM file (in this case, a .zip archive) to the phone, either to its main storage or the external microSD. Once it’s copied, you can click on the Install button, search for the ROM, flash it, and then clear the cache and Dalvik.
After rebooting, you’ll enter your new environment with many pre-installed apps gone. Their icons might still remain, but will be unusable (and thus can be deleted). If you update this way, I’d recommend immediately going to System > Apps > Google Play and hit “Force Stop”, then “Clear Cache”. This will prevent the apps removed with SuperZen from reinstalling themselves through Google Play.
Note: If you want to reset your phone after flashing with SuperZen, then you can choose the wipe option in TWRP’s main screen. Otherwise, you could boot back into the phone and access the reset option through Android itself.
Restoring A Stock ROM
If you’re wanting to move back to a stock ROM, you’ll first need to flash the recovery software back for the same version of the build you’re trying to restore. You’re likely going to have to run a Google search for this, and make sure you’re downloading a reputable copy. With the version-appropriate recovery.img in hand, copy it over to the same folder as adb, and run these commands:
adb reboot bootloader (to reboot the phone to is bootloader)
fastboot devices (type at bootloader to see if the device is picked up in this state)
fastboot flash recovery recovery.img (to apply the version-appropriate recovery)
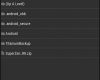
You should still be at the bootloader screen. From here, you can hit the volume down button on the phone a couple of times until you see “Recovery Mode”, and then hit the power button to enter it. You’ll see a black screen with a bunch of text. You’ll want to use the volume rocker to select “apply update from ADB”, and then hit the power button again.
On this screen, you’ll notice that the phone’s waiting for an adb sideload. Here is where you push the official stock ROM back over. Back at your PC, the steps are simple:
adb sideload 2.19.40.20.zip (the version is an example)
After a handful of minutes, the stock ROM will be copied over, and the device will behave as though it’s brand-new. You can select from the menu you are in to reboot the device, at which point you’ll be greeted by an Android setup screen.
Changing The Default Storage To microSD
This is a bit of a “bonus” tweak, and it’s inspired by our article “Moving Your ‘Non-Movable’ Android Apps to an SD Card“. If you have a smaller density ZenFone 2 and would like to move some of your weightier apps over to an installed microSD card, you can. It’s important to note, though, that not all apps will be movable. Some have flags that simply prohibit them being moved, and there’s not much that can be done about that.
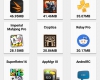
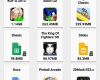
With an app like App2SD, we can see which apps can be moved before the tweak is made. In this test case, there are 24 apps. After the tweak, the number jumps to 38.

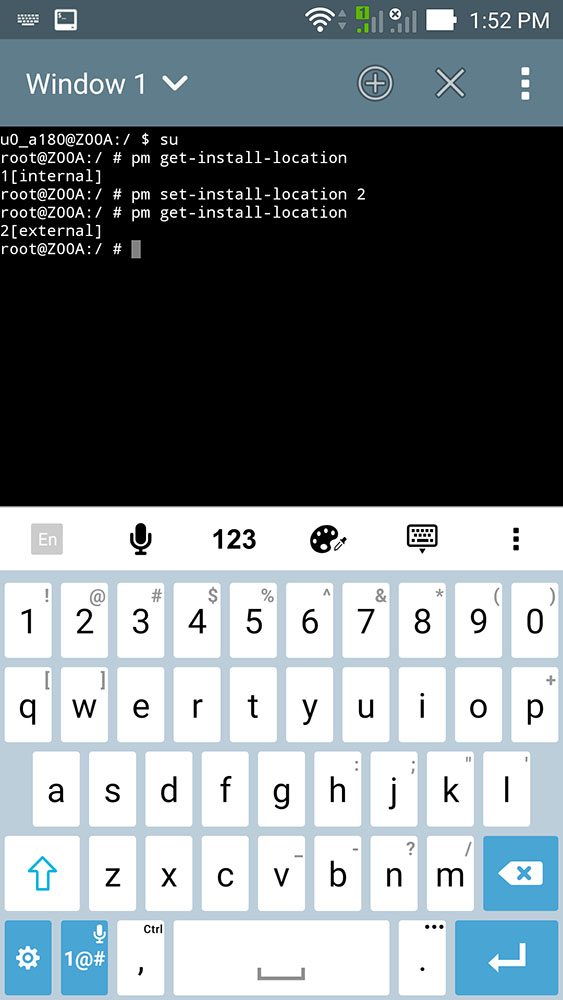

While this tweak can be applied through a computer with Android versions earlier than 5.0, Lollipop-based devices give off an error that forces us to run the tweak on the device itself. In the middle shot in the slider above, you can see me applying the tweak via a terminal emulator. You’ll note that the default install location is 0, which is internal, and I changed it to 2, which is the microSD card. Once in the terminal emulator, the steps are:
su (to grant root access)
pm get-install-location (to make sure the default is 0)
pm set-install-location 2 (to set the install location to external storage)
pm get-install-location (to make sure the value changed to 2)
And that’s it. Again, I highly encourage you to switch back to a 0 value once you’ve moved all of the apps you need to, else some complications could arise (or perhaps not – I just prefer to not take the chance).
Reference Links

Support our efforts! With ad revenue at an all-time low for written websites, we're relying more than ever on reader support to help us continue putting so much effort into this type of content. You can support us by becoming a Patron, or by using our Amazon shopping affiliate links listed through our articles. Thanks for your support!

Rob Williams
Rob founded Techgage in 2005 to be an 'Advocate of the consumer', focusing on fair reviews and keeping people apprised of news in the tech world. Catering to both enthusiasts and businesses alike; from desktop gaming to professional workstations, and all the supporting software.


