- Qualcomm Launches Snapdragon 4 Gen 2 Mobile Platform
- AMD Launches Ryzen PRO 7000 Series Mobile & Desktop Platform
- Intel Launches Sleek Single-Slot Arc Pro A60 Workstation Graphics Card
- NVIDIA Announces Latest Ada Lovelace Additions: GeForce RTX 4060 Ti & RTX 4060
- Maxon Redshift With AMD Radeon GPU Rendering Support Now Available
SilverStone Fortress FT03 Mini-Tower Chassis Review
The benefits of building a small PC are easy to understand, but what’s not always easy is finding an ideal case to store all of the components in. Well, for those looking for something a bit different, SilverStone has its Fortress FT03… an offering that must be seen to be appreciated. It’s a tower, yet small, and has huge aesthetic appeal.
Page 2 – Interior & Installation
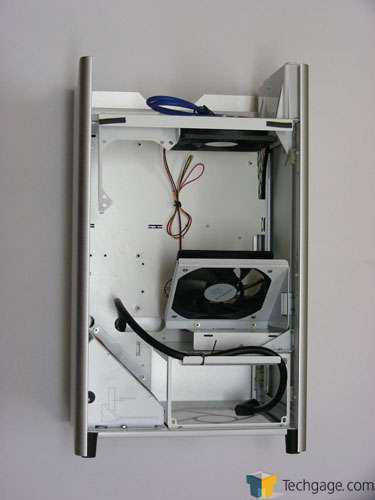
To get at the inside of the case and see what all of the fuss is about, simply remove the top grill, pull up and then out on the side panels and pull straight out on the front panel. What is found is a layout unlike anything that I have ever seen before.
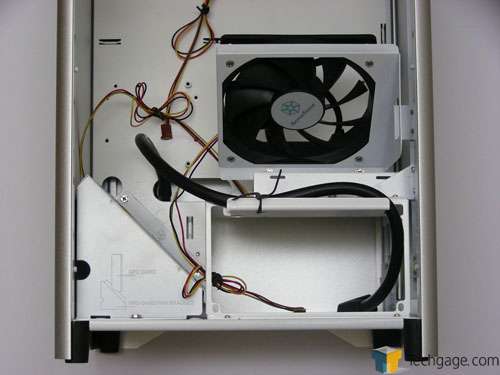
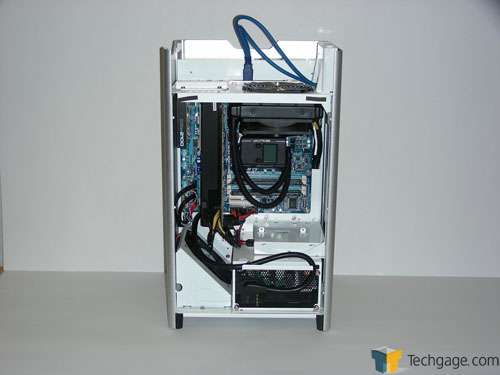
Since the airflow in this case begins at the bottom, that is where the tour will begin. The power supply area is at the front of the case and mounts sideways with the mounting area for the slim optical drive directly above it. At the rear is an angled 120mm intake fan that starts off the airflow by pushing cool air towards the video card and into a second angled 120mm fan that sits above the optical drive.
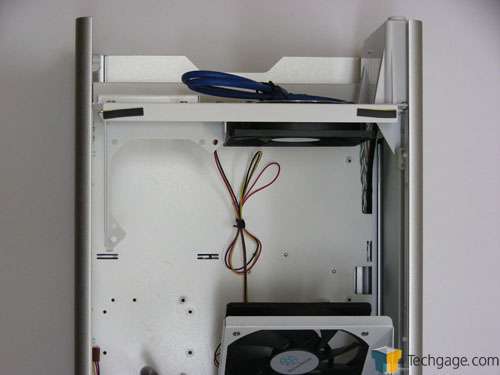
That second fan pushes air over the memory towards the CPU heatsink, but also down onto the components that surround the CPU socket such as the VRMs to help lower overall motherboard temperatures. These two fans can be removed if extra room is required for larger components with the bottom fan making way for two additional 92mm fans.
While the case can accept large tower heatsinks, the motherboard tray does not have a cutout to make mounting easier, but there is a reason, which will be covered in a moment. To help ease the pain, the motherboard tray does have several cable management holes. Above the motherboard tray is the final 120mm fan used to exhaust warm air up and out of the case. Finally, at the top rear is bracket for a 92mm fan for further cooling. All of the included fans feature 3-pin connectors and are rated at 22dB at 1200RPM, which is similar to SilverStone’s FN121 model but with a lower sound rating and a different part number, S1202512ELN-D3.
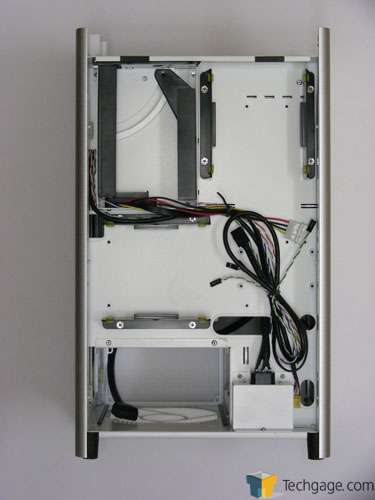
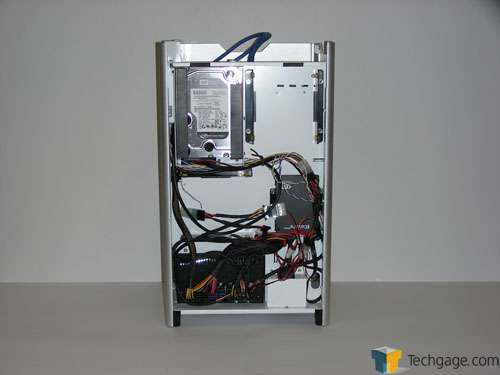
Spinning the case around to look at the right side shows the hard drive mounting points on the back side of the motherboard tray, which is why there is no cutout for mounting heatsinks that feature a back plate. In the upper front corner is the 3.5″ SATA hot swap bay with two additional 3.5″ bays below and to the right. The final drive space towards the rear comes in the form of small metal posts where the included 2.5″ drive mounting plate can be attached. Having hard drives mounted in this location means there will be no power and data cables to disrupt the airflow. Another feature that some may miss is the large aluminum heatsink attached to the inside of the right panel. This heatsink makes contact with the drive installed in the hot swap bay to help dissipate heat.
With all of the eye candy taken care of, it is time to move on to the installation and testing to see if there are any issues that come up while working in such a small, specialized chassis and whether such a dramatic change in airflow can cool components well enough to handle overclocking.
Installation
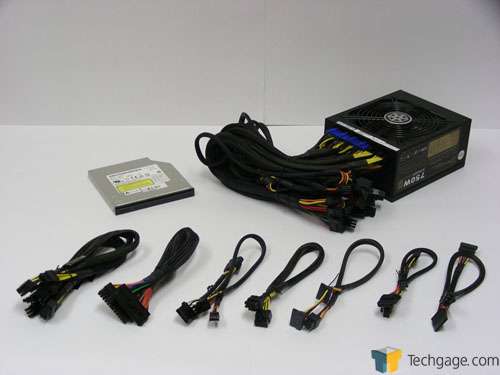
To ensure that the installation went off without a hitch, the folks at SilverStone sent along the SOD01 slim 8X SATA DVD writer, 750W Strider Gold 80 Plus Gold certified fully modular power supply and, in order to help with cable management, the PP05 Short Cable Kit, compatible with certain Strider series power supplies.
Installation was a breeze after removing the front 120mm fan to make way for the motherboard. The bracket at the top, near the video card was also removed since additional cooling there is not needed. Just to be a bit different, I decided to go with the CoolIT Vantage A.L.C. to cool the CPU since these types of all-in-one liquid coolers are becoming more and more popular, plus I wanted to see just how much room was available.
The hoses on the Vantage caused a conflict with the front fan so it was removed from the build. Due to the dimensions of the radiator, there are only two ways to mount it, both of which will have the same problem. The shroud on the back side of the radiator could have been removed, however CoolIT recommends this be left on for best performance. This is in no way a design flaw of the case and aside from this, the rest of the components installed flawlessly.
Not everybody will have access to the short cable kit so all components were connected first using the standard length power supply leads. I had to be a little creative but even those with non-modular power supplies should not run into any problems since there is a lot of room between the motherboard tray and the side panel. After switching over to the short cable kit, cable management was a dream with almost no hiding or tucking required.
The result is a super clean install with no cables cluttering up the motherboard area and disrupting airflow. Installation at times was a bit more cramped than what I am used to, even coming from some smaller ATX cases, but it is to be expected given the small footprint. All in all it was a smooth experience for my first installation into a non-standard case with all components fitting properly and securely. At no time did the chassis or the mounting points feel weak and there were no sharp edges anywhere to be found.
Support our efforts! With ad revenue at an all-time low for written websites, we're relying more than ever on reader support to help us continue putting so much effort into this type of content. You can support us by becoming a Patron, or by using our Amazon shopping affiliate links listed through our articles. Thanks for your support!


