- Qualcomm Launches Snapdragon 4 Gen 2 Mobile Platform
- AMD Launches Ryzen PRO 7000 Series Mobile & Desktop Platform
- Intel Launches Sleek Single-Slot Arc Pro A60 Workstation Graphics Card
- NVIDIA Announces Latest Ada Lovelace Additions: GeForce RTX 4060 Ti & RTX 4060
- Maxon Redshift With AMD Radeon GPU Rendering Support Now Available
Swiftech Apex Ultra kit and MCW60 Review
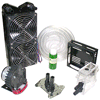
In computing we have many cooling options. Air, water and phase change being the most common in the enthusiast arena. Today we will be looking at a top grade kit from Swiftech and comparing it to a similarly configured kit from the competition and see if there is a clear winner or loser.
Page 4 – Setup, Filling and Bleeding
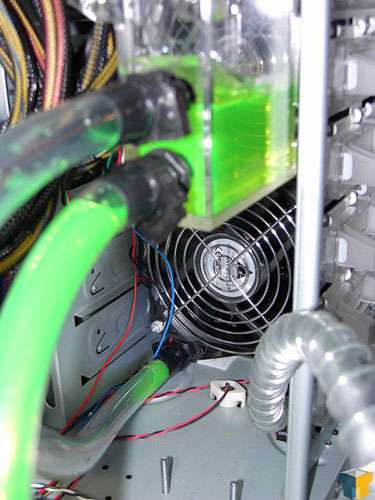
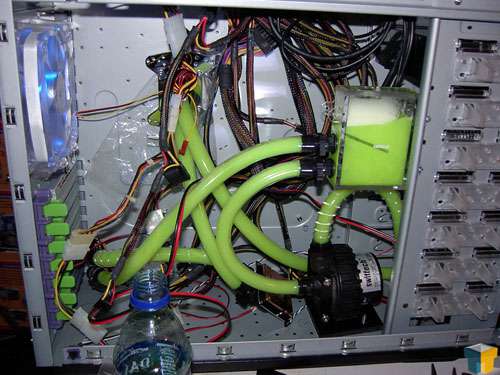
Moving right along, you can see that the radiator is mounted upside down in the front of the case. You can also see that I used the Smartcoils on the output of the pump going to the radiator. While I’m thinking about it, getting the 7/16" tubing to stretch over the output and input for the pump was rather challenging. I found that I had to submerse the tubing in near-boiling water. I also had to put dish detergent on the fittings. For the rest of the tapered fittings, although they were 1/2", I found that smearing a little dish detergent on them and simply wetting the tubing did the trick just fine. The trick is not to use so much dish detergent so that you end up with your reservoir filled with foam like I did.
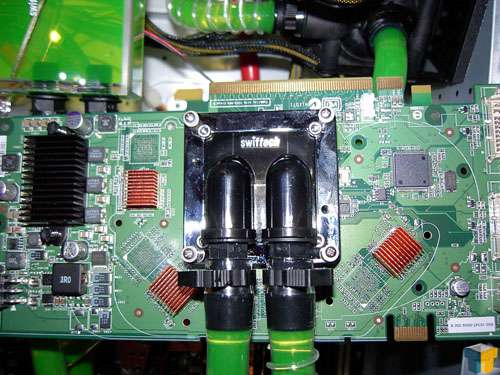
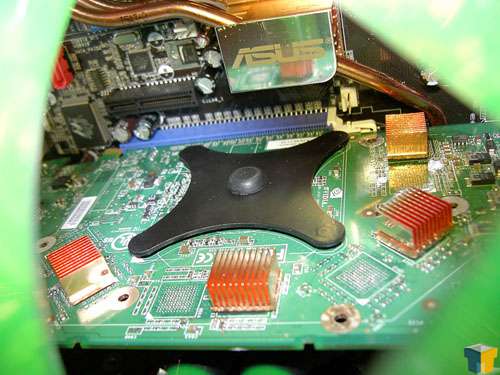
Here are a couple of pictures of the MCW60 water block mounted on a 7800 GTX. You’ll note that I did not use the included RAM sinks because I was testing this on a pre-existing system that already featured RAM sinks. The MCW60 attaches to the card with screws going through springs with tension limiters on the face of the card, passing through the chrome mount on the GPU block, passing through the card and into the rear stiffener. The rear stiffener features a rubber captive bumper to prevent it from coming into contact with the surface mount components on the backside of the card.
Even with the improvement of the mounting system over the competition, there are a few drawbacks that I encountered. When attempting to attach the blocks to the cards with the blocks already plumbed into the system I found that attempting to hold the backing plate captive with my hand while holding the card in my hand and holding the block centered over the GPU core with my other hand I ran out of hands. When I spoke of this to Gabe at Swiftech his response was "Normally you would attach the block to the card before plumbing it." While this is true I personally do not leave the equipment in the case attached to the water cooling blocks while I do my leak test. This means that you either remove the block from the card, run your leak test, reattach the block to the card or remove the block from the loop then reattach the block to the card and re-plumb your loop.
I think it would be easier to locate both the block and the rear backing plate if you threaded two 2" 4-40 pieces of all thread into opposite corners of the backing plate and used those to locate the backing plate on the card so that it could not move around. When you’re holding the card with the 4-40 rods sticking through the card and the card facing up you could simply slide the block down the 4-40 rod and put the springs, screws and spacers in the opposite corners from the rods. After that you would just remove the rods from the backing plate (since they would only be finger tight) and put the screws, springs and spacers where the rods had been. Had this been the mounting method it would have saved me, roughly, an hour and a half of inventive language.
Now don’t take this is as bashing Swiftech and their mounting system. If you don’t normally remove your motherboard and video cards whenever you are doing a leak test you won’t notice a problem. It all has to do with your personal preferences, me personally, I don’t like the idea that if my water cooling system leaks it’s going to leak all over my expensive parts.
|
|
Support our efforts! With ad revenue at an all-time low for written websites, we're relying more than ever on reader support to help us continue putting so much effort into this type of content. You can support us by becoming a Patron, or by using our Amazon shopping affiliate links listed through our articles. Thanks for your support!


