- Qualcomm Launches Snapdragon 4 Gen 2 Mobile Platform
- AMD Launches Ryzen PRO 7000 Series Mobile & Desktop Platform
- Intel Launches Sleek Single-Slot Arc Pro A60 Workstation Graphics Card
- NVIDIA Announces Latest Ada Lovelace Additions: GeForce RTX 4060 Ti & RTX 4060
- Maxon Redshift With AMD Radeon GPU Rendering Support Now Available
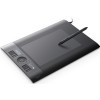
Wacom’s Intuos4: A Photographer’s Perspective

Wacom’s tablets have long been considered an indispensable tool for novice and professional artists alike, but can they also offer some use to those who couldn’t draw a circle? Our resident photographer, Brett Thomas, takes a look at the Intuos4 “Medium”, to see if it manages to surpass the “perfected” workflow using his desktop mouse.
Page 2 – Getting Down to Business
I’ve now edited several pictures using the tablet, and as I began this process, I started jotting down notes of random thoughts, insights and frustrations involved in changing my workflow to make use of the new addition. As such, this section is a little disjointed – I apologize for that, but it was the best way I could think of to impart the actual learning curve involved.
Brushes, dynamics, and why you buy the bloody thing
The first thought was to get down to brass tacks, and turn everything in Photoshop to use pen sensitivity that could. This meant all “Brush Dynamics” on full bore – my pressure would allow the size of my brush to grow and the opacity to increase. This seems intuitive – if you pull a paintbrush across a canvas lightly, you get a very thin line that may or may not be very opaque, depending on the paint.
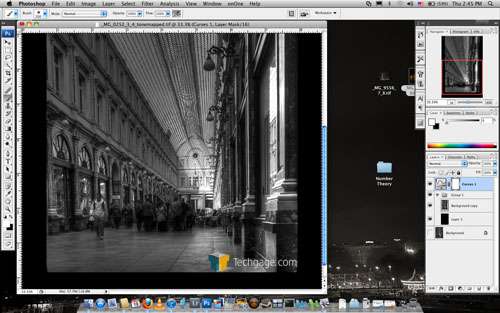
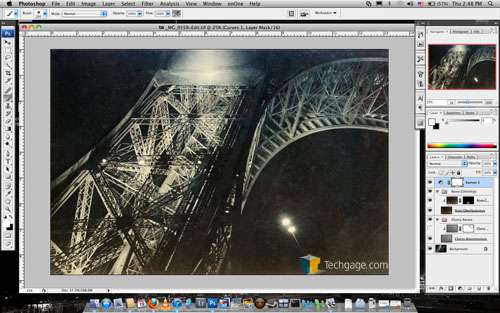
Therein lies the key, though: it depends on the paint. Photoshop does not have an intuitive way to adjust for this (it’s all hidden under the individual brushes) – so turning this feature on is like trying to watercolor on paper with a heavy bleed. There are points where this is useful, but you need to first learn to set your brush sizes appropriately, which means you better have that on the speed dial. If your brush size is set right, the dynamics will control a “bleed” around the edge of the chosen brush – push hard, the bleed is greater. This becomes incredibly useful when dodging and burning, because a harder push not only provides the appropriate level of the effect, but also makes sure it blends into the surrounding area without looking like you went nuts.
Over time, I grew to like allowing the brush to be controlled by pen pressure, but I would in no way recommend this while you are getting used to the tablet – and I turn it off regularly depending on effect. At first, it is very hard to guess just what area you are going to affect with different sensitivity. When working with a mouse, you have zero directions of “dynamic” control – you must set your opacity and your brush size manually, and then if you want more, you have to paint over the same area multiple times (leading to streaks and artifacts).
When transitioning to the tablet, it’s good to give yourself ONE degree of freedom before giving yourself two – and I’d personally start with opacity, as I find that to be less possible with the mouse. Now that I’m more used to it, there’s points where I will use brushes that have both on – but often I will find myself either allowing the tablet to choose brush size or opacity, but not both.
Please note that where to turn all of these individual dynamics on and off in Photoshop is dependent on the brush you choose (not all options are even possible on every brush), so it takes some hunting around and careful choosing or creating of your brushes to make the best use of this feature over time. In fact, a big part of what the tablet has given me is yet one more resource to start building on top of filters and actions – brushes. It’s funny how something that should save me work creates different work.
The Path Tool, and other selection tools
If you’ve not used the path tool before because it was too cumbersome to control with the mouse, well, I can’t blame you. If you’ve listened to or read anything on making proper selections, alpha layers, etc, you also know that you’re missing out on the best technique around. Allow me to say that if there was NO other function that the tablet provided, the path tool would make it worth a good deal of its asking price.
The fine-grained control that you gain from the tablet means that pen points go exactly where you want them, and tweaking their curvature becomes a breeze. My ability to draw a detailed, complex selection with a path has grown from nonexistent to well above passable nearly overnight. Good selections are a HUGE factor in good editing – this control makes that much more possible than ever before.
The lasso selector is another tool that receives a big function boost. Being able to properly draw is a very different feeling than trying to use your elbow and wrist to guide a mouse delicately, and again, the sensitivity comes into play. It is much easier to make a detailed selection with the tablet than it ever was with the mouse. The polygon lasso, rectangle and ellipse selection tools also function better than with a mouse, but not enough to write home about. It’s great to be able to place that rectangle right where you want it, but I never found that to be so difficult to accomplish with the mouse afte a little nudging with the keyboard arrows.
The Tablet outside of the picture
May I just say, “AAAARRGGHH!”
The minute you need to go outside of the boundaries of your picture with the tablet – be it for a tool, a layer change, an action, or to open menus – you begin to feel slowed down. The mouse is a speedy pointer, and I have grown used to that over the years. In fact, my sensitivity is usually dialed up pretty highly so I can get around on my desktop with the minimum of wrist motion.
The tablet, on the other hand, can be quite frustrating in this regard. A big part of it is the size: one wouldn’t think that 5.5 inches by 8.5 inches is that big of a tablet, and indeed there are two sizes even larger than that. However, that means your hand has to move on average at least 4 inches to get to elements on the edge of your screen, assuming that you’re in the center of the tablet. In comparison, the average person moves the mouse about 3 inches to get across the ENTIRE screen.
More size means more sensitivity when it comes to dealing with your actual image, and that is why you buy this in the first place. However, that comes with the sacrifice of mobility when you need to use the remaining interface elements that you couldn’t shoehorn into your tablet’s quick-keys. The included “mouse” is supposed to help with that, but as I mentioned before – it’s way easier to grab your real mouse, or just deal with the speed and motion of the hovering pen.
Overall, this is where the tablet begins to grow very difficult for me – a lot of my editing style is “Apply a filter or action, then edit masks to control where it actually affects, then play around with blend modes, then add necessary curves layers to dodge and burn… then repeat with new filter or action, then edit where it affects, then play around with blend modes, then add necessary curves layers…”
In any image, I might use 5-10 different filters/actions, each with their own layer, then a mask, then a blending change, then adjustment layers. In this pattern, the tablet helps with the mask and the adjustment layers – two integral things, but not the whole workflow. The slow speed of the tablet on the whole rest of the UI means that I still spend a lot of time switching between the pen and the mouse, which is a frustration for those seemingly quick edits.
Support our efforts! With ad revenue at an all-time low for written websites, we're relying more than ever on reader support to help us continue putting so much effort into this type of content. You can support us by becoming a Patron, or by using our Amazon shopping affiliate links listed through our articles. Thanks for your support!


