- Qualcomm Launches Snapdragon 4 Gen 2 Mobile Platform
- AMD Launches Ryzen PRO 7000 Series Mobile & Desktop Platform
- Intel Launches Sleek Single-Slot Arc Pro A60 Workstation Graphics Card
- NVIDIA Announces Latest Ada Lovelace Additions: GeForce RTX 4060 Ti & RTX 4060
- Maxon Redshift With AMD Radeon GPU Rendering Support Now Available
GParted LiveCD 3.1-1

Are you in need of a great partitioner? Don’t want to spend lots of cash for the popular commercial products? The GParted LiveCD offers most of the features that the big boys do, and even some that they don’t. The key benefit? This is free.
Page 1 – Introduction
If you are a computer power user, chances are good that you have had to partition your hard drive in the past. If you don’t have a clue what partitioning is, I will put it simply: It’s a way of dividing up a single hard drive into multiple virtual hard drives. So essentially, you could take an 80GB hard drive and divide it up into a 40GB Windows partition and a 40GB Linux partition. Of course, the options are limitless and will differ depending on your goals.
If you are a single OS user, it still pays to make use of partitions. In Linux especially! Since there is no way to defrag the hard drive, things are sure to get fragmented down the road. So, with some time, you could set up partitions for seperate folders on your hard drive. For instance, you could have one partition on /home, one on /tmp and maybe one on /boot. /tmp is a good one, because that’s a folder that’s accessed a lot, so to have it on it’s own partition would keep the fragmentation away from other areas of the disk.

Many times when roaming some forums, some people will ask for partitioning software recommendations. I see Partition Expert and Partition Magic listed a lot, but those both cost over $60 and require Windows to run. Then we have FDisk for Linux users, which does the job quite well. But, it has no real interface, so it’s difficult to use for those who don’t enjoy CLI based applications.
So here we have GParted (not to be mistaken with “retarded”), which is an official part of the GNOME desktop environment. However, it’s such a useful tool that it has been made into it’s own LiveCD, and that’s what we are taking a look at today. What’s the primary benefit of the GParted LiveCD? It has most of the power of the commercial applications listed above, works regardless of what OS you are using, and is completely free. Perfect for personal tasks, or even in a commercial environment dealing with customers PC’s. Let’s take this for a boot…
Though I don’t have photos to share of the boot sequence, it’s as simple as most Linux LiveCD’s. If you are a Windows user and know nothing about Linux, don’t fret. If you understand the basics of a partitioner, you can certainly understand how to work your way around here. There are two immediate options… default or lowmem. I chose the default as 2GB of ram should prove enough.
Once booted, you will be asked for your keyboard layout, resolution and color depth. The default options should work well enough for anyone. You can also select special options if you have a bizarre setup, but again, you will not likely need to. After you are done this, you can proceed into the live environment.
Well, I should have been in the live environment. I had a stop error that X could not boot, for whatever reason. This came as no surprise to me, since I have had a lot of trouble with Linux on my AM2 system which consists of a DFI NF590 SLI-M2R/G motherboard and ASUS 7900GT. After checking out the xorg.conf, the driver was set to nv, which apparently disagreed with my setup. Changing it to vesa and using startx to begin X fixed the problem entirely.
After a little studying and filing a bug report, I had a reply by a developer mentioning that this is the reason for the “Old manual video card” option. I paid no immediate attention to this option at first, because I figured it was for old video cards as it sounds. However, selecting this option allows you a choice between all of the possible card configurations… and VESA was the first in the list. Why that one is not used by default anyway, I have no idea. Regardless, I’m told that this automatic GPU detection will be changed in the next version.
As you would expect, a very minimal fluxbox environment is used here because the distro has a one specific purpose. The first thing you will see is GParted opened and scanning the hard drive/s, which should only take a few seconds. If you have a thumb drive plugged in, it will pick up on that also.
This is the computer I primarily use for testing, so you can see a few different NTFS paritions which are used for various versions of Windows. Then there are a few reiserfs partitions put there by SUSE Linux Enterprise 10. I won’t be using GParted extensively, but I will give it a few different schemes to toy with. Before we get into that though, let’s first take a look at what else this live desktop offers.
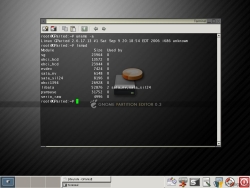
The 3.1-1 version of the LiveCD came out only a few days ago, so we have a very up to date kernel (2.6.17.13) which has required modules already loaded. Also included is the cool Thunar file manager, though you will not likely require it for much here. For simple text editing, Leafpad is included, though nano is also there for a CLI editor. If you are a complete noob to GParted or partitioners in general, there is quick access to a full fledged help file that explains everything.
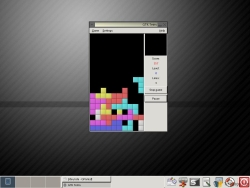
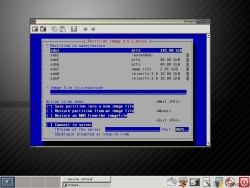
If for whatever reason you are finding partitioning just too boring, spice up the experience with some Tetris! If you have a need to save an entire paritition to a file, you can do so with partimage, also included.
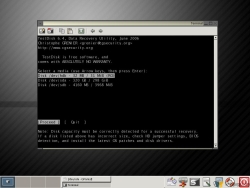
Testdisk is also here if you need to quickly fix a MBR or file system on a disk or thumb drive. So, the GParted LiveCD is not only for recreating new partitions, as we can easily see.
Support our efforts! With ad revenue at an all-time low for written websites, we're relying more than ever on reader support to help us continue putting so much effort into this type of content. You can support us by becoming a Patron, or by using our Amazon shopping affiliate links listed through our articles. Thanks for your support!


