- Qualcomm Launches Snapdragon 4 Gen 2 Mobile Platform
- AMD Launches Ryzen PRO 7000 Series Mobile & Desktop Platform
- Intel Launches Sleek Single-Slot Arc Pro A60 Workstation Graphics Card
- NVIDIA Announces Latest Ada Lovelace Additions: GeForce RTX 4060 Ti & RTX 4060
- Maxon Redshift With AMD Radeon GPU Rendering Support Now Available
Social & RSS Feeds
Latest Videos


Latest News
Synology DiskStation DS415play 4-bay NAS Review
by Ryan Perry on August 26, 2015 in Networking, Storage
Do you hoard digital media? Do you wish your unsupported files played on a media device of your choice? Do you need a central location for storing all files? These three scenarios point to an attractive solution: Synology’s DS415play NAS. Whether for work or for play, this user-friendly NAS has something for everyone.
Page 1 – Introduction & Software
As we continue our march through the digital age, more and more of our traditional media is coming with us. Printed photos are scanned, music is ripped from records, and even home movies shot on ye olde video cameras are being digitized. The catch to this is that we now need somewhere to store all of this digital media. Thankfully, Network Attached Storage (NAS) solutions are available to cover just about every price point, whether it’s for home or small, medium or large businesses.
Here to bridge the high-end home/small business gap is Synology with its ~$500 DS415play, a 4-bay NAS that’s specifically aimed at media storage. Up to 32TB of it, to be precise. In addition to this larger model, there’s also the 2-bay DS214play that allows for up to 16TB of storage.
Both models sport a dual-core Intel Atom SoC CE5335 running at 1.6GHz as well as 1GB of DDR3 memory. 3.5″ and 2.5″ hard drives are supported, as well as 2.5″ solid-state drives. The NAS also supports hot swappable drives.

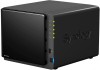
Our review of the DS415play starts off with a look at the exterior. Running down the right edge of the front panel are the status and disk activity LEDs followed by a USB 2.0 port and the power button. The rest of the front is taken up by the removable plastic cover that hides the drive bays.

The Synology branding on the left and right sides also double as ventilation for the system, allowing air to be pulled in to keep temperatures as low as possible.

Around back are two 92mm exhaust fans, a recessed reset button, two more USB 2.0 ports, an Ethernet port, a lock slot to keep the NAS securely in place, the power connector, and a pair of USB 3.0 ports.

The removable plastic front cover is held in place by a rubber bumper in each corner. Around the edge of each bumper is a ridge that fits just inside of the metal body of the NAS that keeps it securely in place, but at the same time makes it easy to remove; plus, the rubber means no vibrations.

Removing the drives is as simple as pushing up on the plastic release latch at the top of the drive bay and sliding it out using the handle on the end of the drive tray. Our review sample came fully loaded with four Seagate ST4000VN000 4TB NAS drives, held securely in the tray by plastic rails that snap into place on both sides. The rails have pegs toward either end that go through the rubber-lined holes in the tray and into the mounting holes on the sides of the drives.

Included with the DS415play are the power adapter and separate power cable, an Ethernet cable, a bag of screws for those using 2.5″ drives, and a quick installation guide.

There’s nothing complicated about the basic physical setup of the DS415play. Simply install the drives, connect the power, connect the Ethernet cable to put it on the network, and you’re off to the races.
A Look At The Software
There are a few ways to access the DiskStation Manager (DSM) software, such as using either of two URLs listed in the quick installation guide, or directly via the IP address. If the IP address is unknown, there’s a handy little application called Synology Assistant that can be download from the product page. It can sniff out multiple Synology NASes on the LAN and display information such as the server name, IP address, status, and firmware version. It also provides the option to map a drive, setup Wake On LAN, or configure a printer.

Whatever method is chosen, users will end up at the login screen where they can enter the default username and password. The default credentials weren’t listed anywhere, but a quick search online found that it’s simply “admin” without a password. Once logged in, users will run through a series of setup screens where they can configure the name of the NAS and create a dedicated user account with a secure password, choose the firmware update options, setup QuickConnect for external access to the NAS, and install some useful applications such as File Station, Picture Station, and Video Station.

After a few quick tips and a look at DSM Help, we were presented with the sparse home screen. Clicking the squares in the top left corner will bring up the main menu where users can access various applications, see how the NAS is performing with Resource Monitor, log a support ticket, or set the backup and replication options, just to name a few. These icons can also be dragged to the home screen to make it easier to access your most commonly used features.

On the right, users can view any notifications, and clicking the icon of the silhouette opens the menu to change various options such as the default language, enable 2-step authentication, and modify how the desktop looks. The magnifying glass opens a search box where users can look for features, the gauge icon displays or hides widgets, and the blocks on the far right enable pilot view, which acts kind of like how Alt+Tab does within Windows to make it easy to bring a hidden menu to the front.

The DS415play is simple enough for a home users to configure, but also has all of the features and options to make it a viable choice in a business environment. There’s the standard fare such as creating users, groups, shared folders, and assigning permissions, but there are also options to add the NAS to a domain and configure LDAP, setup firewall rules, and more. Since every environment will be different, we didn’t want to spend too much time going into the more granular options, but if a more in-depth look is needed, Synology has a software demo available.

Supported arrays for the DS415play are Just a Bunch of Disks (JBOD), RAID 0, RAID 1, RAID 5, RAID 6, RAID 10, and Synology’s own Hybrid RAID (SHR). For those who aren’t up to speed on their RAID setups, be sure to check out our guide.
Out of the box, the DS415play comes configured for SHR, which acts like a conventional RAID 5 setup, but does away with the potential storage draw backs. For example, disks of different sizes can be used without losing space because SHR breaks the storage space into blocks, meaning a 500GB drive and a 1TB drive can be used together with all of the space remaining available, whereas in a standard RAID setup, all drive sizes need to match, and any space above the smallest drive in the array can’t be accessed. Also, if for some reason the array needs to be expanded, drives larger than the smallest drive currently in the array can be added, and once built, all of the space is made available for use.

SHR began with a single disk for redundancy using a minimum of 3 disks in the array, but as of DSM 3.1, redundancy can now be configured for 2 disks using at least four drives. Essentially, you now have a RAID 6 setup, but with the same advantages of SHR mentioned before.
If a traditional RAID setup is more your thing, simply remove the SHR volume, choose the type of array you’d like, and it’ll be ready to go once it finishes building. Obviously, a RAID 5 setup will take longer to build than RAID 1 due to the larger storage capacity that comes with it, and it’ll take even longer if data verification is selected, which we strongly suggest.

With the hardware and software out-of-the-way, it’s time to see how the DS415play performs as we subject it to our usual storage tests, as well as try one of the coolest features, which we’ve purposely kept under wraps until now: video transcoding.

Support our efforts! With ad revenue at an all-time low for written websites, we're relying more than ever on reader support to help us continue putting so much effort into this type of content. You can support us by becoming a Patron, or by using our Amazon shopping affiliate links listed through our articles. Thanks for your support!