- Qualcomm Launches Snapdragon 4 Gen 2 Mobile Platform
- AMD Launches Ryzen PRO 7000 Series Mobile & Desktop Platform
- Intel Launches Sleek Single-Slot Arc Pro A60 Workstation Graphics Card
- NVIDIA Announces Latest Ada Lovelace Additions: GeForce RTX 4060 Ti & RTX 4060
- Maxon Redshift With AMD Radeon GPU Rendering Support Now Available
A Bright New Star – A Review Of The Mionix Castor Gaming Mouse

Mionix’s marketing strategy of naming its products after heavenly bodies is brave. It’s good, then, that the company succeeds more often than not in designing stellar products. Will its Castor, named after one of the brightest of stars visible in our skies, live up to its billing? Or will it explode like a supernova amidst such galactic expectations? Read our review to find out!
Page 2 – A Look at the Software
Because it is a USB device, the Mionix Castor is plug-and-play. Just plug it in, wait a few seconds for Windows to detect it, and you can start using it.
However, to get the most out of it, you must download the Castor software from the Mionix website; I would recommend updating the mouse’s firmware as well, particularly if you’re running Windows 8/8.1 or 10.
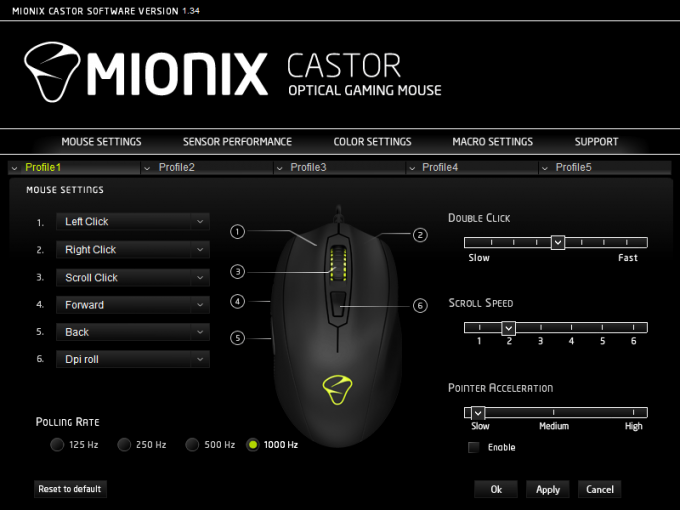
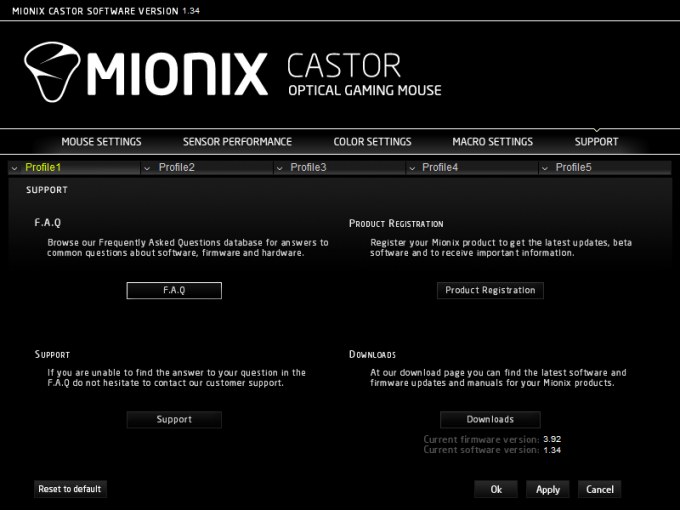
This is what the software looks like. It has five sections; all through five sections you can access and save to any one of five User Profiles. These profiles can be saved in the mouse’s onboard memory.
The Mouse Settings section is where you can assign functions to all six available buttons, set the Double Click speed, Scroll speed, activate/deactivate the Pointer Acceleration feature (default is deactivate) and set its speed, and set the polling rate for the Castor.
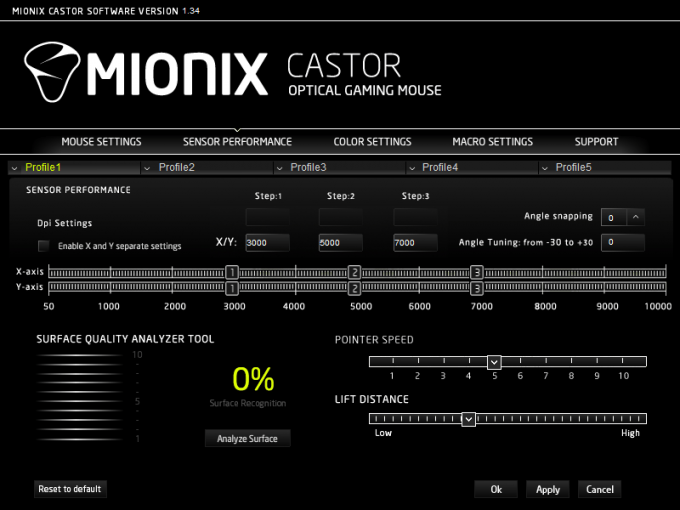
The next section, Sensor Performance, allows the user to set the following parameters of his/her Castor: DPI Settings (including separating the X/Y axes) across three steps; Angle Snapping; Angle Tuning; Pointer Speed; and Lift Distance. This part of the software is also where the Surface Quality Analyzer Tool (S.Q.A.T.) is located. S.Q.A.T. further calibrates the mouse’s optical sensor to the mousing surface’s specific characteristics.
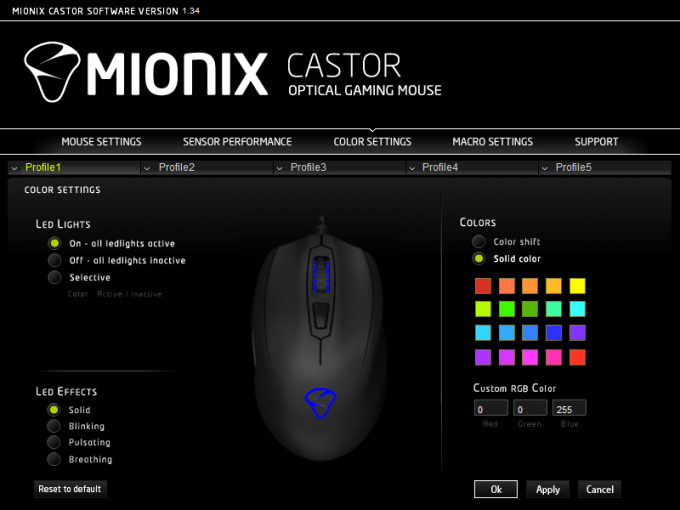
Color Settings, logically enough, controls the Castor’s LEDs color and behavior. There are two LEDs on the mouse – one on the mouse wheel, and another on the mouse’s rump. You can have the LEDs on, off, or turn on selectively. This is also where you can set the LEDs’ effects, which basically controls the rate at which the LEDs go on and off. Finally, this part of the software also controls what color the LEDs are. Mionix says you can choose from among 16.8 million color options. You can set the LEDs to display just one color, or have it cycle through all of the options.
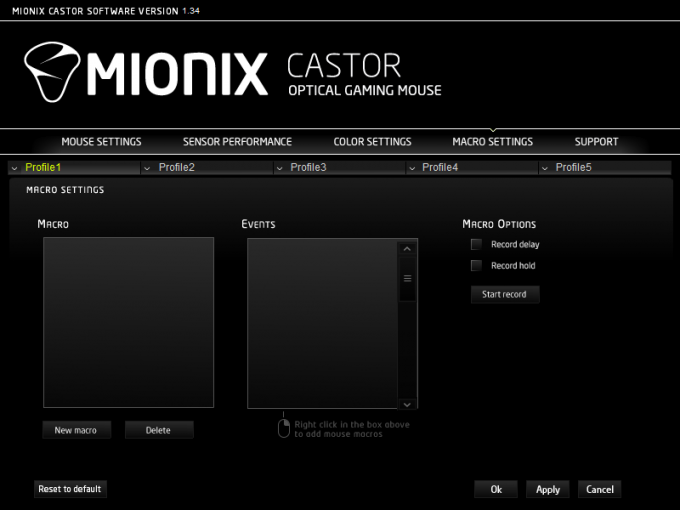
If you want to set macro commands for your Castor, you do that in the Macro Settings section.
Finally, you can find all sorts of useful support options in the Support section of the software should you run into issues with your Castor. There is an FAQ button in case you’re curious about your Castor, a Support button if you need to get in touch with Mionix, a Product Registration button so you can register your Castor with Mionix, and a Downloads button if you want/need to update your Castor’s software or firmware.
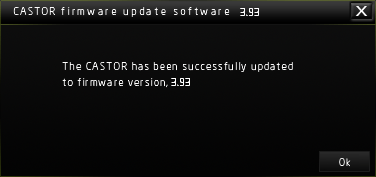
Incidentally, I used that firmware update button to update the Castor’s firmware version to the latest 3.93 version.
Mionix’s software for the Castor is intuitive and very user-friendly. I love the elegant aesthetics of the GUI. You can’t go wrong with the simplicity and clarity of black and white, with a dash of color to highlight certain areas of the interface.
Let’s move on now and put this baby through its paces.
Support our efforts! With ad revenue at an all-time low for written websites, we're relying more than ever on reader support to help us continue putting so much effort into this type of content. You can support us by becoming a Patron, or by using our Amazon shopping affiliate links listed through our articles. Thanks for your support!


