- Qualcomm Launches Snapdragon 4 Gen 2 Mobile Platform
- AMD Launches Ryzen PRO 7000 Series Mobile & Desktop Platform
- Intel Launches Sleek Single-Slot Arc Pro A60 Workstation Graphics Card
- NVIDIA Announces Latest Ada Lovelace Additions: GeForce RTX 4060 Ti & RTX 4060
- Maxon Redshift With AMD Radeon GPU Rendering Support Now Available
Antec NSK2400 HTPC Case
Antecs NSK2400 is worthy of your attention if you are looking for a solid HTPC case. It has an innovative thermal design and great attention to detail. This is one HTPC case that covers all the bases.
Page 4 – Building a System
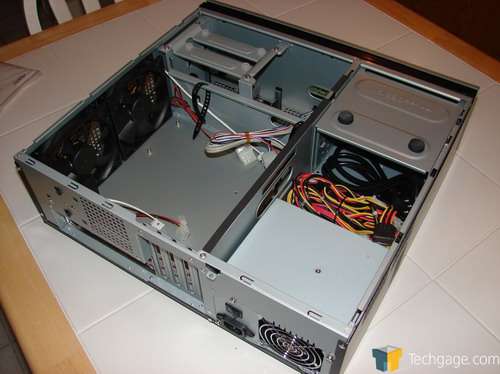
With the Antec NSK2400’s unique internal design, building a system isn’t quite as straightforward as would be in a more typical HTPC. But that’s okay – my friend and fellow PC enthusiast Colin Huckstep and I have all evening to figure it out, and we’ve got all the details for you. For this system, we’re using his hardware, since my reference PC is rather tightly integrated with its current case. This is the same hardware that we installed into an NZXT Duet for an earlier review, which affords us the luxury of comparing both cases directly. In the future, we’ll be collaborating on an article about how to build — and get the most from — a home theater PC of your own.
- Test System
- Processor: AMD Athlon 64 X2 3800+ CPU
- Cooling: Cooler Master Vortex TX CPU Cooler
- Motherboard: ASUS A8N-VM-CSM Micro ATX Motherboard
- Memory: 512MB PC3200 DDR Memory
- Video: eVGA NVIDIA 7600GT KO 256MB
- Tuner: ATI TV Wonder 650 Tuner
- Sound: Creative Sound Blaster Audigy4
- Storage: 3 Hard Drives (One Seagate, Two Maxtor)
- Optical: One DVD-RW Drive
- Power Supply: Antec TruePower 350W
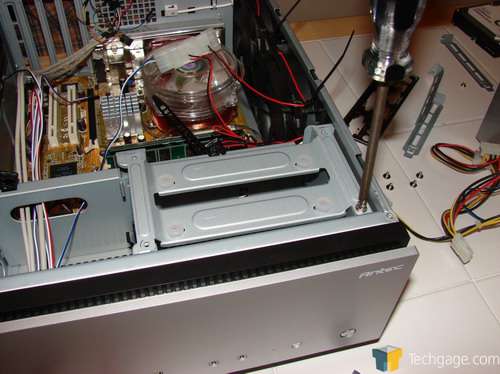
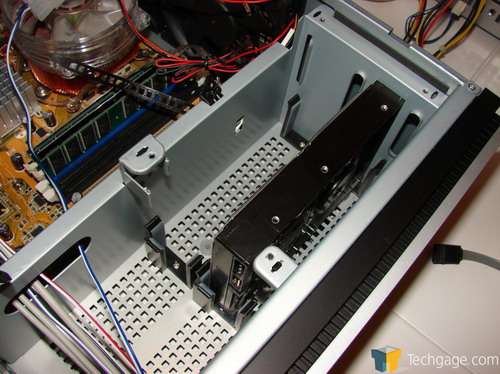
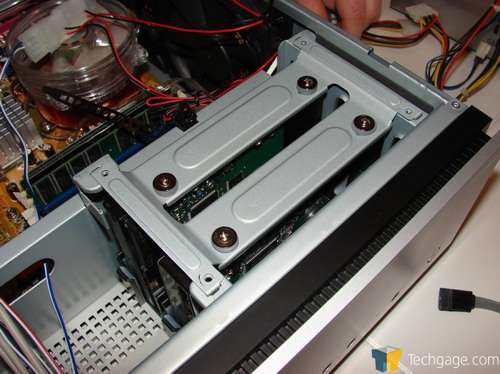
We decided that the first place to start in the NSK2400 is by installing the hard drives. The NSK2400 has space for two 3.5″ hard drives in the right front corner of the case. The drives mount between the bottom panel of the case and a bracket that mounts to the rails of the chassis itself. The first step is removing the bracket, by unscrewing the four screws that hold it in place.
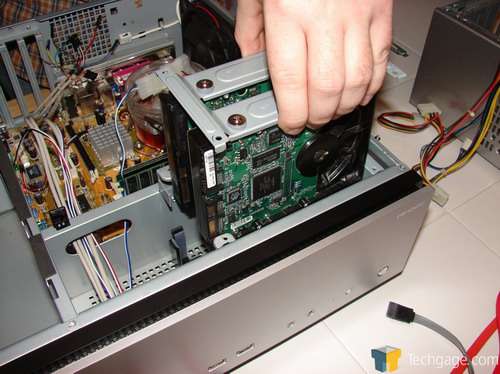
The other end of each drive is supported by a plastic support bracket in the bottom of the case. We found that the best way to install the drives was to attach them both to the removable top bracket, and slide them both into place. The bracket uses silicone rubber grommets to decouple the hard drive’s vibration from the case. This requires special screws with a wide head.
While the screws that Antec includes with other cases have a lag section to prevent them from being screwed in too tightly, the screws included with the NSK2400 do not. This means that the grommets can be over-compressed by the screws, to the point where they begin to flow out of their holes in the metal bracket; we recommend using care when tightening these screws. They don’t need to be cinched down tightly – just enough to compress the grommet slightly.
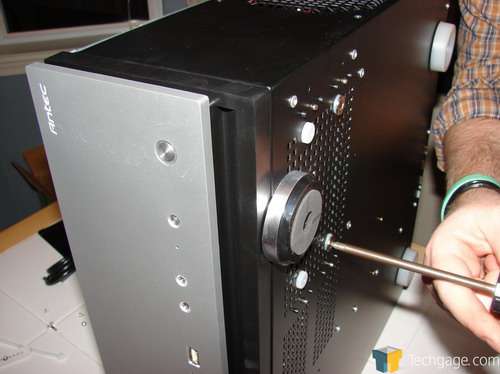
Once both drives are mounted to the top bracket, they can simply be dropped into place. Next, flip the case onto its back (taking precautions to prevent scratching the finish) and install the screws in the grommets on the bottom of the case. These screws anchor the other side of the hard drives for the most secure installation, though with the included plastic bracket, this may not be necessary. The same admonition about the grommets applies here. Once this step is finished, the installation of the hard drives is complete.
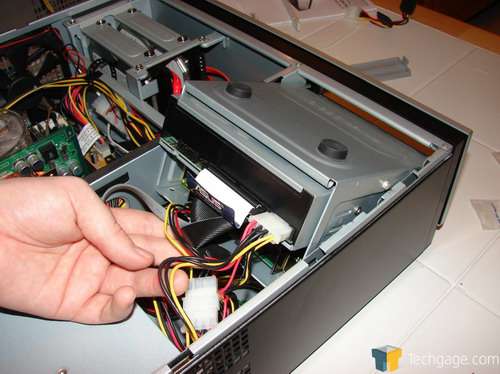
The next step is to install the 5.25″ drives. Simply lift the drive cage out at an angle to remove it. This removable drive cage had no trouble containing a third 3.5″ hard drive, mounted using 3.5″-to-5.25″ converter rails. The removable 5.25″ drive cage is a thoughtful addition.
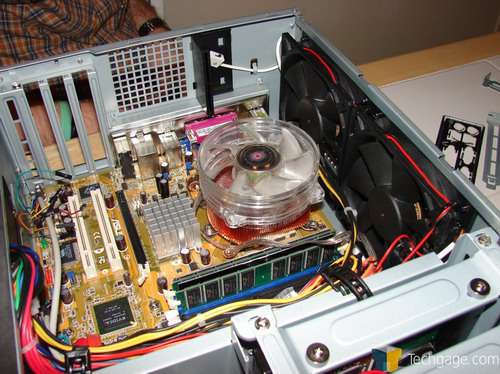
Motherboard installation is simple. The NSK2400 comes with all but two of the standoffs installed. The location of the last two standoffs may be different with different motherboards, so this arrangement provides the greatest installation flexibility. We don’t mind installing a couple standoffs, do we?
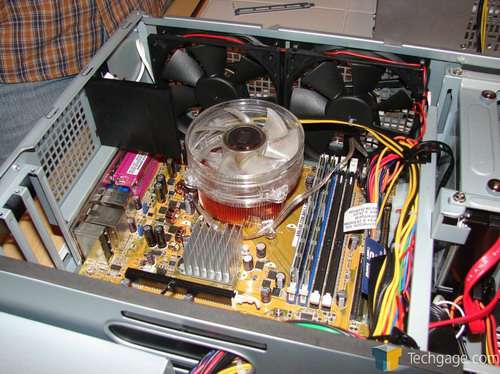
At about this time, Colin had a brainstorm. It turns out that the interlocking plastic pieces included with the case are actually air guides that funnel cold air from the rear panel intake into the CPU cooler. The number of ways that Antec provides to customize the airflow in this case is almost staggering. Use as many of the interlocking pieces as necessary to extend from the rear panel of the case to the edge of the CPU cooler.
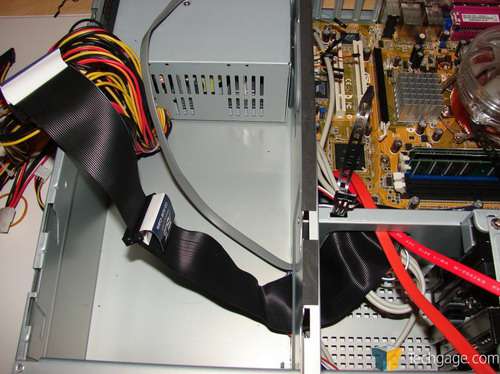
The next step is to connect all the cables. Using the provided cable management solutions, it’s possible to achieve a very clean-looking install in this case with a minimum of extra effort. Antec provides tunnels through the internal partition walls for routing the drive cables. Cables for the 5.25″ bay are routed through the first tunnel as shown, and then through a second tunnel. It’s possible to achieve a cleaner wiring job than we did, with the addition of a few cable ties and some clever folding of the ribbon cables.
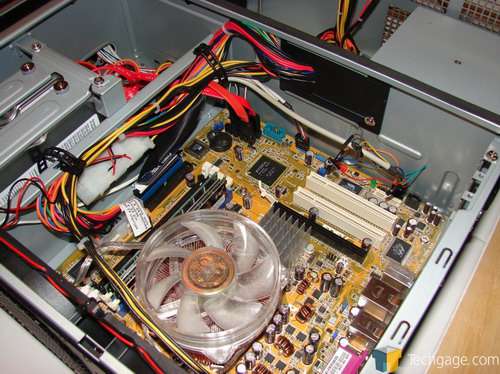
Once the power connections to the motherboard have all been made, the power wiring can be collected into the provided cable ties and locked out of the way. The result is an installation that’s uncluttered by free wires inside the space. In addition to the provided cable ties, we used some smaller ones to fasten the case fan leads safely out of the way.
With the system completely installed, the next stop is testing.
|
|
Support our efforts! With ad revenue at an all-time low for written websites, we're relying more than ever on reader support to help us continue putting so much effort into this type of content. You can support us by becoming a Patron, or by using our Amazon shopping affiliate links listed through our articles. Thanks for your support!


