- Qualcomm Launches Snapdragon 4 Gen 2 Mobile Platform
- AMD Launches Ryzen PRO 7000 Series Mobile & Desktop Platform
- Intel Launches Sleek Single-Slot Arc Pro A60 Workstation Graphics Card
- NVIDIA Announces Latest Ada Lovelace Additions: GeForce RTX 4060 Ti & RTX 4060
- Maxon Redshift With AMD Radeon GPU Rendering Support Now Available
ASUS M2N32-SLI Deluxe WiFi Edition
The M2N32-SLI Deluxe is one feature packed motherboard in every sense of the word. Whether you are a hardcore gamer, enthusiast overclocker or Joe HTPC, this board delivers what you are looking for.
Page 5 – Look at the BIOS Cont.
Under the power options, there is not really that much to deal with except the Monitor. Though ACPI APIC support is there, I was unable to disable it. I am unsure why this is, because it’s odd to have an option there that I have no control over. Under the APM options though, you will have a little bit of configuring you can do such as power up options and the like.
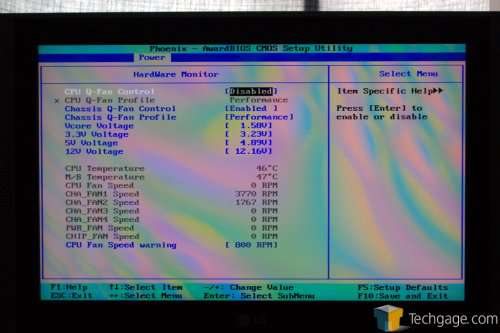
The hardware monitor is likely to prove the most useful section in there though. It’s the -first- place I go after a fresh build, just to make sure the temps and voltages are within reason. If you want the motherboard to control your system fans speeds, you can here. You’ll note that I am lacking a readout for my CPU fan, but that is due to the fact that I’m on water cooling. The Vcore Voltage is a key option here also though, especially if you plan on using the previously mentioned Vcore Offset voltage. After setting that option, rebooting and coming back into here will show you what the Vcore is really at.
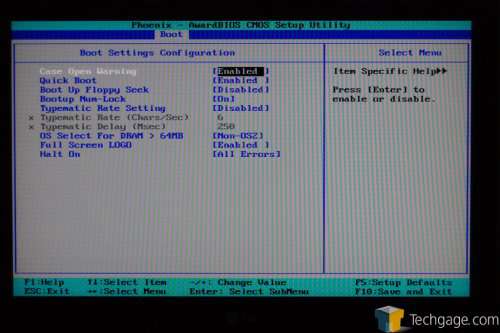
The Boot menu doesn’t include anything groundbreaking, but it proves to be one of the most useful. By default, the CD-Rom is not the primary boot device. So if you are planning on a fresh OS install, you may need to enable it as such prior to booting up with a CD-Rom. If you want to get rid of the boot splash screen, you can do so under the Settings Conf. If you are on water cooling, you will get a nag error at boot that tells you the fan is not running. Changing to Halt On > No Errors will get that error out of your way.
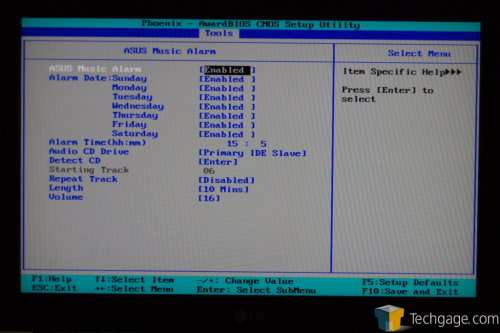
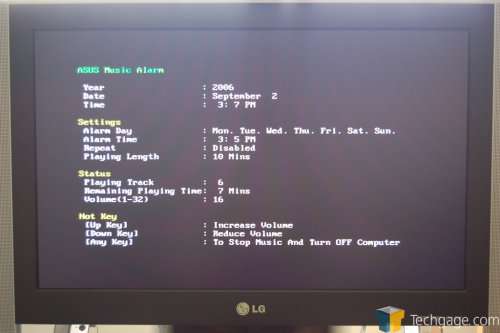
The Tools section is where ASUS stands apart from other manufacturers. First off we have a Music Alarm, and it is exactly as it sounds. In this menu you can set the day, time and starting CD track. Once you set up everything properly, you can safely turn your PC off and it will turn itself back on at the time you specified and start playing the CD. Beats an alarm clock!
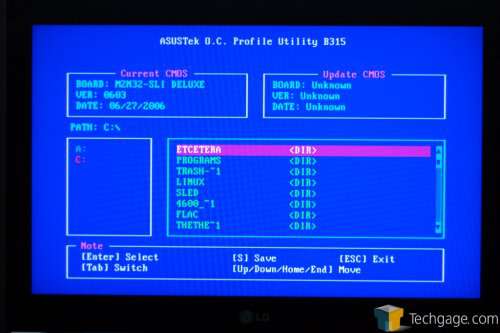
Next up is the OC Profile. This is, by far one of the coolest features on this board in my opinion. Some motherboards out there allow a couple profiles to be saved in the BIOS, but this is different. If you only have a few profiles to save, then you can save up to two. If you have a flash drive plugged into a port, you are able to save as many as you like. This is the process:
- Customize the BIOS to your liking.
- Plug in a thumb drive.
- Use OC Profile to save the profile to the thumb drive.
- Whenever you want to reset your BIOS to your precise settings, just plug the drive in and reload the profile.
One reason this is so useful, is the fact that a lot of time while overclocking, I will go overboard. This results in me having to reset the BIOS completely, then starting from fresh. Now, I tend to set over 20 options manually and this takes time… especially when you need to do it a few times in an evening. There was even an instance where I had to reset the BIOS twice [I really went overboard] and lost my profiles that were saved in the BIOS. So this is a great way to save it to a backup source that you will always have handy. It could also prove useful if you are helping someone achieve a good overclock on the motherboard. You could create the profile, save it and then e-mail it. Great addition here.
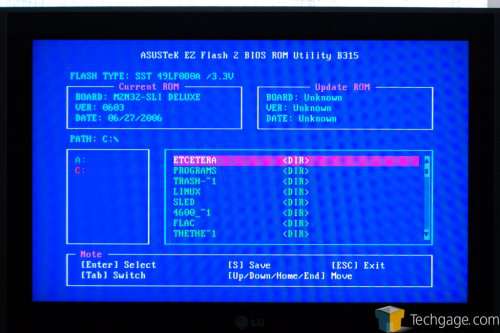
EZ Flash is the last major option in the BIOS. Need to flash your BIOS but don’t have a diskette drive? No worries here, as you can flash the BIOS from within the BIOS. If you download a BIOS from ASUS’ website and save to a thumb drive or CD-Rom, you can access it in here. You simply select the *.bin file you want to flash with, and it does the hard work for you. No diskette drive needed… no third party applications… just in the BIOS. It truly could not get any easier.
|
|
Support our efforts! With ad revenue at an all-time low for written websites, we're relying more than ever on reader support to help us continue putting so much effort into this type of content. You can support us by becoming a Patron, or by using our Amazon shopping affiliate links listed through our articles. Thanks for your support!


