- Qualcomm Launches Snapdragon 4 Gen 2 Mobile Platform
- AMD Launches Ryzen PRO 7000 Series Mobile & Desktop Platform
- Intel Launches Sleek Single-Slot Arc Pro A60 Workstation Graphics Card
- NVIDIA Announces Latest Ada Lovelace Additions: GeForce RTX 4060 Ti & RTX 4060
- Maxon Redshift With AMD Radeon GPU Rendering Support Now Available
ASUS P-Series AMD 690G Barebone PC

What if you could build a sub-$500 HTPC that was slim, fast, and capable, without the headache of picking bargain-barrel parts to accomplish your design goals? What if it had HDMI and 7.1 audio? With the help of their Pundit series, ASUS hopes to make barebones relevant again. Have they done it?
Page 4 – BIOS Settings
The ASUS P2-M2A690G barebone system offers system builders a low-cost, small-form-factor option that would be difficult to achieve with ordinary off-the-shelf components. It’s based around an integrated graphics chipset with HDMI support, but given its obvious orientation toward basic productivity and less-demanding home theater PC applications, we don’t expect to see a wealth of performance-tweaking functionality in the BIOS menu. Here’s a targeted look at the BIOS menu options that you’ll be most interested in for tweaking.
When you power on the machine, you’ll see a custom boot screen with the ASUS logo and instructions for accessing the BIOS menu or POST messages. Pressing the Delete key takes you into the BIOS menu, which has all the characteristics of a typical ASUS-provided American Megatrends BIOS.
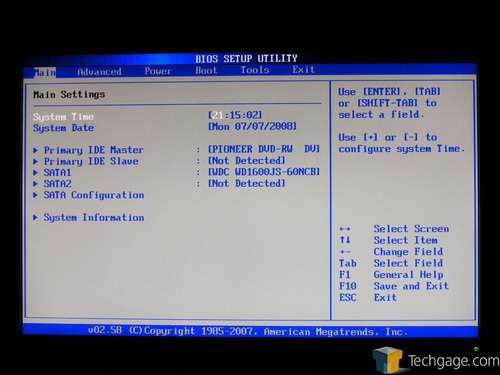
The first BIOS screen, labeled “Main,” contains configuration options for the board’s two SATA channels and single IDE channel, as well as operating mode settings for the SATA controller. If everything’s working properly, you won’t need to change anything here. Of much more interest to us is the “Advanced” menu, where you’ll find most of the motherboard’s tweakability.
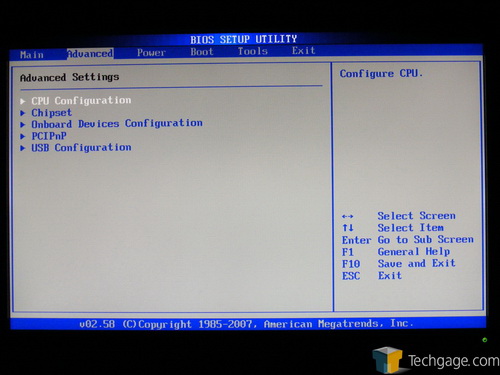
Here’s the Advanced menu, where you can access many of the more important tweaks that this motherboard’s limited BIOS makes available. We’ll be most interested in the CPU Configuration and Chipset menus.
The CPU configuration screen is where we would expect to find options for FSB speed and CPU multiplier, but any overclocking-related features are conspicuously absent from this screen, replaced by immutable gray text that lists the CPU’s default operating parameters.
If we were dealing with a motherboard product, even one targeted at the low-end market, lack of overclocking features would be a deal-killer. However, the P2-M2A690G barebone system is targeted at a very specific set of applications, and the omission of overclocking features may help keep novice system builders out of trouble. ASUS could have included overclocking functionality, but it would be mostly pointless.
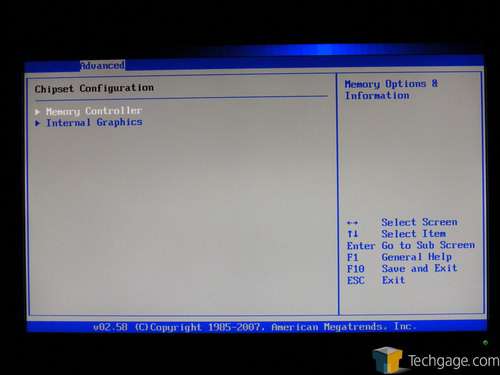
The Chipset screen is your gateway to memory speeds and timings, as well as settings related to the 690G chipset’s IGP. First, let’s take a look at the memory configuration menu.
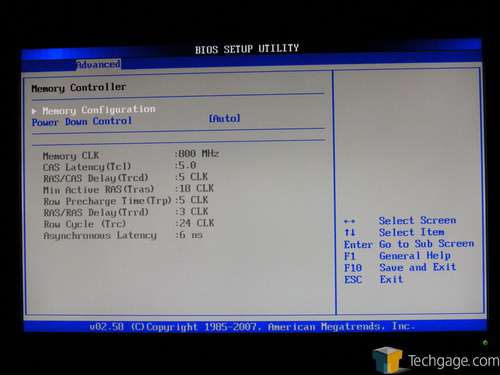
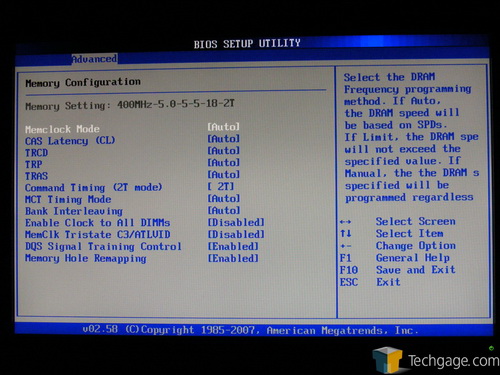
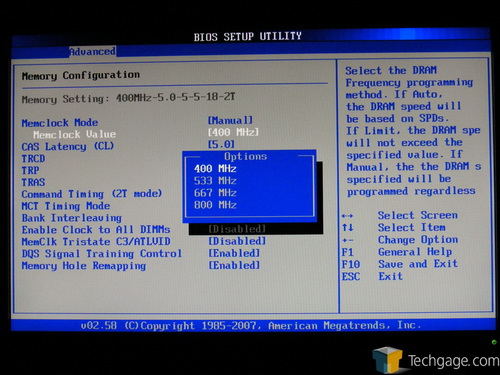
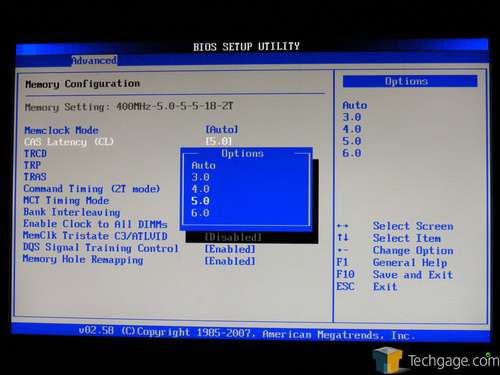
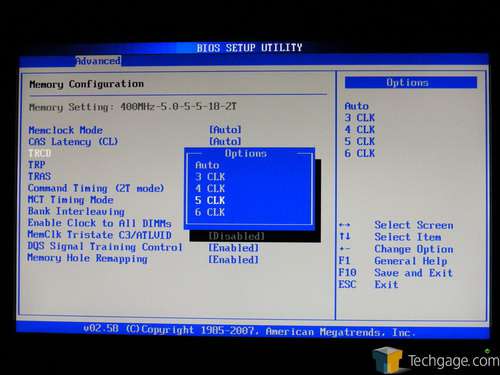
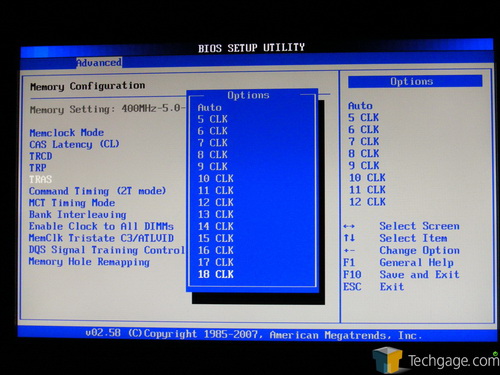
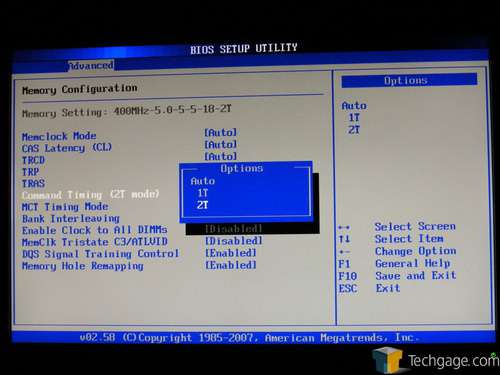
The “Memory Controller” screen brings up a list of current memory operating parameters, such as timings and effective operating speeds, but to make any changes, you’ll need to enter the Memory Configuration screen. The only setting available from the Memory Controller screen is the energy-saving Power Down Control, which allows the system to save energy by powering down the memory modules in standby mode. From the Memory Configuration screen, you’ll be able to adjust the memory clock speed, timing, and other relevant settings.
From the Memory Configuration screen, you’ll have access to virtually all the memory tweaks you could want, which makes it an oasis of customization in an otherwise crippled BIOS. The Memory Configuration screen provides the typical range of adjustments we typically expect from any motherboard, but with the notable omission of memory voltage controls. Any improvements in memory performance that you can effect from this screen will be limited to what your memory can manage at its stock voltage.
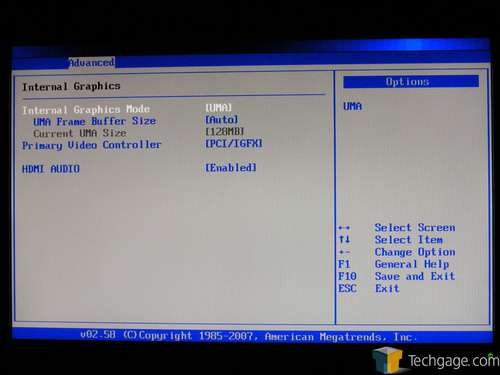
On the Internal Graphics screen, you’ve got far fewer options at your disposal, but they can affect the performance of the 690G chipset’s Radeon X1250 IGP. The Internal Graphics Mode option only has one setting – UMA, which means that the IGP borrows its video memory from the main system memory, via the CPU’s memory controller. The UMA Frame Buffer Size setting allows you to ‘force’ a specific frame buffer size at all times, regardless of what is specified in the operating system. The default frame buffer setting is 128MB, but this is bumped up to 256MB when the operating system loads, unless you’ve selected a different setting in the Catalyst Control Center software.
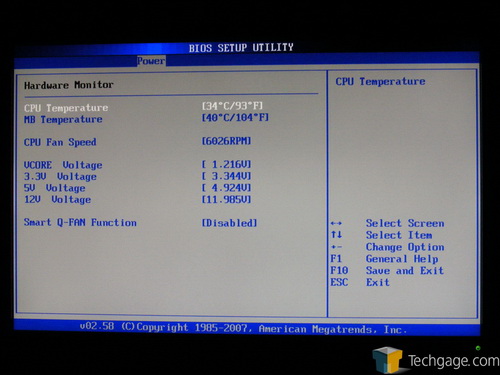
The Hardware Monitor screen under the Power menu allows you to monitor the CPU and northbridge temperatures and system voltages, and enable or disable the “Smart Q-Fan” functionality, which controls the CPU fan’s speed based on thermal load. I’ll explain later why this is especially important in the case of this system. For now, you may want to leave this enabled.
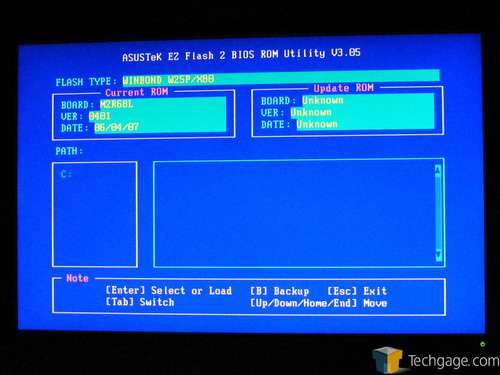
The BIOS also includes ASUS’ EZ Flash utility, which makes it easy to update the BIOS firmware. Simply locate the file, and EZ Flash handles the rest. You won’t need a separate floppy disk or USB key to boot from, since the entire updating process is handled in the BIOS firmware itself, adding an extra measure of simplicity, safety (corrupt boot media won’t wreck the whole updating process), and convenience.
Now that we’ve seen everything that’s of interest in the P2-M2A690G’s motherboard BIOS, let’s move on to performance testing.
Support our efforts! With ad revenue at an all-time low for written websites, we're relying more than ever on reader support to help us continue putting so much effort into this type of content. You can support us by becoming a Patron, or by using our Amazon shopping affiliate links listed through our articles. Thanks for your support!


