- Qualcomm Launches Snapdragon 4 Gen 2 Mobile Platform
- AMD Launches Ryzen PRO 7000 Series Mobile & Desktop Platform
- Intel Launches Sleek Single-Slot Arc Pro A60 Workstation Graphics Card
- NVIDIA Announces Latest Ada Lovelace Additions: GeForce RTX 4060 Ti & RTX 4060
- Maxon Redshift With AMD Radeon GPU Rendering Support Now Available
ASUS P-Series AMD 690G Barebone PC
What if you could build a sub-$500 HTPC that was slim, fast, and capable, without the headache of picking bargain-barrel parts to accomplish your design goals? What if it had HDMI and 7.1 audio? With the help of their Pundit series, ASUS hopes to make barebones relevant again. Have they done it?
Page 3 – Internal Hardware
ASUS’ Pundit-series P2-M2A690G barebone system is billed by the company as the world’s first book-size PC with HDMI functionality. To make the system’s slim design possible, ASUS uses a proprietary enclosure and motherboard form factor that bears resemblance to both the older Intel NLX and the newer AMD DTX form factors for compact systems.
The lack of a consistent form factor has been a major stumbling block for the small form factor market segment, but ASUS’ barebone offering overcomes this shortcoming by offering the motherboard and chassis together in a complete package. Let’s take a look at what you can expect when opening up the ASUS P2-M2A690G system for the first time.
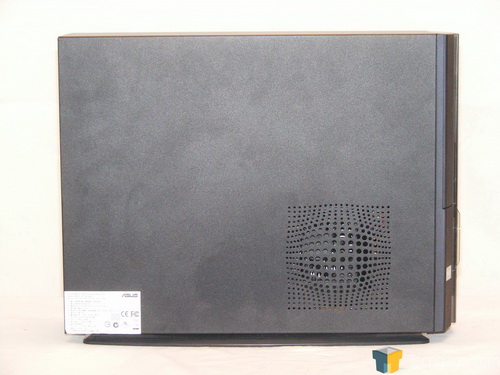
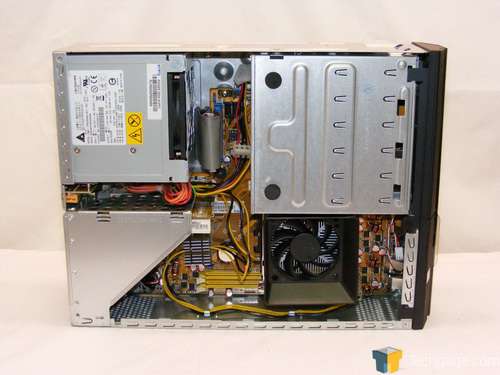
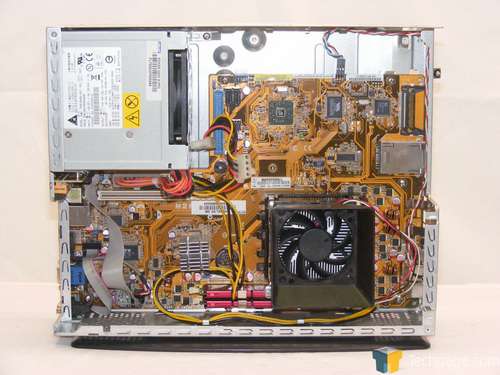
The P2-M2A690G barebone system’s enclosure uses a one-piece cover that slides back and upward to reveal the system’s innards. Upon first opening the system, the interior may look horribly cramped and nearly impossible to work on. But the Pundit P2-style enclosure has been well thought out, and most of the internal structure is removable, including the drive cage and the NLX-style riser card.
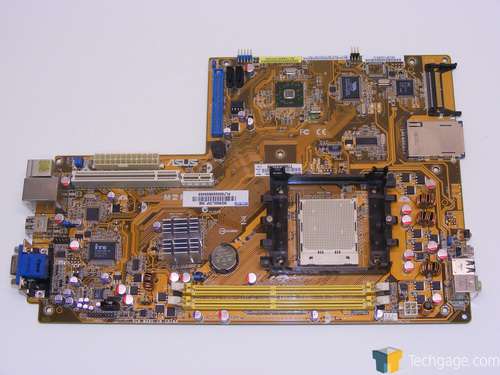
The P2-M2A690G uses a special motherboard form factor that’s notched to make room for the PSU. The motherboard itself is largely a derivative of the ASUS M2A-VM 690G-based Micro ATX motherboard, but with two fewer RAM slots, a right-angle riser card for the expansion slots, and onboard memory card readers. The P2-M2A690G’s motherboard also adds IEEE 1394 support, and only offers two internal SATA ports. It’s based on the same AMD RS690G northbridge and SB600 southbridge as the M2A-VM, however, so it’ll likely offer similar performance to its Micro ATX cousin.
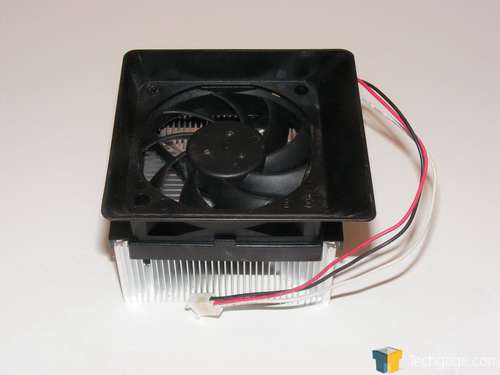
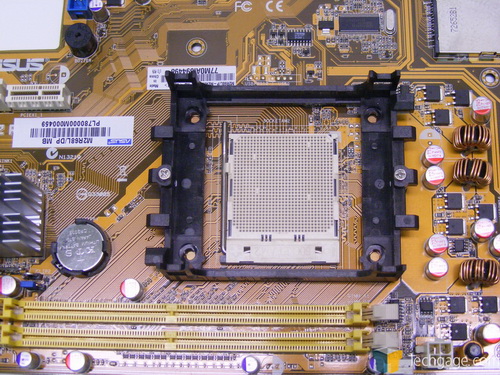
Your first order of business when building a system in the P2-M2A690G will likely be to install the CPU. To do that, you’ll first need to remove the CPU cooler. The P2-M2A690G barebone system uses a non-standard CPU cooler mounting bracket that’s more similar to a Socket 478 cooler. However, this is unlikely to be a gripe, since you probably won’t be changing out the stock CPU cooler for another, anyhow – the included cooler has an airflow direction shroud that mates to the side air intake, feeding colder exterior air directly to the CPU heatsink. Once you’ve got the cooler removed and the CPU installed, you may want to install your memory at this point – it’s easier without the CPU cooler’s shroud in the way.
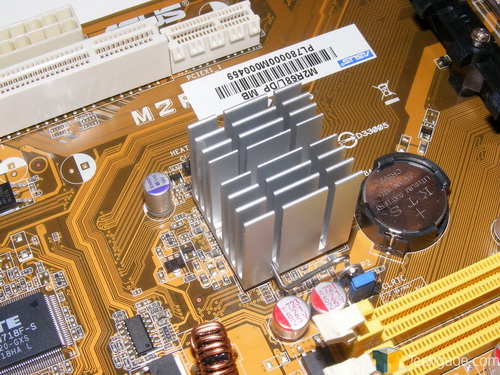
The AMD RS690G northbridge is located underneath a small extruded-aluminum heatsink, which is more than sufficient to cool the low-power chipset. In operation, it only becomes warm to the touch, but not uncomfortably hot. It also receives some airflow from the CPU’s fan as well. The northbridge heatsink is short enough that it won’t interfere with any expansion cards installed in the riser.
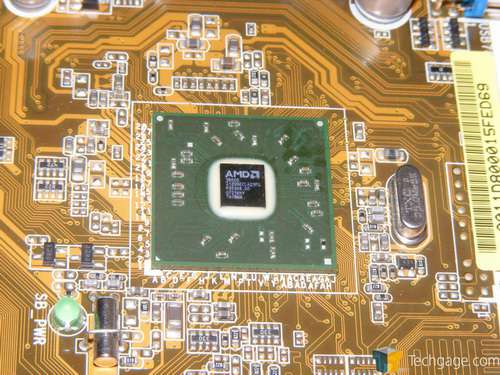
The motherboard’s AMD SB600 southbridge is placed, counterintuitively enough, in the upper section of the motherboard behind the drive cage. No heatsinking is provided for the SB600 – though its manufacturing process only provides a miniscule amount of heat-dissipating surface area, the chip itself uses so little power that heat generation isn’t a major concern. While the chip does feel hot to the touch, it’s not hot enough to cause burns. Early 690G-based motherboards from MSI also omitted the southbridge heatsink safely.
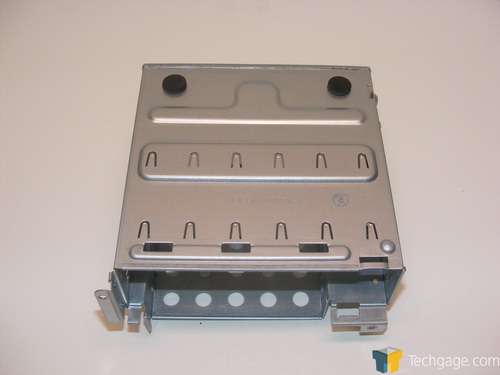
The drive mounting cage itself provides mounting locations for one 5.25″ optical drive and a single 3.5″ internal hard drive. This may dampen your enthusiasm for this barebone system for a home theater PC application, unless you’re prepared to invest in a single 750GB or 1-terabyte drive to store their HD-quality media.
If you’re building a HTPC system from scratch, however, you’re probably already looking at hard drives in these capacities. Simply be aware that the P2-M2A690G will limit you to one. The P2-M2A690G’s chassis provides ventilation holes behind the bezel that draw cool outside air over the hard drive, so its cramped location isn’t too much of a concern here.
To install your drives, simply remove the two screws in front and a third screw on the top of the chassis that hold the drive cage in place. Once these screws are removed, the drive cage can be easily lifted out. Be careful as you’re sliding the cage back into place, since it has channels and tangs that must align to give the enclosure structural strength once reassembled.
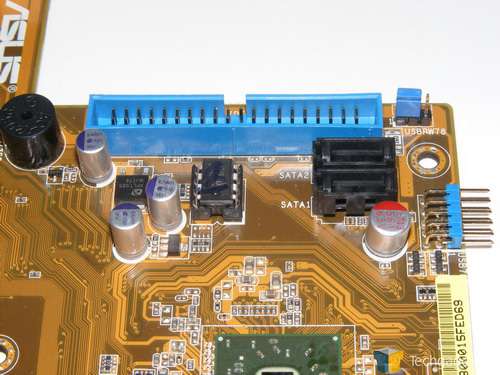
The P2-M2A690G’s motherboard provides two internal SATA2 connectors, which means that if you’ve got a newer serial ATA optical drive, you’re still covered when it comes to connectors. However, the barebone’s accessory package only includes one SATA cable and one parallel ATA cable, so if you have a serial ATA optical drive, you’ll need to source an additional SATA cable. All parallel ATA traffic is handled by a single parallel ATA channel.
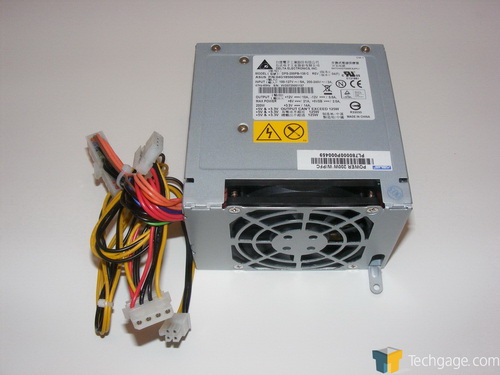
Located directly behind the drive cage is the system’s PSU. The PSU is a Delta Electronics (Yeah, the same company that makes fans) 200W unit with power factor correction (PFC). This means that the power supply contains circuitry that makes its complex AC load (affected by momentary bursts of power demand) look more like a simple AC load (with more consistent power demand) to improve the PSU’s efficiency in utilizing the power it draws from the wall socket. It also won’t inject as much line noise into the AC circuitry of your home, or the power grid as a whole. PSU designs with PFC are more complex, and this particular PSU has two internal PCBs filled with components, despite its modest 200W rating.
The PSU integrates a single 80mm x 15mm fan at its interior end, which pushes air through the PSU instead of drawing it from the rear. The advantage to this approach is that it allows the internal components of the PSU to act as a resistive ‘muffler’ to noise propagation from the fan, lowering its overall operating noise. The PSU uses a proprietary form factor, so you’ll need to source replacements directly from ASUS.
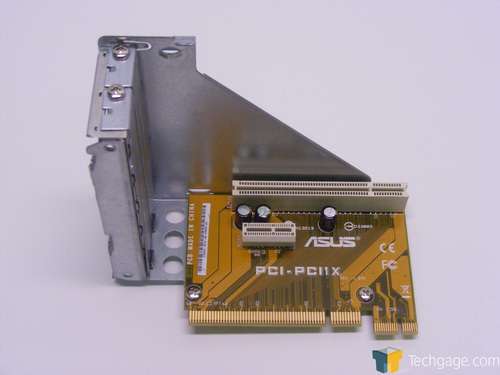
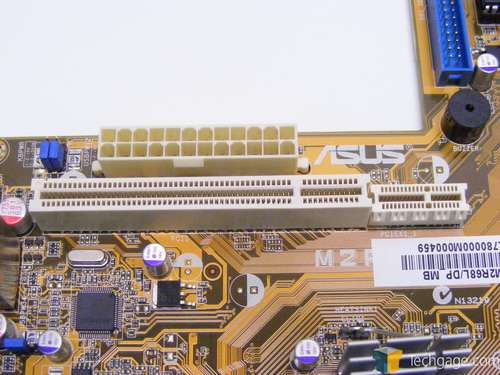
Even though the P2-M2A690G barebone system’s chassis is extremely slim, it accommodates two full-height expansion cards via a right-angle riser card. This means you won’t need to find low-profile versions of the expansion cards you wish to install. The riser card mounts to a bracket that slides in and out much like the drive cage – use care when reassembling the system to ensure that the tangs and channels line up properly.
The riser card offers a single PCI slot and a single PCI-Express 1x slot. This will be a disappointment to anyone who wants to upgrade the machine’s graphics capabilities, as there’s no 16x PCI-express slot provided anywhere on the motherboard. The 690G chipset’s Radeon X1250 graphics core provides just enough horsepower for most productivity and home theater tasks, though as you’ll see in the testing portion of this article, hardware-accelerated 1080p video playback taxes its capabilities, and it’s almost thoroughly unfit for any serious gaming (beyond, of course, last-generation DX9 games like World of Warcraft.) You’ll likely end up populating these two expansion slots with an 802.11n wireless adapter (if you’re on a wireless home network), and a TV tuner card like PowerColor’s AMD TV Wonder if you intend to incorporate the machine into a home theater system.
Once you’ve installed the CPU (and replaced the CPU cooler), memory, hard drive, optical drive, and any desired expansion cards, it’s time to power up the system and check out its BIOS settings.
Support our efforts! With ad revenue at an all-time low for written websites, we're relying more than ever on reader support to help us continue putting so much effort into this type of content. You can support us by becoming a Patron, or by using our Amazon shopping affiliate links listed through our articles. Thanks for your support!


