- Qualcomm Launches Snapdragon 4 Gen 2 Mobile Platform
- AMD Launches Ryzen PRO 7000 Series Mobile & Desktop Platform
- Intel Launches Sleek Single-Slot Arc Pro A60 Workstation Graphics Card
- NVIDIA Announces Latest Ada Lovelace Additions: GeForce RTX 4060 Ti & RTX 4060
- Maxon Redshift With AMD Radeon GPU Rendering Support Now Available
ASUS Vento 7700
Long known as a high quality motherboard manufacturer, Asus isn’t normally included in conversations about computer chassis. With their Vento line of gaming cases, Asus looks to expand their reach even further into the gaming industry. Is it worth it or should they stick to motherboards? We intend to find out.
Page 2 – Interior and Exterior
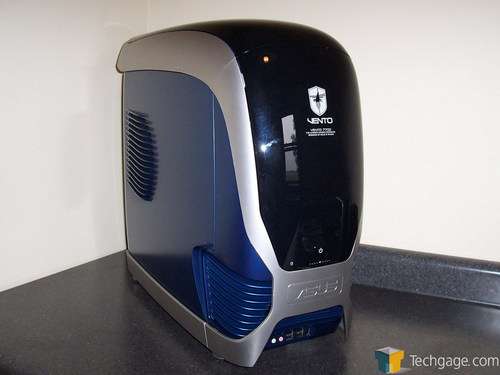
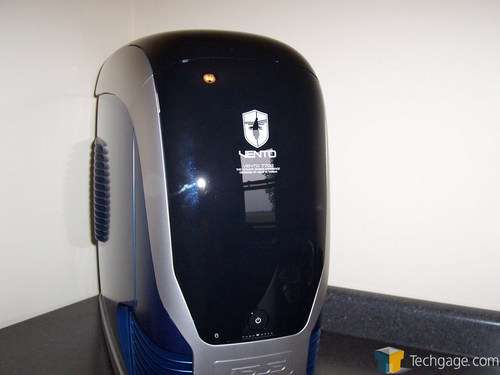
As stated earlier, if anyone has seen the first Vento, the case is not one that is easily forgotten. With its automotive like intakes at the bottom of the front, along with its front door that folds upward, the original design was without a doubt one of a kind. With the second version, the 7700, Asus as ditched the large intake look but kept the curvy design and fold up door. Offering front I/O ports, and a back lit power button, the 7700 is armed with more than enough up front to keep pace with the other big name cases available today.
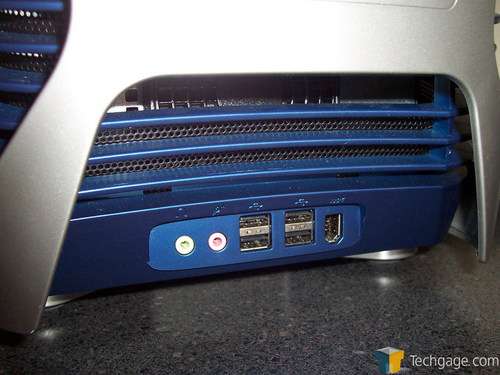
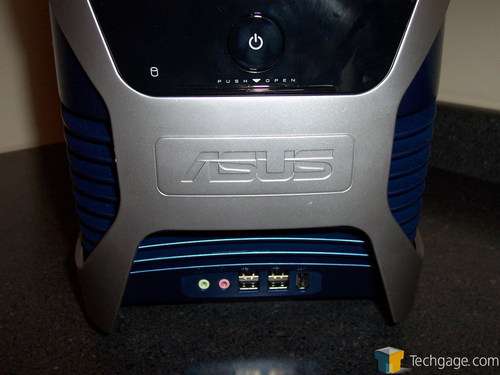
At the front of the case, on the bottom, the Vento has four USB 2.0 ports, a FireWire port as well as audio out and microphone in. I personally prefer the I/O ports to be a bit higher, as my case sites on the floor under my desk, but for those of you who set their case on top of the desk, this is an ideal location for the USB and audio jacks.
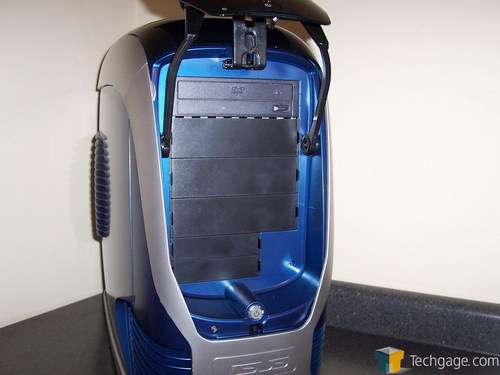
As stated earlier, the front drive bays are well hidden behind what Asus calls the magic mask. This mask is spring loaded and when the bottom is pushed, the door pops upward and over the top of the case. When the bottom is pressed, one can either guide the door up or let it go up on it’s own. While not dangerous, it does get up and over in quite a hurry.
Just below the door and directly above the USB ports, there is a silver piece of plastic with the Asus name molded into it. Adding to the overall look of the front, the piece actually has functionality to it as well. Underneath the silver logo is open space intended to be used as a handle when transporting the case to and from LAN parties or friends houses.
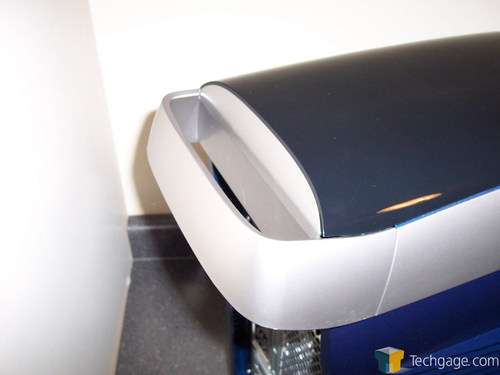
This is the first case that we have used that actually incorporates not one handle, but two into the design. After loading up the inside with hardware, having the ability to transport the Vento anywhere I choose was a simple task thanks to the handles on both the back and the front of the chassis.
The handle on the back of the case isn’t hidden near as well as the front but with it being in the back, it really doesn’t take anything away from the overall look of the Vento. This is thanks to the long silver trim that runs from the front of the case, up the side and along the top towards the back. The handle continues the silver piece around the back sending it back along the top of the case and then back down to the front.
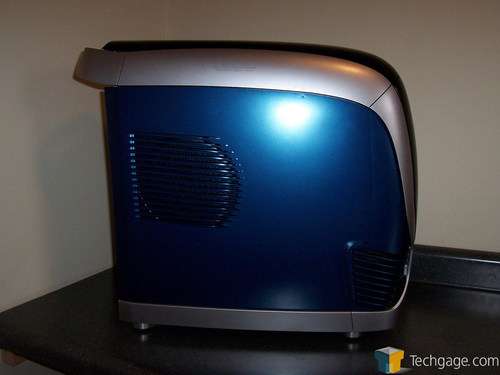
Moving onto the side of the case, there is a large vent in the upper back corner of the side panel. Also, at the bottom, towards the front, Asus has replaced the intakes of the first Vento and instead opted for a simple grill style vent. These front vents are both lit up with white LEDs when the case is powered on, adding to the appearance of the Vento when used in dark environments.
Also, on the top of the side panel, there is a small arrow. This is to help when putting the panel back onto the case. When the arrows are pointing towards each other, the panel is where it is supposed to be. While convenient, this can also be determined by looking at the back of the case.
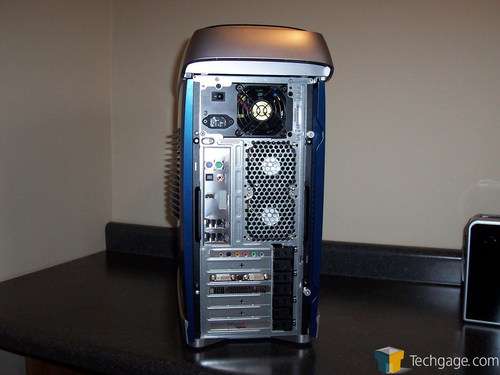
The back of the case shows off my least favorite feature of the Vento 7700. The dual 80mm fan approach is something that I thought I was done with when I switched cases from my trusty Antec 1080B SOHO chassis. While not bad, a single 120mm is more often than not quieter and can move a good amount of air. Clearly my complaints with the dual 80mms is out of personal preference and the use of 80mm fans does help to keep the case a little bit thinner than most other cases available today.
As is normal with most other cases, the PSU is positioned at the top. The I/O shield goes just to the left of the fan grills and below that are the PCI brackets.
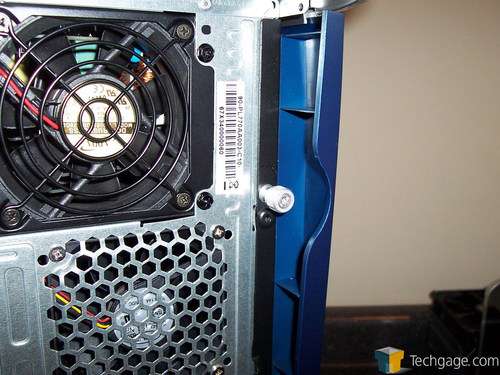
To secure the side panel onto the body of the chassis, there is a pair of aluminum thumb screws. This isn’t anything out of the ordinary but the fact that the screws are attached to the panel is. I can’t count the times I have lost the thumb screws on countless other cases (not counting the incredibly large thumb screws on the Thermaltake Kandalf) so for Asus to make them a part of the panel is convenient.
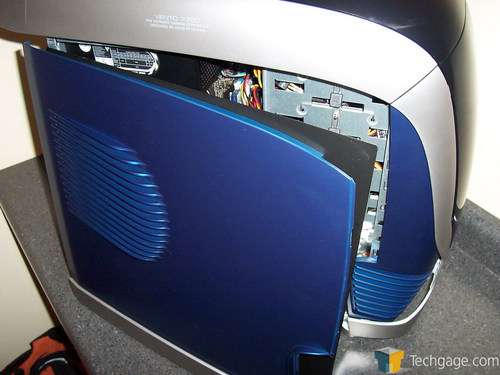
Popping the side panel off reveals an interested piece of information about the 7700. Since the entire outside body of the case is plastic, Asus had to attach the plastic parts to an aluminum case that sits underneath. This isn’t a bad thing, but something that we found interesting.
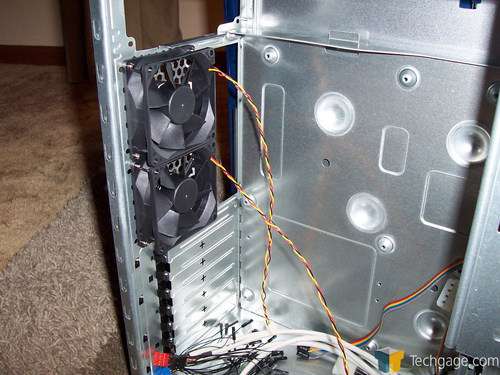
Once inside, we can see the back of the 80mm fans, both of which use a small 3 pin connector. This is a convenience and allows the fans to be plugged directly into a motherboard or fan controller. On the motherboard tray, which is not removable, Asus as eliminated the need for stand offs by simply raising the areas that need to be elevated to install a standard ATX motherboard.
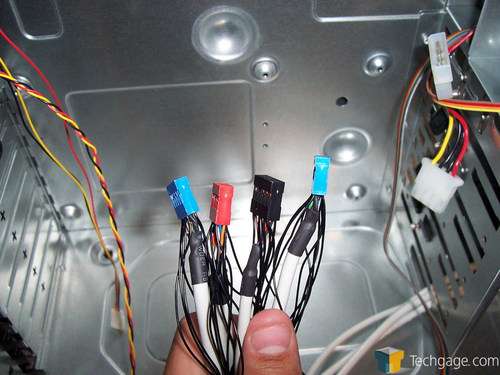
To connect the front USB, FireWire and audio jacks to the motherboard, the Vento has standard plastic pin plugs. Each pair of USB ports has a plug, the FireWire port has its own and the audio jacks have one of their own as well. To add to the compatibility of the case, each plug has independent pins that allow the installation on motherboard that might have different pin header configurations.
While this does add to the compatibility of the case, it looks ungodly bad and in my case, the bottom PCI slot was used for an Asus Ageia PhysX card and the pins would clank against the fan when powered on. This was easily solved with a zip tie and with the Vento lacking a side window, the individual pins are nothing more than a minor eye sore and shouldn’t be seen as anything that might prevent someone from choosing this case for their PC build.
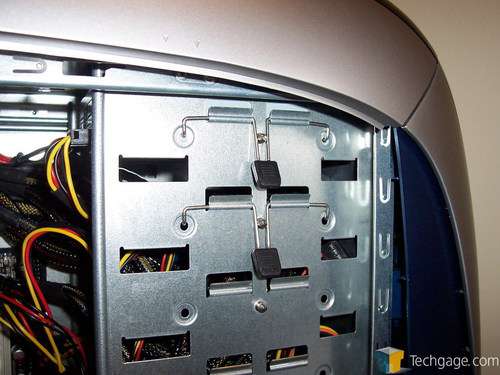
To hold the optical and hard drives, Asus has approached things a bit differently than other case manufacturers. To make the case relatively tool free, there is simply a metal piece that can be rotated down into the screw holes of the drive. When the tabs are in the holes, they can be locked into place by pressing the mechanism down onto a metal pin. This isn’t much different than the way Thermaltake locks down their drives in the Armor and Kandalf.
On to installation and testing!
|
|
Support our efforts! With ad revenue at an all-time low for written websites, we're relying more than ever on reader support to help us continue putting so much effort into this type of content. You can support us by becoming a Patron, or by using our Amazon shopping affiliate links listed through our articles. Thanks for your support!


