- Qualcomm Launches Snapdragon 4 Gen 2 Mobile Platform
- AMD Launches Ryzen PRO 7000 Series Mobile & Desktop Platform
- Intel Launches Sleek Single-Slot Arc Pro A60 Workstation Graphics Card
- NVIDIA Announces Latest Ada Lovelace Additions: GeForce RTX 4060 Ti & RTX 4060
- Maxon Redshift With AMD Radeon GPU Rendering Support Now Available
ASUS Xonar D2 Sound Card
At Computex 2007, ASUS wowed us with their new Xonar range of audio products, aiming to take a chunk of Creative’s market share in the high end PC audio category. Now we’ve got our hands on the ASUS Xonar D2, and we’re putting it to the test. Does the newcomer Xonar D2 have what it takes to challenge the X-Fi?
Page 4 – Driver Software
The driver software for the ASUS Xonar D2 sound card reflects a significant effort on ASUS’ part to produce a professional-looking driver interface that is both usable and easy to understand.
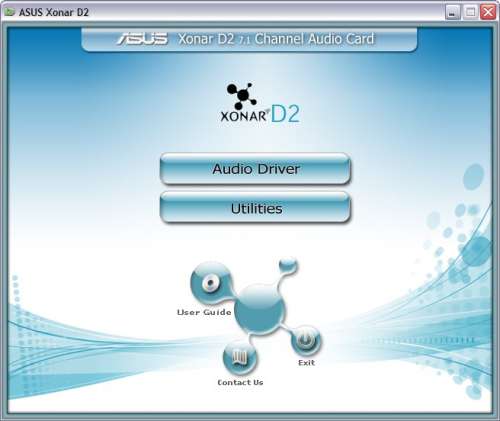
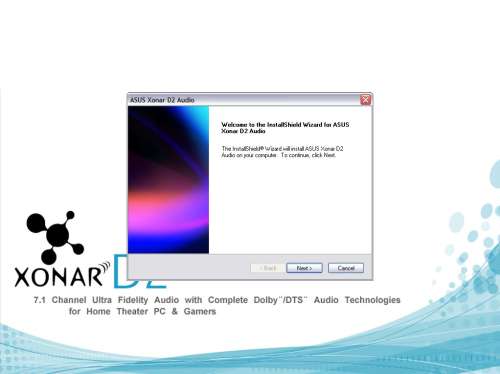
The installation program for the Xonar D2 driver software is easy and intuitive to use, and features high-quality graphics that continue the particle flow theme from the product box. To install the sound card driver only, click on the upper button labeled “Audio Driver”. The lower button launches an install program that installs the additional included utilities, which include RightMark Audio Analyzer 5.6 and ASUS Portable Music Player (PMP).
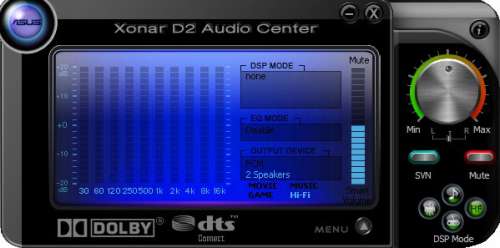
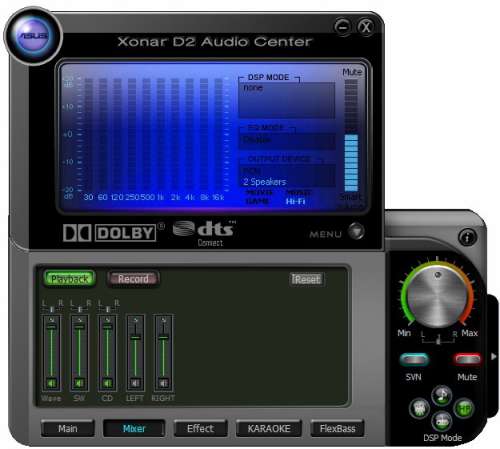
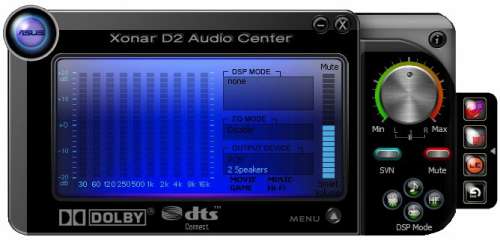
The control program for the Xonar sound card is ASUS Audio Center. The Audio Center software is essentially an alternate embodiment of the reference control panel for the CMI8788 driver from C-Media, just as we saw with the Razer Barracuda AC-1 control panel. The initial display incorporates a rotary volume control knob and a VFD-style display that contains a spectrum analyzer and indicators for the active DSP modes. Four small buttons beneath the volume control allow you to quickly choose sets of DSP options that are most appropriate to gaming, music listening, or movie playback. The fourth button, labeled “Hi-Fi”, disables all DSP processing, for a pure signal path.
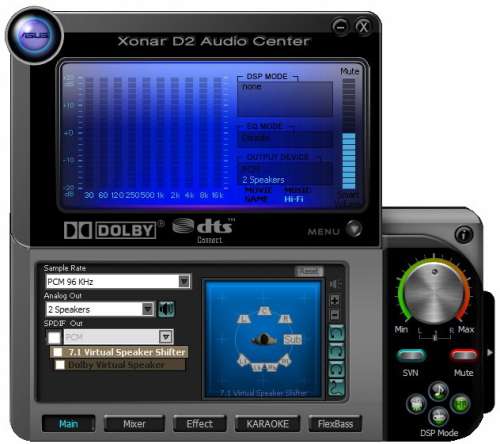
Clicking on the button labeled ‘Menu’ causes the VFD panel to slide upward, revealing additional controls. The first pane that appears is the ‘main’ panel, which contains options for adjusting the sample rate and the output mode (which affects the analog outputs). The output mode for the digital outputs can also be changed here, and Dolby Virtual Speaker may be activated (which simulates rear surround speakers from two or three front-stage main speakers) as well as an interesting DSP algorithm called ‘7.1 Virtual Speaker Shifter’ that allows you to modify the apparent placement the seven speakers in the room. This can be useful if your speakers aren’t placed in optimum locations.
The ‘Mixer’ pane mimics the functionality of the Windows Volume Control program, allowing you to adjust the level of each source independently. The changes you make to these controls will also appear in the Windows Volume Control. To view controls for recording inputs, simply click on ‘Record’. Here, you can access the ALT input feature. When you switch to the ALT input for recording, you’ll hear a small ‘click’ sound from inside your computer as the miniature relays redirect signals from the analog outputs straight to the analog recording inputs. If you switch away from ALT mode, you’ll hear another click.
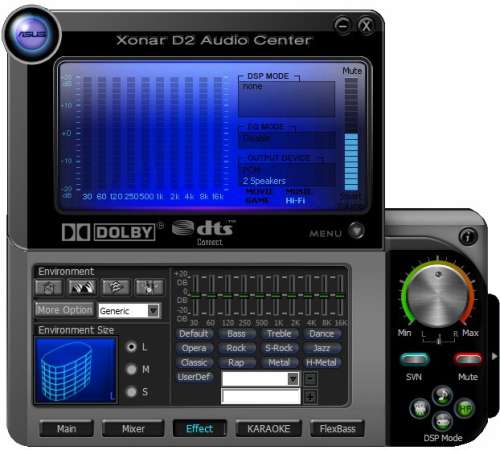
The ‘Effect’ pane brings into view a 10-band graphic equalizer and settings for environmental DSP effects. The graphic equalizer has 12 presets, and allows you to create and store your own user-defined presets. The ‘Environment’ control group lets you simulate a variety of listening environments using C-Media’s Xear3D DSP algorithms. You can also tweak the apparent size of the listening environment.
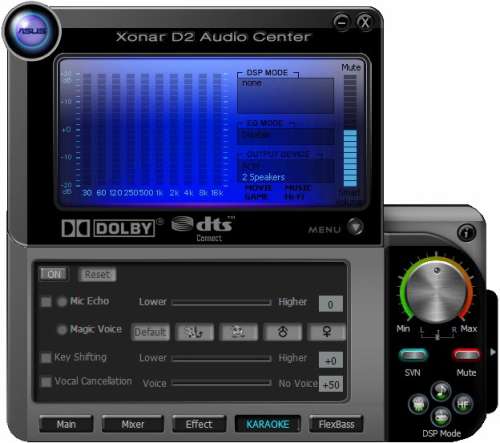
While environmental DSPs of the past were cheesy and only served to destroy fidelity, the ASUS AV200’s environmental DSPs are actually realistic, and deliver substantially better sound quality. Still, I prefer to do my listening without any additional effects. The ‘Karaoke’ pane displays even more DSP options, related to pitch shifting and vocal removal. Pitch shifting can even be applied exclusively to the microphone input. The vocal removal option, however, adds substantial dynamic compression to the card’s output. I typically regard these DSP options as novelties, as only the most adventurous enthusiasts will care to experiment with them.
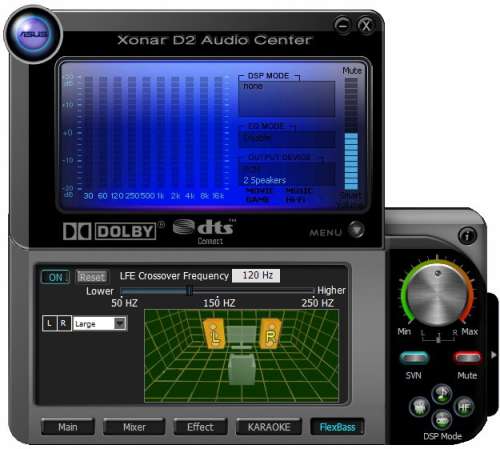
The last pane of DSP options is the ‘FlexBass’ pane, which offers a wealth of options for tweaking the LFE output of the card. These options closely emulate those of a high-end preamp/processor, allowing you to not only set an upper LF cutoff frequency for the subwoofer, but selectively exclude that frequency range from the main speakers as well. The LFE Crossover Frequency slider allows you to select a crossover frequency anywhere between 50 Hz and 250 Hz. This range of adjustment gives you the flexibility to set an appropriate crossover frequency for just about any size subwoofer or main speakers, though the THX-specified LFE crossover frequency is 80 Hz.
Setting the “L|R” control to “Large” causes the card to pass deep bass to the main speakers as well, while setting the control to “Small” excludes frequency content below the crossover frequency from the main speakers, an option that’s useful for small satellite speakers.
Clicking on the small arrow tab to the right of the volume control causes a small panel to slide out with quick-access buttons for the bundled software applications. Next, we’ll take a look at the programs ASUS bundles with the Xonar retail package.
|
|
Support our efforts! With ad revenue at an all-time low for written websites, we're relying more than ever on reader support to help us continue putting so much effort into this type of content. You can support us by becoming a Patron, or by using our Amazon shopping affiliate links listed through our articles. Thanks for your support!


