- Qualcomm Launches Snapdragon 4 Gen 2 Mobile Platform
- AMD Launches Ryzen PRO 7000 Series Mobile & Desktop Platform
- Intel Launches Sleek Single-Slot Arc Pro A60 Workstation Graphics Card
- NVIDIA Announces Latest Ada Lovelace Additions: GeForce RTX 4060 Ti & RTX 4060
- Maxon Redshift With AMD Radeon GPU Rendering Support Now Available
AZZA Toledo 301 Mid-Tower Chassis Review
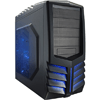
The sub-$100 chassis market is filled to the brim with selection, with the $70 price-point in particular being a total hotspot. AZZA, a relative new-comer to the chassis game, has a wide-variety of models available, with its $70 Toledo 301 being the most recent. Let’s dive right in, and see if other $70 models have a reason to be wary.
Page 2 – Internals
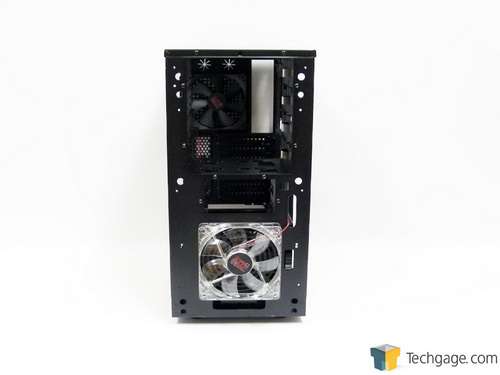
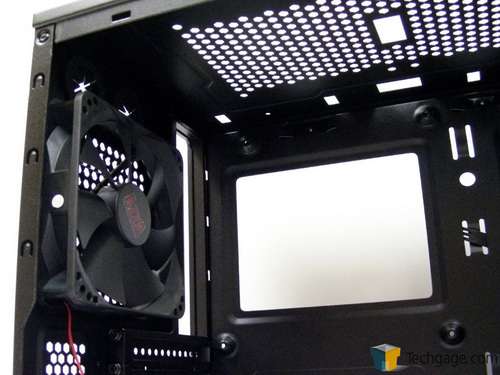
With the front panel removed, the 120mm intake fan can be found along with the drive bays. As you can see by the color of the frame, this case features the same black paint job inside to help keep the internals looking clean.
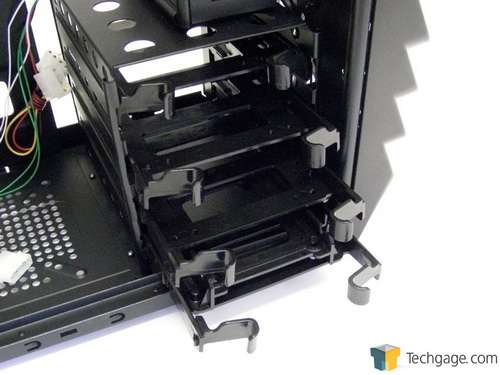
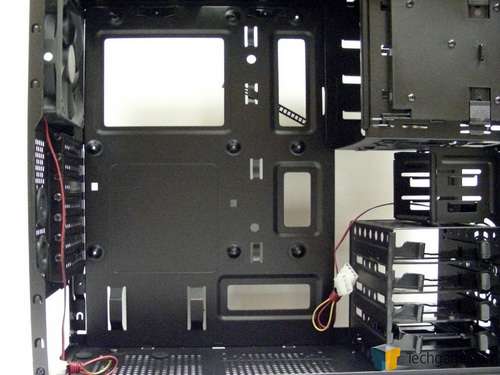
On the left side at the front are four tool-less hard drive bays. The cage where the drives sit has been rotated 90 degrees for easy installation and to keep the build free of extra cables by allowing them to be routed out the back. Each hard drive is secured to a plastic tray and the tray slides into the cage. All trays accept 3.5″ or 2.5″ drives and the bottom tray can handle two 2.5″ drives mounted front to back. If adding a 2.5″ drive, a screwdriver will be needed, however 3.5″ drives can be installed without tools thanks to small plastic pegs on the trays that fit in the mounting holes on the side of each drive.
Above the hard drive cage is the locking mechanism for the 5.25″ drive bays, which is unlike anything I have seen before. To open the lock, two sliding latches need to be pushed together from the top and bottom. The door swings open, components can be installed into any of the drive bays and with the door back in position, the latches are pushed away from each other locking everything in place.
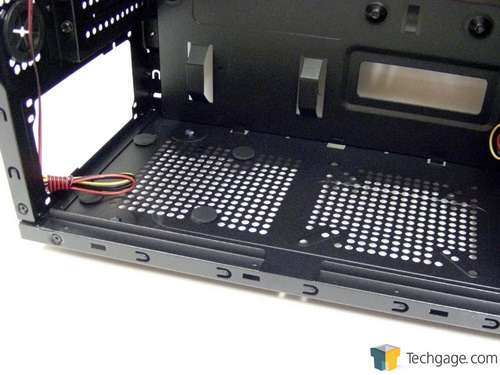
Moving to the bottom of the case, we see the area for the 120mm fan and power supply. The power supply rests on four rubber pads to help absorb any vibration created by the fan. One important point to note is that with larger power supplies installed, the fan area will be blocked off.
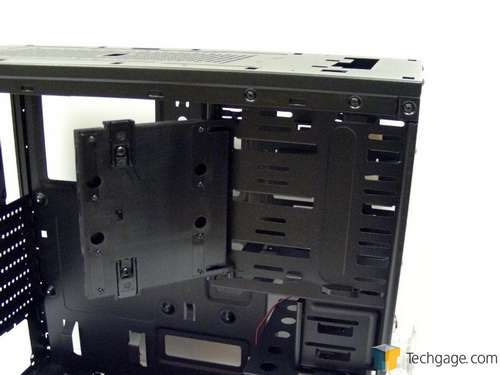
The motherboard tray has another feature that I wish more manufacturers included; built-in motherboard standoffs. Less parts, less fumbling, and less build time. Down the right side and at the bottom are cable management areas to help keep things neat and tidy and there is also a large cutout for the CPU cooler back plate to help with the mounting and the removal of some aftermarket heatsinks.
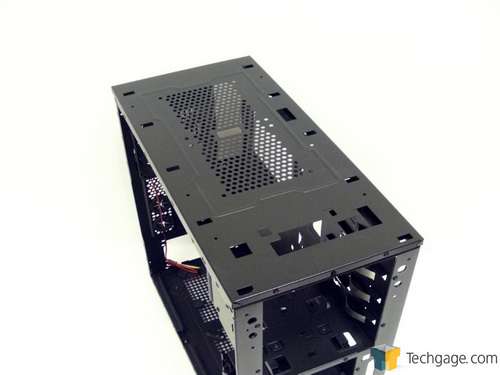
Before the components are installed, I want to have a quick look at the top. Removing the top cover is as easy as removing a screw from each side on the inside of the case and sliding it forward.
Now, I didn’t exactly tell the whole truth earlier. There -is- room for two 120mm fans but users can also install a 240mm radiator. The radiator is mounted inside the case while the fans are mounted outside and the plastic cover goes on over them to keep everything looking stock.
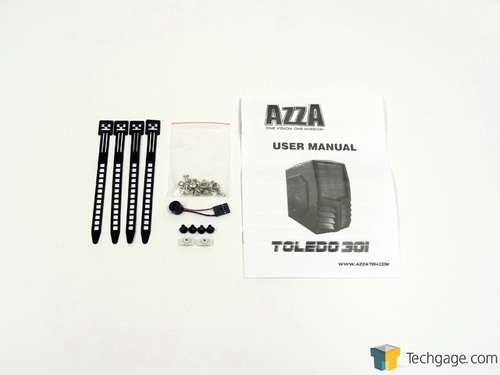
The included hardware is a little sparse but it’s no less than what is needed. There are four reusable cable ties to go with the one pre-installed to keep the wires together during shipping, a baggie of screws to mount the motherboard and drives, a speaker for those who like to hear a reassuring beep during POST, four black screws to secure the power supply and a user guide.
So with that said, it’s time to see how the Toledo 301 stacks up by loading it up with some gear.
Support our efforts! With ad revenue at an all-time low for written websites, we're relying more than ever on reader support to help us continue putting so much effort into this type of content. You can support us by becoming a Patron, or by using our Amazon shopping affiliate links listed through our articles. Thanks for your support!


