- Qualcomm Launches Snapdragon 4 Gen 2 Mobile Platform
- AMD Launches Ryzen PRO 7000 Series Mobile & Desktop Platform
- Intel Launches Sleek Single-Slot Arc Pro A60 Workstation Graphics Card
- NVIDIA Announces Latest Ada Lovelace Additions: GeForce RTX 4060 Ti & RTX 4060
- Maxon Redshift With AMD Radeon GPU Rendering Support Now Available
Cooler Master HAF 922 Mid-Tower
When Cooler Master released their HAF 932 full-tower last fall, it was well-received for its overall design, build quality, impressive cooling-ability and, to some, aesthetics. With the success of that case, CM has followed-up with a mid-tower version that follows many similar design cues, but happens to look even better, and costs less.
Page 1 – Introduction
I can honestly say that I am usually not a big fan of sequels. More often than not, the story line was played out by the original and we are forced to stretch the imagination to keep from tuning out the new and improved version. Whether it is a movie, TV show, car, or whatever “new and improved” item we are looking at, the sense of déjà-vu can easily overshadow the excitement of a new release.
Cooler Master built quite possibly one of the most flexible cases I have ever reviewed when they unleashed the HAF 932 on the world. While the styling was a love or hate it affair, no one could deny the well thought-out layout and design. It was a true full package in that the size, cooling efficiency, layout, and the included goodies made for one hell of a deal… and an even better house for your PC.
Here we are, 6 short months later, getting ready to debut the HAF 922. The next generation “High Air Flow (HAF)” has some really big shoes to fill.
This time around, we are not dealing with a full-tower that is E-ATX compatible. The 922 is a true mid-tower and only accepts ATX and mATX systems. We are also not dealing with the massive size that was the original 932. And finally, we are not dealing with a large price tag, as rumor has it that the 922 will arrive around $120US retail.
Closer look
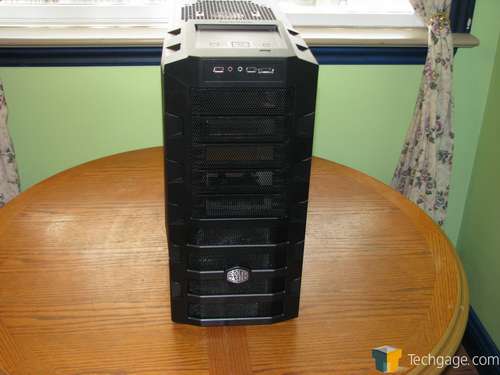
Once out of the well-packaged shipping box, there is no mistaking the pedigree of the HAF 922. Cooler Master has done an excellent job of shrinking down the larger model and went even further to make it much easier on the eye this time around. The front panel still sports the all mesh design and a large 230mm red LED fan. There are five bays for your 5 ¼ devices as well.
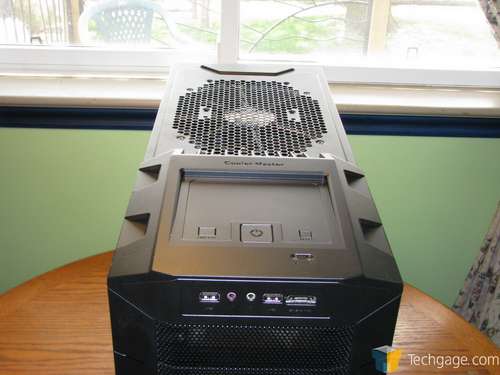
The I/O panel is located on the top of the front section. We are given two USB ports as well as an E-SATA and headphone/microphone jacks. Above the I/O area we have the power, reset and LED controls. Nestled in an angled tray they are easy to reach and even easier to use. The LED on/off feature is a novel touch. There are lots of people that like the ability to turn down the lights when possible. We also see the huge exhaust area. The supplied 230mm fan is a quiet power house that can be replaced with dual 120mm fans should you so desire.
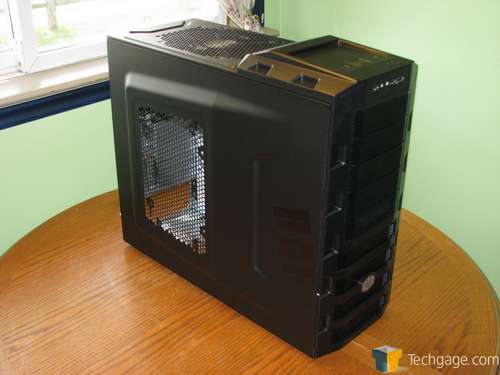
The left side panel that accesses the belly of your beast sports a large mesh design. While there are no included fans for the side, you do have the option of running up to two 120mm fans or a single 230mm fan. I really like the way the steel is bumped out to give you some extra room between the fans and those extra large heat sinks, should you choose to have both living inside your PC at the same time. Like the original, we get the “HAF” logo ghosted into the finish.
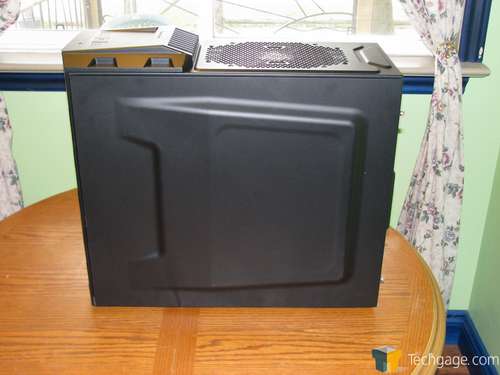
The left side panel is somewhat unremarkable at first glance. They have made the wise decision to mirror the right panel in the design which really does complete the overall package and look.
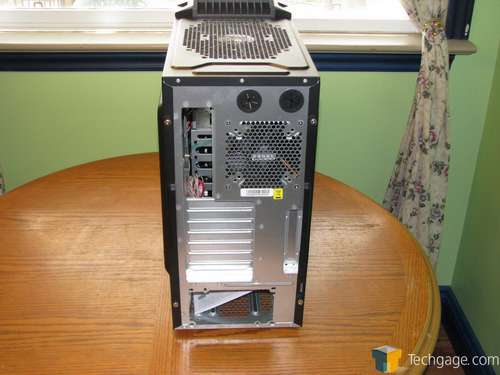
Traveling to the back, we see a somewhat standard but effective layout. The exhaust fan is a 120mm unit with the provision of swapping down to a 92mm or even an 80mm should you choose. Right above the fan you get two large grommeted holes to allow the pass through of large water cooling lines. The PCI slot area is standard fare with the PSU being mounted on the bottom. There is also a PCI slot pass through cut into the panel above the normal PCI slot area allowing for further flexibility.
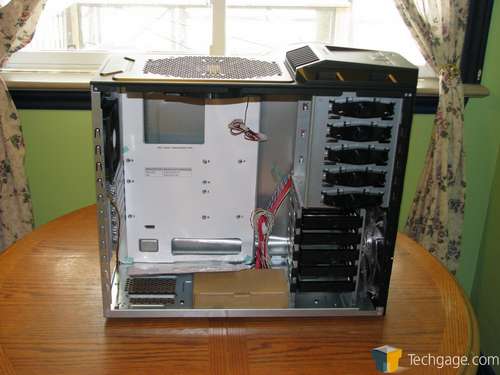
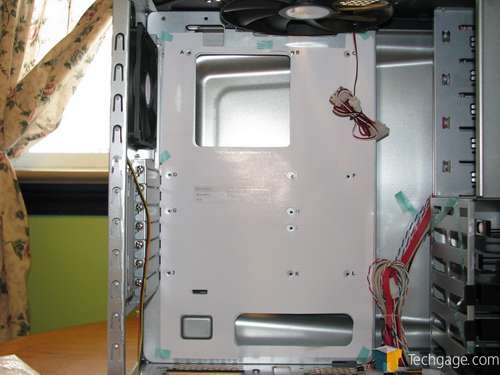
With the side panel off, we see the trademark paper motherboard tray liner. The layout is very logical and there are large holes for passing wires through the backside of the motherboard tray. For a mid ATX chassis, we are given a tremendous amount of room for the largest graphics cards, heat sinks and whatever else you want to fit.
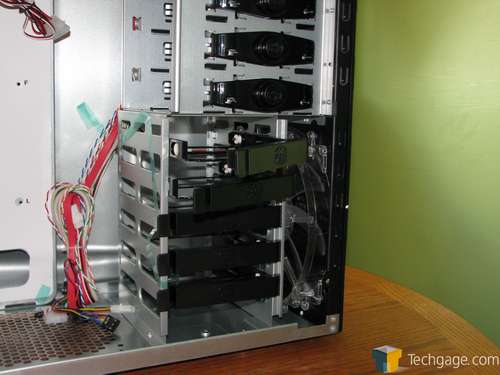
Up to 5 hard drives are able to be mounted internally behind the front 230mm intake fan. The tool-less design is very simple and effective. A push of the tab and the locking arm pivots out allowing us to simply slip the hard drive caddy out. Installing your drive into the caddy is a simple tool-less affair as well. I also like the large open spaces cut into the steel housing allowing for really good airflow around and through this area.
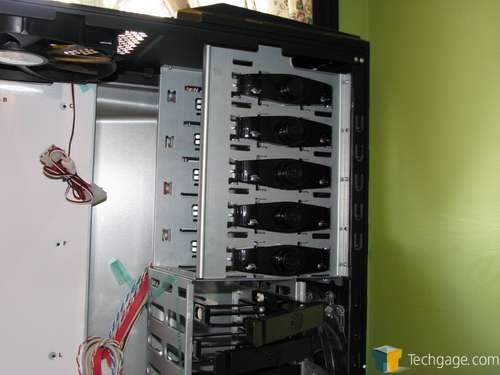
Five simple but effective push-lock holders will quickly and firmly grab hold of your CD/DVD drives. Reaching behind the front panel, you can unclip the mesh covers to make room to slide in your drives. The bottom 5 ¼ area is also setup to accept an external 3 ½ device should you so choose.
Another signature feature is the large opening in the motherboard tray behind the CPU area facilitating the installation of heat sinks. Many of today’s larger CPU coolers require back plates to be installed behind the motherboard, which then requires us to remove the motherboard from the case. So, this simple feature really saves some time when performing this task.
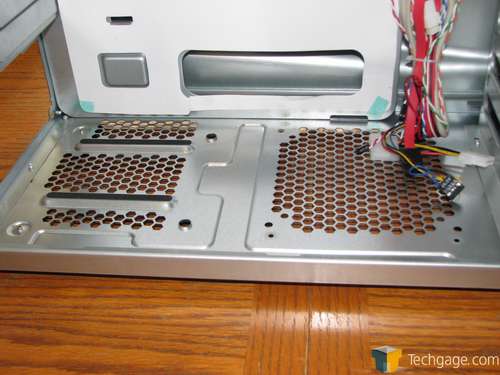
Down on the bottom we get the opportunity to install a 140mm/120mm fan if we so choose. The power supply is also given the option to breathe in fresh air from underneath. You can theoretically mount your PSU in either orientation, but the best choice would obviously to allow it to pull cold air through the bottom. There are two padded raised areas to prevent any scratching of the power supply’s finish.
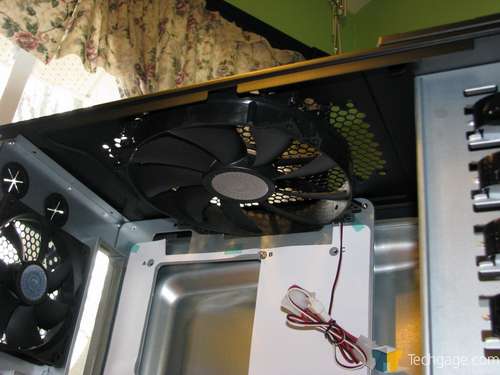
Looking up top from the inside, we see the huge exhaust fan. It is so large, that they needed to recess it into the motherboard tray for it to fit. As I mentioned earlier, we are given the option of replacing this fan with dual 120mm fans. While this does open up the option to internally mount a dual 120mm water cooling radiator, we are not given much room to use anything but very thin radiators without interfering with the motherboard. This is not really a problem considering the fact you could easily mount the radiator on the outside and run the tubing through the backside.
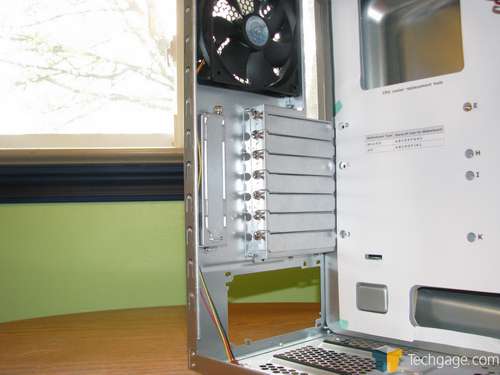
The rear PCI area is no-nonsense and also tool-less. I much prefer the use of thumbscrews as chosen instead of plastic locking tabs. You get a better look at the integrated pass-through above these slots. It doesn’t seem like a big deal until you need to run anything through the inside to the outside.
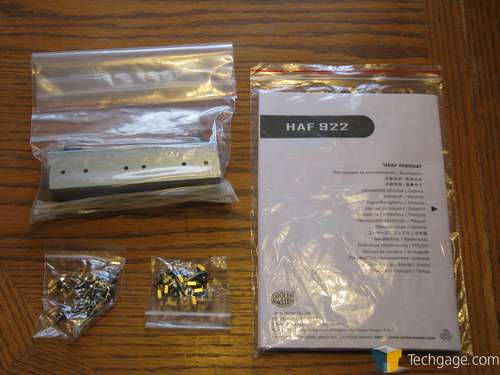
We are not treated to a large assortment of extras this time around. You do get a full complement of motherboard standoffs and screws plus a bunch of other various screws. There is a removable locking tab as well as a small handful of zip ties, and also a few adapter rails to fit that 3 ½ device into the 5 ¼ bay. Top it off with an owner’s manual and you get a rather expected bunch of bits.
With that huge look at the chassis out of the way, let’s move right into both testing and my final thoughts.
Support our efforts! With ad revenue at an all-time low for written websites, we're relying more than ever on reader support to help us continue putting so much effort into this type of content. You can support us by becoming a Patron, or by using our Amazon shopping affiliate links listed through our articles. Thanks for your support!


