- Qualcomm Launches Snapdragon 4 Gen 2 Mobile Platform
- AMD Launches Ryzen PRO 7000 Series Mobile & Desktop Platform
- Intel Launches Sleek Single-Slot Arc Pro A60 Workstation Graphics Card
- NVIDIA Announces Latest Ada Lovelace Additions: GeForce RTX 4060 Ti & RTX 4060
- Maxon Redshift With AMD Radeon GPU Rendering Support Now Available
Social & RSS Feeds
Latest Videos


Latest News
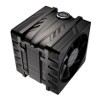
Cooler Master V6 GT CPU Cooler
by William Kelley on September 1, 2010 in Cooling
In the market for the best CPU cooler for the buck? Cooler Master’s V6 GT is the one to look out for. It features a great design that’s both appealing to look at and efficient in doing its job, and despite it taking up less room over all compared to other mega-coolers out there, it offers exceptional cooling ability.
Page 1 – Introduction
The use of acronyms in retail products is nothing new. There are a wide array of products that use passing references to automobiles as this conjures up the feeling of power, control and freedom. It is no surprise that the PC world is full of this type of advertising. It is not hard to understand why, either. When you look at your computer, you can see that it does consist of an engine (CPU), case (chassis), memory (ECU) and motherboard (power train) as well as the rest of the peripherals that can easily be given automotive attributes.
Since the processor can be related as the engine, it doesn’t take much poetic license to look upon the heat sink as an automotive appliance. Cooler Master has already had two successful coolers based upon this theme, the V8 and V10. Both coolers worked well and yet, as always, we were left wanting for more. Not to disappoint, the V6 GT was unleashed just a short time ago.
In my mind, air cooling has somewhat stagnated as of late. There are so few ways to design something that is going to outperform a previous product or a competitor’s offering. We’ve seen all sorts of designs with all different shapes and sizes and most filled their niche just fine. One thing is for sure, bigger is not always best when it comes to a CPU cooler, especially when you are an overclocking enthusiast looking cut out those last few degrees from your PC.
Cooler Master has been around for over a decade and has established itself as one of the front-runners in design and execution in the PC enthusiast market. With its long line of highly successful chassis to its ever growing list of high performance coolers, there is no doubt it has been doing its homework to continue to deliver newer and better products for all of us. Now it is time to unbox the company’s latest creation and put it to the test so we can see just how well it stacks up against not only our Core i5-750, but the rest of the competition as well.
Closer Look
Once we unbox the V6 and lay it out on the table we see that there was A LOT of attention paid to the fit and finish. There is no creaking or movement to the plastic and it is firmly attached to the heat sink.

The fan shrouds are well designed and wrap the fan with an envelope to direct the air full through the fins and over the heat pipes. Many designs fall short here as they do not direct all the air over the body itself. I also really like the gloss black fans as they add to the beauty of the overall design.

I added a shot of the exhaust side of things to drive home the solidness of the design. As stated earlier, the shrouding is very well designed and executed as to make the best possible use of the fan’s airflow.

Six large heat pipes – hence the acronym V6 – make their way through the fins and base plate to wick the heat away from your CPU. The staggered design helps ensure more airflow over each individual unit up in the airstream between the fans.

The base itself is a machined surface and is smooth to the touch. Over the years I have noticed that it makes minimal difference between a polished or machined surface when it comes to absolute cooling potential.

There is a fair bit of hardware involved for the installation process. Intel platforms S775, S1156 and S1366 are covered as well as AMD II/II+/III sockets.

One thing for certain is that the included installation instructions are excellent . Once unfolded it is just a matter of following the outlined steps, each of which illustrated clearly with what was needed.

I have to admit that I was more uncertain as to what it was going to take to install the V6. Many times, the hardware is straightforward and easy to decipher, but to me it seemed somewhat clunky. With that in mind I was ready for the install process to see just how involved it was going to be.

Support our efforts! With ad revenue at an all-time low for written websites, we're relying more than ever on reader support to help us continue putting so much effort into this type of content. You can support us by becoming a Patron, or by using our Amazon shopping affiliate links listed through our articles. Thanks for your support!