- Qualcomm Launches Snapdragon 4 Gen 2 Mobile Platform
- AMD Launches Ryzen PRO 7000 Series Mobile & Desktop Platform
- Intel Launches Sleek Single-Slot Arc Pro A60 Workstation Graphics Card
- NVIDIA Announces Latest Ada Lovelace Additions: GeForce RTX 4060 Ti & RTX 4060
- Maxon Redshift With AMD Radeon GPU Rendering Support Now Available
Corsair H60 Self-Contained Liquid CPU Cooler Review
When Corsair earlier this year announced its partnership with CoolIT, it at the same time also announced a follow-up to its popular H50, the H60. At first glance, the H60 looks simpler in design to the H50, but with an entirely rethought inside, featuring a split-flow design with micro-channel cold plate, that’s not the case at all.
Page 2 – Installation & Testing
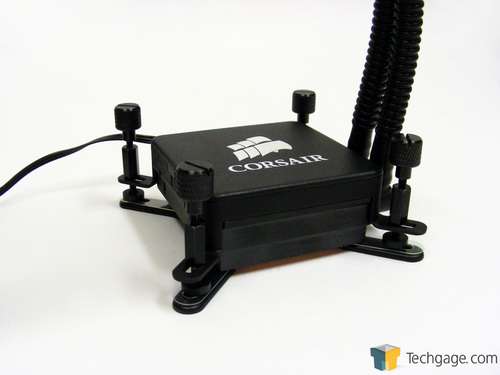
For those who have installed the H50 or H70 and feel that the “ring” mounting system can be a bit of a pain, you’re in luck. That system has been given the axe in favour of a much more simplified method for both AMD and Intel platforms. The H60 comes fitted for an Intel based system so the first step is to line up the four mounting points on the back plate by sliding them into position based on the CPU socket type. The riser threads through them, the block is placed over top and the thumbscrews are put in place over the top of the risers.
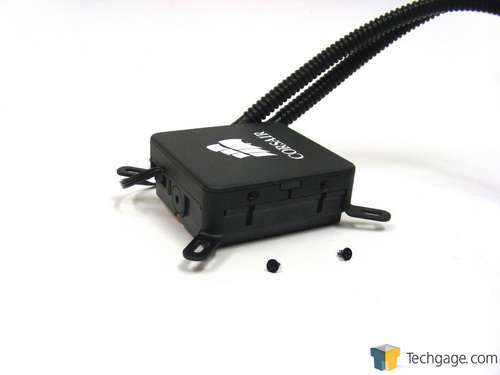
AMD users will need to remove the Intel brackets that are held on by two small screws on each side.
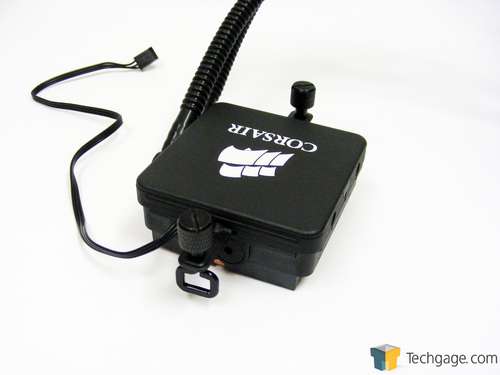
The AMD brackets are then screwed on, the loops are threaded up through the tabs, the block is put in place and thumbscrews are screwed down onto the top of the loops. Leaving them loose allows for a bit of play so they can be positioned to hook onto the plastic catches on the motherboard before tightening them down.
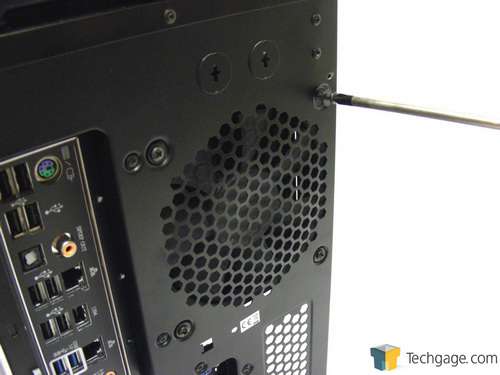
The fan and radiator are just as easy to mount. To start with, a washer goes onto each of the four bolts that are then threaded through the holes in the case at an open fan area. The bolt goes through the fan and into the radiator where it is tightened.
The last piece of the puzzle is to connect the power for the pump to the CPU fan header on the motherboard and the power for the fan to a spare chassis fan connector or directly to the power supply with a 4-pin to 4-pin Molex adapter. The fan can be run off of a fan controller if needed but it’s recommended to run the pump off of a steady 12V source.
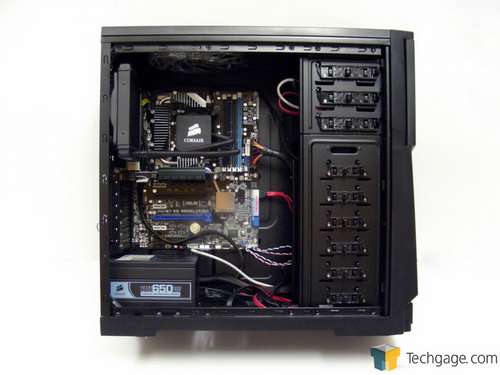
Once installed, users will hopefully see something that looks like this, but the radiator can be mounted with the hoses at the top or bottom and can even be mounted at the top of a case so users can get creative if the case allows.
Testing
Stock CPU settings were obtained by setting the AI Tweaker option within the BIOS to Auto. and the maximum stable overclock frequency of 3.85GHz was obtained after setting the base clock to 107 and the multiplier to 36. Our locked CPU was able to do this on stock voltage so the vcore was raised to 1.25V to generate additional heat.
All of our testing is performed in a near steady 20°C ambient environment with readings taken before and after with a standard room thermometer. AIDA64 Extreme Engineer is used for monitoring and recording all system temperatures throughout the testing process. All fans are run at 100% during testing and all coolers have any pre-applied thermal interface material replaced with Zalman’s ZM-STG1 Super Thermal Grease due its ease of application that virtually eliminates the possibility of skewed temperatures due to poor surface contact.
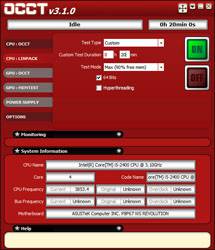
Windows is allowed to sit idle for 10 minutes after startup to ensure all services are loaded before recording the idle CPU temperature. CPU load temperatures are generated by performing a 20 minute run of OCCT LINPACK using 90% of the available memory.
The components used for testing are:
|
Component
|
Techgage Test System
|
| Processor |
Intel Core i5-2400 – Quad-Core (3.10GHz)
|
| Motherboard |
Asus P8P67 WS Revolution – P67-based
|
| Memory |
Corsair Dominator 1x2GB DDR3-1600 7-8-7-20-2T
|
| Graphics |
AMD Radeon 5450
|
| Audio |
On-Board Audio
|
| Storage |
Kingston/Intel SSDNow M Series 80GB SATA II SSD
|
| Power Supply |
Corsair HX650 650W
|
| Chassis |
Thermaltake Armor A90 Mid-Tower
|
| CPU Cooling |
Corsair H50
Corsair H60 Corsair H70 |
| Et cetera |
Windows 7 Ultimate 64-bit
|
And the results!
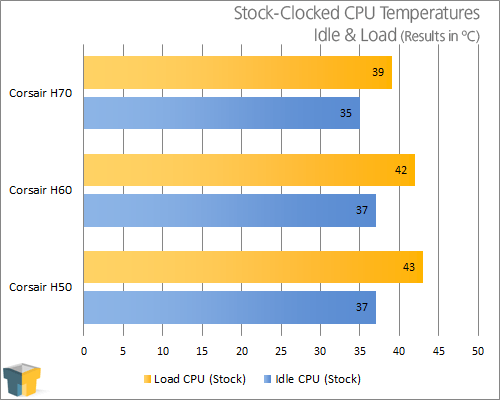
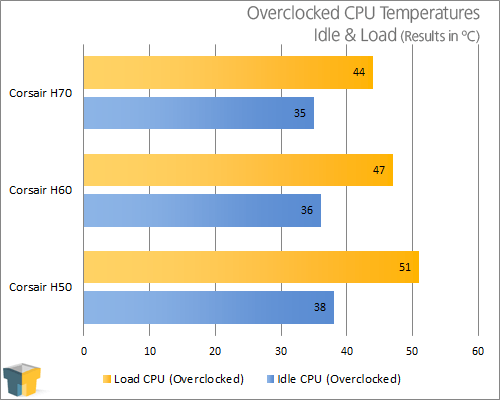
We decided to test the H60 against the H50 and H70 to see where each one falls on the performance scale. Just as expected, not to mention intended by Corsair, the H60 ended up smack in the middle of the pack. These results show just how efficient the new design and fan are when compared to the previous products. When overclocked and under full load there was a five degree improvement on the H50 and it only trailed the H70 by three with the later sporting a thicker radiator and two fans.
From a noise perspective, the H60 is a little on the loud side but the fan run at 100% all the time. When paired up with a fan controller or software users can keep the noise down until they need the extra cooling power. Just for fun I used a simple, single channel fan controller and found that at about 70% the fan was whisper quiet and started to get drowned out by the case fans.
It’s no wonder that Corsair has more coolers up its sleeve that will use this new design including the H100 that features a 240mm radiator. In a future review it’s going to go up against a personal favorite, a CoolIT Vantage C240 prototype, so stay tuned.
For now though, it’s time to pack it in and finish things up.
Support our efforts! With ad revenue at an all-time low for written websites, we're relying more than ever on reader support to help us continue putting so much effort into this type of content. You can support us by becoming a Patron, or by using our Amazon shopping affiliate links listed through our articles. Thanks for your support!


