- Qualcomm Launches Snapdragon 4 Gen 2 Mobile Platform
- AMD Launches Ryzen PRO 7000 Series Mobile & Desktop Platform
- Intel Launches Sleek Single-Slot Arc Pro A60 Workstation Graphics Card
- NVIDIA Announces Latest Ada Lovelace Additions: GeForce RTX 4060 Ti & RTX 4060
- Maxon Redshift With AMD Radeon GPU Rendering Support Now Available
Evercool Nighthawk VGA Cooler VC-F117

There comes a time, when a stock video card cooler just doesn’t cut it. To get lower temps or better overclocks, you need specially designed coolers to help you achieve what you need. Evercools Nighthawk VGA Cooler, like all others, promise to offer superb cooling, for a great price. Let’s dive right in.
Page 3 – Installation
In my opinion, there are two difficult parts during this procedure. First, it can be a massive pain taking off the stock cooler, due to crazy mechanisms that companies put in place. Second, it can be a massive pain installing the new cooler! Ok, I did just say that the entire procedure can be a pain, but I have high hopes for this one.
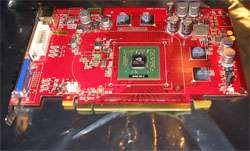
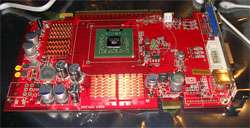
The instructions that came with the packaging were quick and to the point. This is fine, since it does only take a few steps to install, and most people will not even benefit from reading the instructions in the first place. After the stock cooler was removed, we choked on the dust that jumped at our faces. We then cleaned off the residue on the memory chips and also replaced the thermal paste on the GPU with a fresh coating of the supplied stuff.
Usually when using custom coolers, I never pay much attention to the thermal solution they supply, because I have come to trust Arctic Silver so much. I was surprised though, when I seen the included paste very much resemble AC5, at least to the look. So, we used what was supplied to us, rather than using the AC5.
Now came the time to install the heatsinks, four to be exact. As I mentioned, these don’t seem to have any heat dissapation properties, except that they are copper, which will help to an extent. I would have liked to have seen thermal tape on the back of them, but in the case with a smaller card, it may not make that much of a difference. We will see.
One thing to mention about the heatsinks, is that they don’t seem to secure themselves perfectly to the chips. Possibly the glue on the back just is not strong enough. After around 20 minutes of them just sitting on the chips, they could easily be taken back off without any effort. So, if you do happen to bump them during installation of the cooler, you will have to move them back into place.
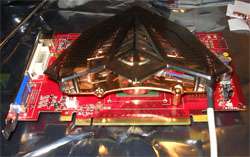
Now we come to the best part of installing a GPU cooler. Cursing and swearing! First, Pete and me matched up the holes and figured out where we would align the cooler. After we did this, we screwed the mounting screws into the cooler, and then Pete aligned it up while I mounted the included bracket in the back. While we were both trying to hold it into place, we secured the screws into the back and tightened them up. We were now good to go!
If you have ever installed a similar cooler, or any GPU cooler for that matter, you know that it can be a little testing to do it solo because we only have two hands. This is nobodies fault really, just that the bracket is hard to secure while you are still trying to align the holes. We were happy to see the finished product though, and it looks great!
|
|
Support our efforts! With ad revenue at an all-time low for written websites, we're relying more than ever on reader support to help us continue putting so much effort into this type of content. You can support us by becoming a Patron, or by using our Amazon shopping affiliate links listed through our articles. Thanks for your support!


