- Qualcomm Launches Snapdragon 4 Gen 2 Mobile Platform
- AMD Launches Ryzen PRO 7000 Series Mobile & Desktop Platform
- Intel Launches Sleek Single-Slot Arc Pro A60 Workstation Graphics Card
- NVIDIA Announces Latest Ada Lovelace Additions: GeForce RTX 4060 Ti & RTX 4060
- Maxon Redshift With AMD Radeon GPU Rendering Support Now Available
eVGA 7800 GT PCI-E 256MB

If you are looking for a killer gaming card, but find the 7800GTX too expensive, then you will want to check out the recently released 7800GT. It’s been scaled down to 20 Pipes and 7 Vertex Units but it still packs a massive punch. We are taking a look at the eVGA version, which comes pre-overclocked! Time to see what this beast can do.
Page 5 – Transparent Anti-Aliasing
What is this, and why does it deserve it’s own page in the review? Anti-Aliasing, for those newer tech geeks, is the process of cleaning up jaggy edges in your games. Without AA, you can notice how flat or supposedly smooth surfaces can have jagged edges and can detract from your gameplay. Anti-Aliasing though, based on advanced algorithms, have the ability to smooth out those edges at varying degrees. You can learn a lot more about the algorithms and how they work in the Wikipedia.
The higher the Anti-Aliasing setting you choose though, the more it will affect your gameplay performance. While you may get 100FPS with no AA, with 4x AA, you may get 60FPS or less. You will see the varying affects with different AA modes in the upcoming screenshots.
With the introduction of the 7800GTX, NVIDIA introduced Multi-Sampling and Super Sampling, which are the only two modes of Transparent Anti-Aliasing. It’s called Transparent because it works well with transparent textures. The most common example of this is a fence with various objects behind it. While the fence in the forefront may look great, the objects on the other side may not be pretty. Multi-Sampling is a great mode and looks fantastic, but it will cut down on your performance greatly. At 1280*1024 though, games were still completely playable and fluid. Super Sampling is another thing though, and will likely end up being more SLi users primarily.
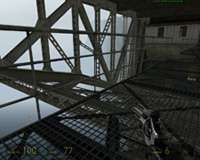
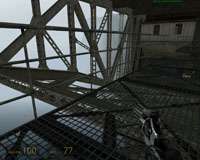
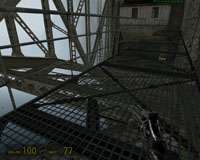
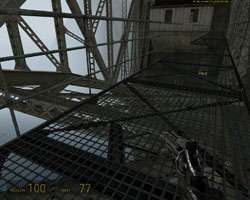
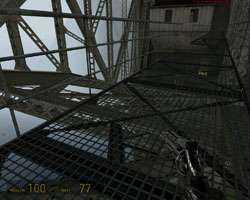
These screenshots are all taken at 1280*1024 resolution, with the ingame details all set to high. Anti-Aliasing and Anisotropic Filtering are controlled through the display driver. All of the screenshots have 16x Anisotropic Filtering enabled.
The first screenshot above is taken without any AA, and the second has 4x AA enabled. You can immediately notice the difference. The first shot has the infamous jaggies all over the place, but are pretty well taken care of in the second shot. Of course, if you look hard enough, you will still find many. The third picture is 4x AA once again, but this time Multi-Sampling is enabled. If you compare the second and third picture directly, you can easily see the difference. Look closly at the ground Gordon is standing on.. very noticable difference.
Now we get into the hardcore of the hardcore settings! The first picture directly above, has 4x AA enabled and also Super Sampling. The game looks absolutely amazing in this setting! Shall we try 8x SAA and Super Sampling? The second picture is just that. The differences are very difficult to see right off, but if you save each picture to your computer and then flicker back and forth to each picture, you will see them.
Notice this trend though? No AA gave me great frames per second, and they diminished as the settings were increased. Even playing with 4x AA and Multi-Sampling, which looks fanstastic, delivered over 100 FPS. Change that Multi-Sampling to Super-Sampling and I lost 40FPS! Then crank up the AA to 8x, and that’s where the differences are seen. 1280*1024, 8x AA, Super-Sampling and 16x AF for a still somewhat playable 30FPS!
I think it’s safe to bet, that if you wish to use either MS or SS at a higher resolution than 1280*1024, you may be thinking even more about an SLi set-up :)
Now that all that techno babble is out of the way, let’s jump right into benchmarking!
Support our efforts! With ad revenue at an all-time low for written websites, we're relying more than ever on reader support to help us continue putting so much effort into this type of content. You can support us by becoming a Patron, or by using our Amazon shopping affiliate links listed through our articles. Thanks for your support!


