- Qualcomm Launches Snapdragon 4 Gen 2 Mobile Platform
- AMD Launches Ryzen PRO 7000 Series Mobile & Desktop Platform
- Intel Launches Sleek Single-Slot Arc Pro A60 Workstation Graphics Card
- NVIDIA Announces Latest Ada Lovelace Additions: GeForce RTX 4060 Ti & RTX 4060
- Maxon Redshift With AMD Radeon GPU Rendering Support Now Available
Social & RSS Feeds
Latest Videos


Latest News
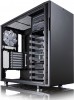
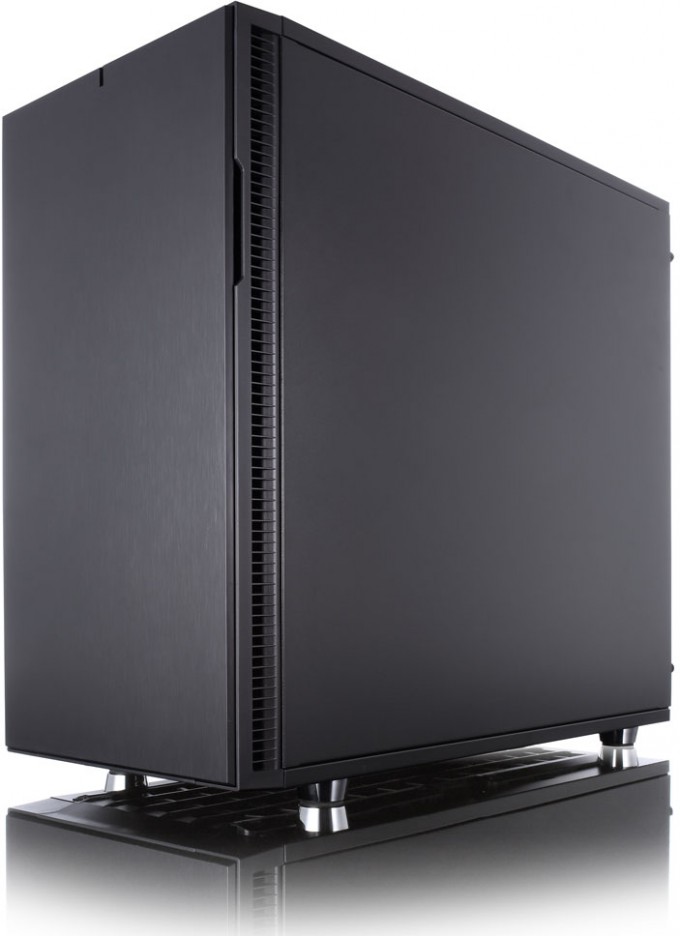
Fractal Design Define R5 Dual Loop Water Cooling Build Log
by Matthew Harris on May 11, 2015 in Cases & PSUs, Cooling
After we posted our look at Fractal Design’s Define R5 a couple of months ago, it didn’t take long before Matt was craving not just a chassis upgrade, but a water cooling one, as well. With the chassis in hand, join him as he takes you through the process of setting up a dual loop setup, and tells you what he thinks of working with the Define R5.
Life has a funny way of presenting things to you. About 5 months ago I wandered into my local Micro Center in search of a 120mm fan to replace the stock intake fan on my aging Silverstone TJ10. While I was there I happened to stumble across the Cooler Master HAF XB EVO, a smallish ATX cube case that just captured my imagination. I’ve been running water cooling in PCs for so long that I was beginning to tire of the added complexity inherent to loops, plumbing and the seemingly endless upgrade cycle of blocks versus sockets and graphics cards. I had an epiphany: I’ll make the move to air cooling and be done with liquid cooling altogether. Heh, as if.
After purchasing my XB I started perusing Newegg in search of the perfect CPU cooler, one that wouldn’t block my ram slots and that didn’t require three hands and a small child to install… and one that didn’t sit sideways on my board. I was running AMD at the time (still am at the outset of this build guide but I digress) and many of the coolers on the market are made so that the fans face the PCIe slots rather than the rear of the case when used on the rectangular AMD socket. On the square Intel socket you’re free to face them top to bottom or fore and aft to your heart’s content.
I was also faced with another forced upgrade path, my GPU. I had to move from my decrepit GTX 260 which is a water only card or spend $50ish on a HSF for it since I was without the stock cooler for it. Rather than throw that kind of money at a card so far behind the curve, I found a used GTX 470 for $80 and moved forward with that. That still left me trying to find a CPU cooler. I was about ready to opt for the huge dual 140mm Phanteks tower style cooler when I stumbled across refurbished Corsair H100i’s for sub $65. Hmm, technically it’s still water cooling but it’s self contained, sealed and it supports every popular socket out there. As an added bonus, it doesn’t require the assistance of a double jointed ninja to install. I was sold.
Let me start off my story of moving to simpler air cooling by saying that there’s a place in hell reserved for the person who invented the reference blower style cooler on the GTX 470. I ended up spending another $50 on an aftermarket GPU cooler anyway. The stock blower cooler made it sound like there was a 747 taxiing for take-off every time I opened anything that was remotely GPU intensive. Then there’s the learning curve associated with Corsair’s Link software. As shipped, the fans on the H100i would pull papers across my desk the moment my CPU ramped up to any extent.
But I’m getting off track here. I’m nearly 500 words into this build log for dual loops in a Define R5 and I’ve yet to discuss either the Define R5 or the concept. My point is, I discovered that if I’m looking to get a quiet and cool running rig, making compromises means I’ve had to sacrifice something somewhere and I’m not ending up any better off than I was initially. The HAF XB EVO is a great little case. For the money, it’s tough to beat if you’re prepared to work within its limitations. I’m running dual GPU’s and a CPU on a serial/parallel loop with a 60mm thick 240 rad and a 30mm thick single 120mm rad. It does the job adequately. Just… that. For the past 2 or three months I’ve been contemplating the Define R5 because it has more robust support of water cooling options. You can put radiators literally everywhere in this chassis and the sizes allowed are staggering. All in a case that hardly takes up more room than the XB EVO.
So, here’s the plan. I’m making the move from AMD to Intel. I’m going to install a dedicated CPU loop consisting of the aforementioned 60mm thick 240mm rad, a Swiftech MCR Micro-res and a Swiftech Apogee Drive II. I’m also making a dedicated GPU loop consisting of paralleled Swiftech MCW 82’s, a Black Ice Nemesis GTS 240, another Swiftech MCR Micro-res and a Swiftech MCP-35X pump. All of this is going to be shoehorned into a Define R5, and I believe it’s going to work like a charm.
So, let’s get on with the show, shall we?

At first glance the R5 doesn’t appear to be all that or a bag of chips. There are drive cages blocking the front of the case and a goodly bit of the roof.

Of course anyone familiar with the case knows that the top panel can be opened up to make way for up to a 360mm radiator by removing the three mod-u-vents.

I’d go into greater detail about the drive options and mod-u-vents but that’s been covered already in our review. Instead, I’d like to introduce the central player in our little saga, the ASUS Z97-PRO WiFi-AC.

The sharp eyed among you will notice that the rear 140mm fan is now missing. It’s been removed and placed into the second fan spot behind the front intake filter. What’s that? I didn’t cover that? You really should go read the review and get up to speed… I’ll wait.

Just in case you decided to skip the review (shame on you) here’s a shot of the 280mm’s effective cooling at the front.
Initially my plan was to put a 240mm radiator in the floor of the case and a second into the roof. The Nemesis was going to live in the upper reaches while the 60mm thick Feser X-Changer was going to dwell in the basement.

Of course anything seems possible when you’ve got the entire basement open. Once you move a neighbor in, well, that’s when things begin to take a bit of a turn.

Hmm, not quite as much room as I first imagined.

As I was saying earlier, I’m planning to mount the radiator up in the front standing vertically.

The Nemesis found its way into its permanent abode. After that I moved the rear 120mm into its permanent home and placed the first of my reservoirs where they were slated to live. Namely, the rear fan location.

Yeah, I know I said that the front drive bay area was going to play host to my lower radiator and it will, just be patient. I’d decided to forgo the Feser out of the new need to mount the smaller HDD caddie in the bottom of the case to allow me room to keep it away from the bottom GPU. Instead I ordered another Nemesis GTS to drop my rearward expansion from 85mm to 55mm.

Remember what I’d said about dual MCR Micro Res’s hanging from the rear fan mount? Yeah… that didn’t end up happening. My life is in a constant state of flux (or crisis to put it more aptly), and after a minor emergency involving a Lian Li PC-V358B, the pictured pump/res combo and a pessimistic 67 year old roomie, he ended up with one of my MCR’s and the pump slated to run my GPU loop and I got this. The EK pump to 120mm fan mount I purchased when I was originally planning to put the rad in the floor of the case.

And now you see why I needed a thinner front radiator. I had to keep the pump (and as it turned out, the pump/reservoir) from interfering with the front edge of my video cards.

Since I’m running GTX 760’s I only had to keep the pump to the front edge of the motherboard. The drive caddy is sitting in the spot it would reside in with a 25mm thick fan mounted on the radiator so I had enough room, even with the output barb facing the rear of the case. Happily enough, the reservoir managed to fit under the 5.25″ bay so I could keep it. Call me antiquated but I still use my optical drive. That and I like having the option of putting a bay mounted device in the case. Fan controls, reservoirs, displays, what have you.

I guess now is as good a time as any to introduce the other players in this little drama. First up, my Cooler Master HAF XB EVO. An outstanding case in its own right but one that didn’t lend itself quite as readily to an all inclusive custom loop.

The HAF XB is a fairly roomy case for its form factor. Unfortunately, that form factor also leads to more than a few issues such as limited options when it comes to radiators. You can put a 240 or 280 in the front of the case and a single 120 in the rear. Beyond that and you’re breaking out a saw or a Dremel or both.
The Apogee Drive II did make the task of running a custom loop in the XB a whole lot easier though. The pump was already mounted to the CPU block so one less item to deal with.

The first order of business after the test fit of the drive cage was to mount the fans into position. Note that owing to the way that Fractal implemented the front fans in the stock locations, with long machine screws screwing into threaded bosses on the case front, I was allowed the luxury of mounting the radiator with the stock 140’s out front. This allows for a nice push/pull setup without the added expense of buying another pair of 120’s.

Then it was a matter of mounting the smaller drive cage into the case. Thankfully, Fractal used a fairly tight honeycomb pattern on the floor of the case which allowed me the liberty of mounting the cage where I chose rather than making me go with the predetermined 120mm fan locations.

Had I been tied to them the reservoir would have been too close for easy plumbing.

As it stands, even with the more favorable drive cage mounting, I nearly had one of the hoses fouling the PEG connectors.

Next came the plumbing of the shrew. I still had my MCR Res from the HAF XB system for reservoir duties on the CPU loop. That, the Apogee Drive II and the second top fan were carried over from the loop on the HAF XB. I mounted the Apogee Drive II with the inlet and outlet facing vertically rather than horizontally with the inlet on the bottom in an effort to make priming the pump easier. Unfortunately, this made for an interesting bend going from the reservoir into the pump.

I was faced with either getting a 90 degree fitting or something a bit unconventional, I chose the latter.

A handful of zip-ties around the tubing will prevent any kinks and if you turn them just right, you can’t see the tie-ends.

So, that’s both loops filled and bled. The upper drive cage made its reappearance as well. It had to be removed to facilitate said filling as the top of the reservoir for the GPU loop is just a few millimeters from it. One thing is missing though, the PSU. Yes, I had the Ultra pictured earlier but it’s not really Haswell approved and the size has always been a sticking point with me. At just 800W it’s just too big for what it brings to the table in my honest opinion. Plus it tends to get rather noisy when pushed. Back when it was the latest and greatest, it wasn’t too bad but in today’s age of upper 80% to lower 90% efficient PSU’s, I could do better.

And the troubling part was that I had all this to deal with and I hadn’t even run PSU wiring aside from power for the drives. If this were a review I’d be dinging Fractal for the nearly utter lack of tie points. Granted, there are a few along either edge of the motherboard tray but that’s about it. In my opinion the CPU cutout could stand to be a tad smaller and that wasted space could be used for tie points. Of course I can remember when there were no such things on cases and we used self stick tie points. I also remember rotary phones too. Anyway, I guess I got spoiled by my HAF XB. That’s one case that knows how to do cable management. There are more tie points on it than you could ever use.

So, the PSU comes into play finally. I picked up another BeQuiet! Straight Power 10 800W. It’s a much more reasonably sized PSU and more importantly much quieter than the Ultra. Granted, it doesn’t have the cool flat all black cables and the sleeving is about as transparent as a politician’s campaign promises but it’s also 80 Plus Gold rated and from the reviews I’ve read (actual load testing) it’s about as solid as my shrink’s shrink.

M-I-C, K-E-Y, M-O-U-S-E… I’m rather surprised someone hasn’t received a C&D letter from a certain film conglomerate. Of course there’s a reason there’s rodentia on the drive trays, it allows you to mount the drive favoring the front or back of the tray using grommets to absorb drive vibrations.

Now that everything is installed we dive back around to the other side and… whoa. That’s a metric ton of cables. Can you believe at one point I was considering getting individually sleeved extensions? Pah! Where on earth would I have put them? Again, we’re back to the nearly complete lack of tie points. Once you’ve populated the few available you just start stuffing wires where they won’t interfere with closing the case. That and pray if that’s your thing.

At least from the business side it looks pretty good. Yes, there’s a lot going on in there but it could be worse. I can still make my way around the case to swap ram and the optical drive has enough room so that I could stealth it.

Door open, no drive.

Pop the handy-dandy drive bay cover off and party like it’s 1999.

And so there you have it, dual loops in a mid tower sized chassis. Not only that but without giving up much. Sure, you go from 8-3.5″ drives to a paltry 3 but you’ve still got 2 more 2.5″ drive mounts and if you use a different reservoir and pump combo in the front, you can ditch the optical drive bay and migrate the other 5-3.5″ drive cage up there. Still, I’m sold.
I’ve managed to get a stable 4.6Ghz OC on my 4690K, run SLI’d water cooled GTX 760’s that are mildly overclocked, keep everything under 60C at load all while being nearly inaudible. You can’t beat that in a case of this size. Not in my opinion at least.
Again, this isn’t a review, just a log on a proof of concept but I can tell you this much, you cannot go wrong with this case.

Support our efforts! With ad revenue at an all-time low for written websites, we're relying more than ever on reader support to help us continue putting so much effort into this type of content. You can support us by becoming a Patron, or by using our Amazon shopping affiliate links listed through our articles. Thanks for your support!