- Qualcomm Launches Snapdragon 4 Gen 2 Mobile Platform
- AMD Launches Ryzen PRO 7000 Series Mobile & Desktop Platform
- Intel Launches Sleek Single-Slot Arc Pro A60 Workstation Graphics Card
- NVIDIA Announces Latest Ada Lovelace Additions: GeForce RTX 4060 Ti & RTX 4060
- Maxon Redshift With AMD Radeon GPU Rendering Support Now Available
Fractal Design Array R2 mini-ITX NAS Chassis Review

With mass storage being available at reasonable prices, the desire to build home servers, NAS boxes and so forth has never been stronger. Some might choose the pre-built NAS route, but for those pro-DIY, Fractal Design has its Array R2. Interested in a mini-ITX chassis that can support up to 6 hard drives and 1 SSD? Read on.
Page 2 – Installation
As the Array R2 is marketed as a home server or NAS machine, a lot of the niceties of an ATX chassis are missing. Compared to the Define R3, with its removable drive bays and handy cable management, the R2 was designed to allow you to install your gear and forget about it until the time comes to move it or bounce it. With that in mind, we used the following hardware.
- ASUS P8H61-I
- Intel Celeron G530 (Sandy Bridge)
- Intel Retail Heatsink and Fan
- 8GB of Patriot Gamer DDR3 RAM
- 1 x Western Digital 640GB HDD
- 2 x Western Digital 2TB Green HDD
- Intel PRO/1000 PT Dual Port NIC
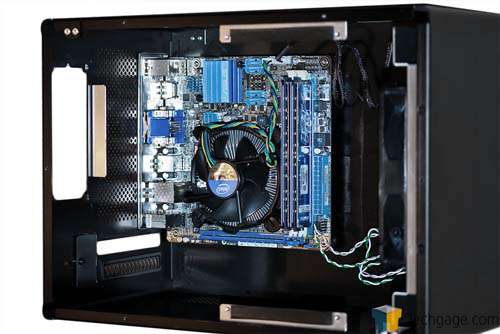
Removing the hard drive cage is accomplished by removing four small screws. With these out of the way, the cage can be lifted up slowly and with a bit of force. The additional force is needed because the mounting brackets will stick to the rubber strips that the cage rests on. Once removed, the motherboard can be installed.
Placing the motherboard on the four spacers is an easy task and there is plenty of room to put it into place. As mentioned earlier, it’s recommended by this editor to install your heatsink before installing the motherboard but you are free to go about this however you see fit. Regardless, this tip needs mentioned once more. After the board is in place, connecting the power, reset and activity LED headers all required minimal effort. The last thing we did before putting the hard drive cage back into place was connect the SATA cables to the motherboard. Doing this beforehand can save you a tremendous amount of hassle and frustration.
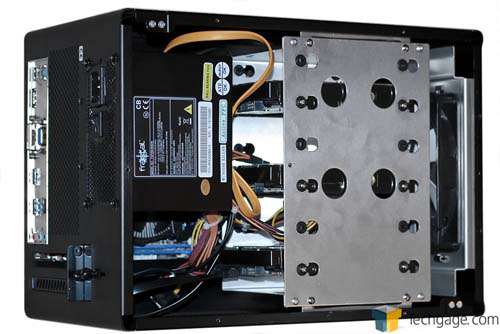
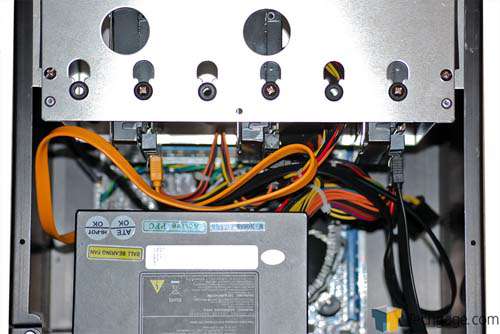
Getting the hard drive cage back in the case is the trickiest task in the entire build. With the power supply having shorter cables, I had to rest the cage on one of the corners of the Array R2 while I connected the SATA data and power connectors. With everything connected, we had to take special care to position the hard drive cage back into the chassis. This is because there is very little clearance between the SATA data connectors and the tail end of the power supply. If you aren’t careful, you can break off one of the connectors, rendering your HDD useless.
With everything in place, you can see how tight the Array R2 becomes. While not the easiest case to work in, a pass can be given to Fractal Design simply because of all it managed to fit into the design of the chassis. If you are uncomfortable with working in tight spots, the Array R2 might not be the best choice for your small computing needs. Given that the case has been designed to be setup and placed out of the way, never to bother you unless a reboot is required, this editor happily accepts the potential inconveniences of working within the Array R2.
Support our efforts! With ad revenue at an all-time low for written websites, we're relying more than ever on reader support to help us continue putting so much effort into this type of content. You can support us by becoming a Patron, or by using our Amazon shopping affiliate links listed through our articles. Thanks for your support!


