- Qualcomm Launches Snapdragon 4 Gen 2 Mobile Platform
- AMD Launches Ryzen PRO 7000 Series Mobile & Desktop Platform
- Intel Launches Sleek Single-Slot Arc Pro A60 Workstation Graphics Card
- NVIDIA Announces Latest Ada Lovelace Additions: GeForce RTX 4060 Ti & RTX 4060
- Maxon Redshift With AMD Radeon GPU Rendering Support Now Available
Fractal Design Define R3 Mid-Tower Chassis Review
With the chassis market dominated by a small group of major companies, it’s easy to get excited when we receive a model from a company that’s not that well known – at least on these shores. In this particular case (no pun, of course), that company is Fractal Design, and its the silence-focused Define R3 mid-tower on deck today.
Page 1 – Introduction
A lot of what we do here at Techgage is deeply rooted in the interactions we have with others in the industry. Many times, we line up a meeting via phone or if lucky, in person, at any one of the trade shows we cover. More often than not, we have a gameplan when going into anything that we do. We wake up and know what needs worked on or who we are going to meet with that day. But, more often than not we know what to expect going into any meeting or discussion about a new product. The genesis of this review is not such a scenario.
Going into CES last January, I hadn’t heard much about Fractal Designs. If it hadn’t been for a few visits to a couple of European tech sites, the company’s name would have in no way crossed my mind. However, in an opportune moment while waiting for Rob’s plane to land at the Las Vegas airport, I ran into Elizabeth Castiglioni, Channel Marketing Manager of Fractal Design North America Inc. At the time, I had no idea who she was and whether or not she was there for CES, but given the numbers that CES brings into the city ever year, I played the odds and started up a conversation in the same way anyone does in an airport. I asked her if she could watch my gear while I stepped away for a minute.
With small talk out of the way, we did the obligatory business card exchange and went about our way for the first couple of days at CES. However, after a few emails, I was in their suite, looking at their lineup of PC towers that were about to be released in North America for the first time.
Based in Sweden, Fractal Design has been a player in Europe and elsewhere in the world for some time, but only recently became available to us in North America. When meeting with the company at CES, the folks there shared with us their pricing structure. Aggressive to say the least, the mid-tower Define R3 that we are reviewing today can be found online for just about $100 US, and the flagship chassis, the Define XL, starts at around $150.
For those of a more budget-minded position, the Core series fits nicely into the sub-$100 market. With these prices, the Fractal team has positioned themselves amongst hearty competition. The $80 to $150 price range is ripe with many quality players and all of them bring something worthwhile to the table. Also littering the reasonably-priced market is a good amount of sub-par manufacturers who I wouldn’t recommend to anyone. That said, I’m interested to see where the Define R3 fits and how it fares when put through the stresses of consistent daily use.
Closer Look
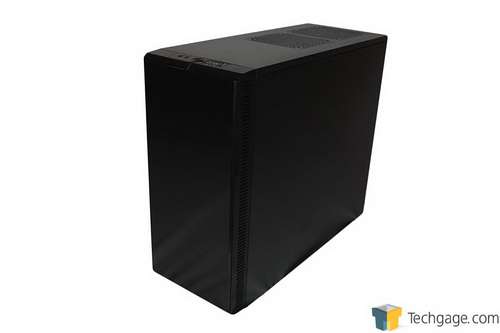
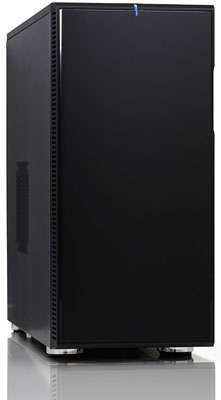
The Define R3 is an all black mid-tower designed with a focus on an appealing exterior and near-silent operation. My first impression when getting up close and personal with the case was that Fractal Design might have cribbed part of the design sheet from the Antec P182. With a front door that runs the entire height of the case, the only source of cool air comes from slits arranged around the perimeter of the door.
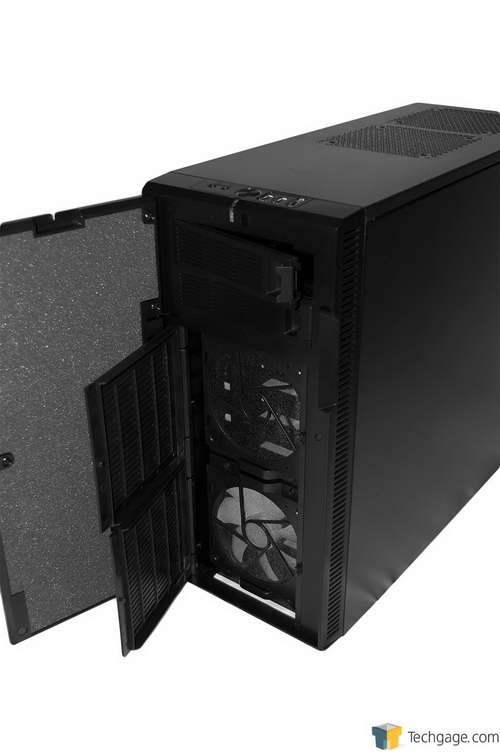
The front of the Define R3 is plastic, thicker than I am used to, and glossy. As mentioned earlier, the door runs the entire front of the case and has a depression on the right hand side to aid in opening the door. When opening, it slides out from the right to the left, exposing the two optical drive bays and a pair of vent covers that can be opened with a push of their front.
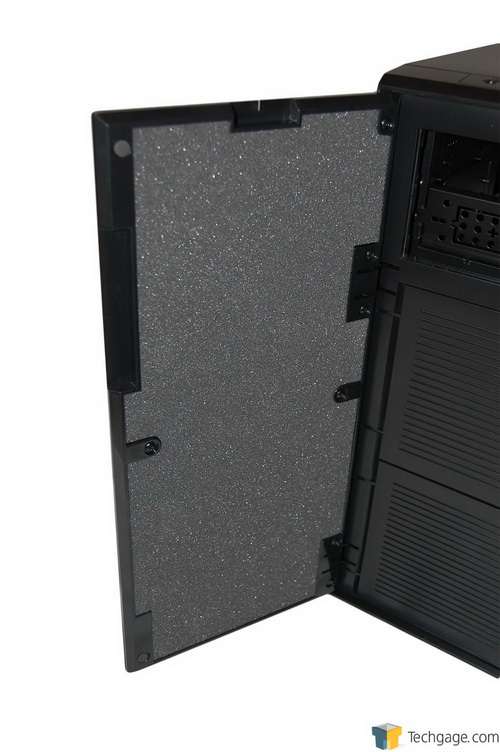
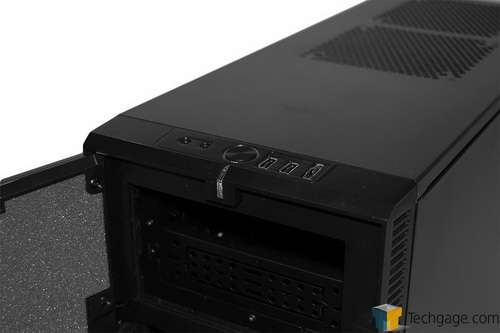
When open, the front door is lined with a type of foam, used to dampen the acoustics of the fans and optical drives. Running the entire length of the door, it should be more than adequate in quieting the noise trying to escape outward through the front of the case. When closed, the door is held shut with the help of magnets. They aren’t strong enough to necessitate a firm pull when trying to open but are weak enough that getting into your case from the front isn’t difficult. In my opinion, a fair balance between too strong and too weak.
When the fan panels are opened with a push on their right-hand side, they swing outward from right to left. Once open, we see dust filters that sit between the fans and the outside world. Fractal Design hasn’t made cleaning them very easy, as each filter is held in place with four screws. This is personally fine with me but it could be a turn off for many – having to remove eight screws every time they want to rinse them out. It should be said however that in my experience with the Define R3, all I needed to do was use the narrow attachment to my Dyson and it was simple enough to suck any debris caught by the filter away. So while inconvenient, most people won’t need to remove the filters unless doing a major cleanup of their system.
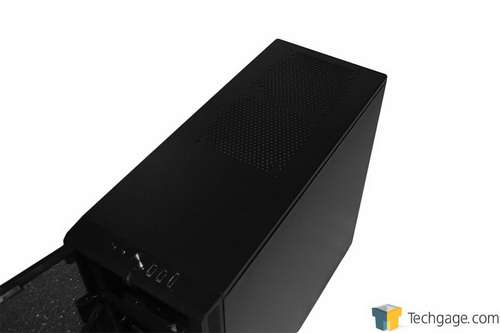
Either throwing the water cooling community a bone or simply allowing the Define R3 to be more versatile for those looking for more airflow, the top of the case has a pair of 120mm fan grills, perfectly spaced to allow the use of a dual radiator if one so chooses. While we will get into it more later, the vents are sealed shut with a pair of foam squares. This not only prevents dust from entering into the case from above, but it also helps dampen sound. Each square is held in place by four screws that would normally be used to secure a fan.
On the top front corner of the Define R3 we find the power and I/O ports. From left to right we have headset and microphone ports, the power button, a pair of USB 2.0 ports and one eSATA connector. Sitting in front of the power button is an activity LED that glows blue when in use. Many will groan about the omission of USB 3.0 but given the number of USB 2.0 devices still in use, it seems smart that Fractal Design chose to leave 3.0 for future models.
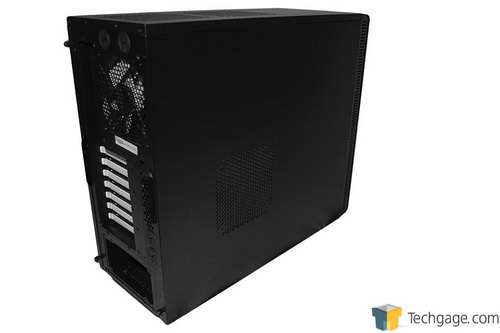
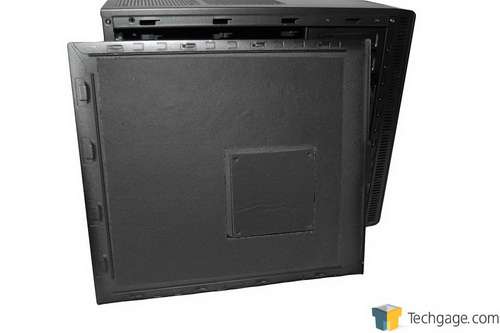
While many cases include a window of some sort on the left hand side of its cases, Fractal Design chose to keep with the quiet design and instead, opted to allow the user decide how they want to use the case. Like the top, the side has a 120mm fan vent pre-cut into the side. Keeping it sealed however, another foam patch is used. Easily removed, it’s only there to keep dust out while not in use.
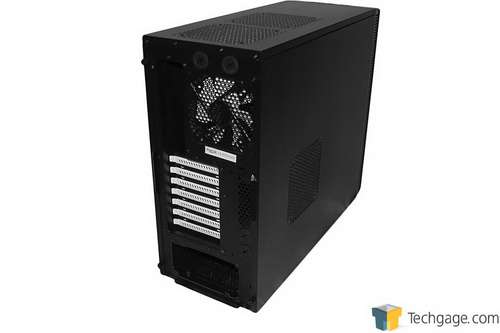
The back of the Define R3 shows us that the case has a PSU-on-bottom design. One nice touch is the white covers for the PCI slots. With slots for airflow, they look good against the all black case. To the right, as well as the top, there is a pair of holes for water kits. Both of which are sealed with rubber grommets.
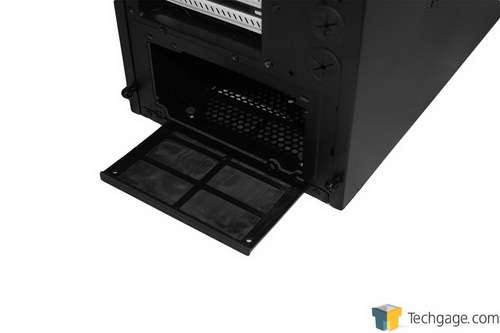
At the bottom of the Define R3 there is another dust filter that can be used to filter the air going into your power supply. Easily removed, you can blow the dust out and slide it back in with minimal effort.
Taking a closer look at the matting used to dampen the noise put out by your hardware, we see that the inside wall of the left side panel is covered with it. We can also see that foam used to cover up the fan vent. It should be mentioned that this covering adds a fair amount of weight to the case and that the right side panel also has the same covering.
It’s time to check out the inside!
Support our efforts! With ad revenue at an all-time low for written websites, we're relying more than ever on reader support to help us continue putting so much effort into this type of content. You can support us by becoming a Patron, or by using our Amazon shopping affiliate links listed through our articles. Thanks for your support!


