- Qualcomm Launches Snapdragon 4 Gen 2 Mobile Platform
- AMD Launches Ryzen PRO 7000 Series Mobile & Desktop Platform
- Intel Launches Sleek Single-Slot Arc Pro A60 Workstation Graphics Card
- NVIDIA Announces Latest Ada Lovelace Additions: GeForce RTX 4060 Ti & RTX 4060
- Maxon Redshift With AMD Radeon GPU Rendering Support Now Available
Iolo System Mechanic 5

Are you the type of person who always wants to keep your PC in top running condition? Of course you are. Iolo promises to help, with their award winning System Mechanic 5. Does it have what it takes to pass our tests?
Page 2 – Registry Cleaner
All this in a program you can download in less than 8MB’s. Nice. There is one little thing I’d like to mention: You can purchase this software in the store and it comes in a nice box presumably with hard copy documentation, or you can purchase it online. If you purchase it online expect to receive it in a mailer sleeve with no hard copy. [Editor note: The way we received the product may differ from yours]. It does include documentation in the form of a fairly comprehensive help file but I would have been a little more pleased to see a PDF of the actual hard copy with some graphics to illustrate the operations you’ll be undertaking when using the software. This isn’t a major ding, it’s just that less savvy users would find the help file confusing and as the old saw says “A picture is worth a thousand words” and seeing what everything does with a diagram to show the more confusing parts would greatly lower the learning curve required for some operations.
That said, there are wizards that bundle several operations into one big operation which is for ease of use. It makes it a more painless single click type of operation. I naturally, being a bit more knowledgeable, opted to go the more hardcore route and pick and choose what I wanted to do so that I could share my results here.
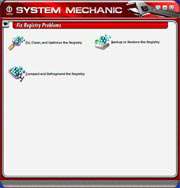
First off is the registry cleaner. I ran this back to back with Reg Cleaner to see how many invalid entries each turned up. Much to my surprise Reg Cleaner yielded 21 invalid entries whereas System Mechanic found 110.. 110! That’s quite a few more, and after backing up my registry with the included interface, I performed the cleaning function and scrubbed those entries out of my registry. I crossed my fingers and rebooted my PC, much to my delight not only did it boot, it actually seems a bit more stable. After my initial success with the first phase I moved on to the memory defragmenter, and this is something that deserves to be seen to be appreciated.
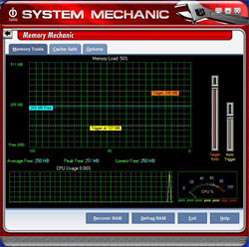
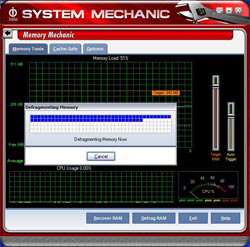
In the first screen shot you’ll notice that I have 250MB’s free out of 512MB’s. In the second screen shot you’ll see that during the defragmenting operation, it’s actually writing the ram to the hard drive in order to rearrange what’s stored in memory into the most compact space possible. What you’ll see in the first below screenshot is that after this takes place you gain back quite a bit of lost memory and not only that, if you’ll notice where the free memory dips you’ll see where I fired up paint to save the screenshot of the optimizing taking place. You’ll notice that when I closed paint the ram was freed right back to the same level as it had been prior to paint being opened. Very nice indeed.
|
|
Support our efforts! With ad revenue at an all-time low for written websites, we're relying more than ever on reader support to help us continue putting so much effort into this type of content. You can support us by becoming a Patron, or by using our Amazon shopping affiliate links listed through our articles. Thanks for your support!


