- Qualcomm Launches Snapdragon 4 Gen 2 Mobile Platform
- AMD Launches Ryzen PRO 7000 Series Mobile & Desktop Platform
- Intel Launches Sleek Single-Slot Arc Pro A60 Workstation Graphics Card
- NVIDIA Announces Latest Ada Lovelace Additions: GeForce RTX 4060 Ti & RTX 4060
- Maxon Redshift With AMD Radeon GPU Rendering Support Now Available
Logitech Harmony 880 Remote
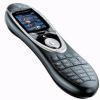
How many remote controls do you have right now? Let’s see, TV, DVD player, PVR, Xbox360, Amp, Converter, and maybe a partially functioning universal that is more problem than solution. I bring you harmony, the Logitech Harmony 880 remote that is.
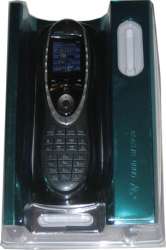
Right out of the box I was impressed with the lightweight feel, ergonomic design and balance of the unit itself. The docking recharge cradle is sleek, small and holds your remote horizontally, and is thankfully only a half-brick power supply. The docking cradle is designed in such a way that you can direct the power cord in the direction from the unit that best suits your setup.
If you get used to placing it in the cradle each night, you’ll always know where it is, and I don’t mean stuck between your sofa cushions. While it may be habit to just leave your remote wherever it may fall, placing it in the cradle is no more of a chore than placing your cordless phone back in its recharger each night.
There is a wonderful tilt sensing ‘wake up’ function that saves on battery power by sleeping when not in use. Speaking of batteries, while you do recharge in the docking cradle even rechargeables wear out over time, and when they do the batteries in the Harmony 880 remote are easily changed out. Stated charge duration is one week, however if you keep in on the cradle at night, it will always be charged and ready.

|
The keys are hard not soft, for a more solid feel and a satisfying ‘click’ but they are close together so operating by feel alone will take time. Some reviewers have faulted the Harmony 880 for its smaller buttons, however many are shaped in such a way that they peak in the middle and can be easily manipulated.
Thankfully the buttons are also backlit, so if you have to look at the remote, you can easily find the button you want in any lighting condition.
The only downside I found to the buttons was their responsiveness, in comparison to my TiVo remote for example, the Harmony 880 remote moves through the menu slower than the original TiVo remote. However I have found this site that walks you through how to set the Inter-Key Delay and Command Repeat to 0, so I’ll have to try that out.
Logitech Harmony 880 Remote Layout
1. USB Connector: Downloads remote configuration from the Harmon Web Site
2. OFF: Turns all the assigned devices off with one button press.
3. HELP: Asks simple questions so that the Harmony remote can troubleshoot when a component is not in the correct state.
4. ACTIVITIES: Press Activities to view a list of activities you have added. Press the screen (LCD) button next to the activity you want and the Harmony remote will set up your entertainment system.
5. COLOR DISPLAY: Shows help, infrared (IR) commands and any available listings.
6. ON-SCREEN BUTTONS: Use the buttons at the side of the screen to select the corresponding command. Use the right arrow button to display more commands.
7. DEVICE: Lists all the devices in the entertainment system on the screen (LCD), and allows you to select and fully control any device individually.
8. MENU BUTTONS: While there is a default setting for the buttons in most activities, you can customize these buttons to send different commands.
9. GUIDE: Provides television program listings on TV screen if you have a device with that feature.
10. MEDIA: In the Watch TV activity, press this button to view favorite channels on the screen.
11. LEFT/RIGHT ARROWS: Navigates between Harmony LCD screens where there are more than eight choices in a given menu.
12. GLOW: Produces backlight glow.
13. IR LEARNING PORT: Includes infrared receiver so remote can learn commands from other remotes.
|
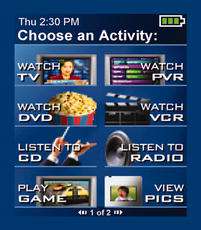
LCD Display is clear and bright, though the activity icons could have been cleaner, and customizable. You can upload your own background images, or find pre-made ones online. Keep the image simple or the text and icons can be difficult to read on a busy background. You can have up to 16 favourite channels appear when you’re in ‘Watch TV’ mode for easier surfing, and this site was gracious enough to provide all the logos for almost all the channels for you to download. You simply assign the icon during the process of programming the favourite channels.
There’s a nice bonus of a customizable slideshow feature, though I can’t really imagine a practical use for it except perhaps as your screensaver when the remote is docked before it powers down.

|
The Harmony 880 Remote’s LCD Displays the following status information.
1. Date and Time
2. Indicator if the USB is attached
3. Indicator when infrared (IR) commands are being sent to devices.
4. Battery indicator (battery’s power)
5. Current screen / Activity Label
6. The number of screens available in a menu and the screen currently displayed.
For a sample of all of the screens you will see, check out the huge (400*4000) image here.
The 880 operates up to 15 devices and supports 255 commands.
The LCD display menu walks you through the first few steps up until you need to install the software. Unlike most universal remotes, the Harmony 880 is actually programmed via your computer (PC or Mac) in a web interface. One thing to note with the web interface is its current incompatibility with FireFox and you may need to temporarily disable security software before the remote can be programmed.
|
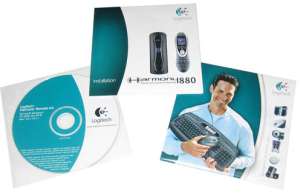
Get your devices’ manufacturers and model numbers written down first for handy access, as you will be asked to provide them. Then install the software and simply use the USB cable provided to hook your remote directly to your computer.
To program your remote, you are walked through a questionnaire that asks you to choose your devices from their list. Believe me, I think everything ever made is on those lists, yes, even your Hypson.
Once you have selected the devices you want to control, you can command the devices one at a time, or, as is more likely to be used, you can assign them to activities, such as Watch DVDs, Play Xbox360, Listen to Music, Watch TV and so on. For each activity, you select from the web interface exactly what each device should be controlling during that activity. For example, if I want to just watch TV, the DVD player should be off, the volume should be controlled by the TV but the channels should be controlled by the PVR. One button sets all this up automatically for each activity. It’s even smart enough to know that my TV takes a bit to ‘warm up’ and that it won’t accept input commands until it’s darn good and ready. The Harmony 880 remote software automatically takes this delay into account and waits the right amount of time to perform the next function.
Once you’ve set up everything, the software then uploads all the relevant codes to your Harmony 880. Changes took between 30 seconds and one minute to upload to the remote. More advanced tweaking requires more effort and may be a little daunting for some, but take it slow and the interface has excellent help options to guide you if you get stuck. I do suggest programming your remote in a room other than the one with all your media devices (or blocking its IR signal), because once you unplug the USB cable, the remote likes to shut everything off to get the equipment into a default state.
Now granted, not every button on every remote is represented on the Harmony 880, but the good news is, there are 8 programmable buttons along the sides of the LCD display that you can assign as you need, for whatever the device requires. You can add multiple pages for these display buttons For example, the “Thumbs Up” and “Thumbs Down” feature of my PVR are not represented, so I can easily assign them to one of the ‘border’ buttons and specify the text to appear in the display. This was the only time I had to actually ‘face’ the two remotes and press the desired button to assign it to the new remote. All in all, painless. I have yet to find anything missing that I cannot just add to the display. Some functions can be substituted for existing buttons, for example, there is a Replay button on the remote that I simply programmed to be the ‘Back 8’ function of my PVR.
Once you have all your ‘activities’ programmed, anyone who’s never used the remote before should be able to pick it up and see your activity buttons, such as ‘watch DVD’, press the corresponding button, and you can be confident the applicable devices will be turned on, the tuners and options will be correctly set and the DVD will start playing.
I give the Logitech Harmony 880 a solid 8.5/10 with deductions for slow responding buttons and the need for more on screen graphical customization such as the ability to create your own screen button images and have the option to have no text, just the icon.
But overall, I’m very impressed with how well this device is presented, how easy it is to setup, and its wide range of uses…I say…as I eye my IR controlled fan curiously, and wonder how much x10 light switches are at the local hardware store.

|
|
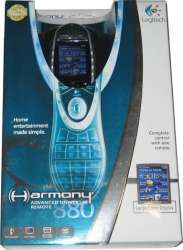
The Logitech® Harmony 880 advanced universal remote control takes the guesswork out of controlling today’s complicated home entertainment systems, especially those with HDTVs and DVRs. With simple one-touch activity controls, the Harmony 880 remote reflects how people actually experience entertainment. It’s easy for the entire family ‘ and even the babysitter ‘ to use. With an intuitive Web interface and USB connection, it’s also easy to set up and update. The Harmony 880 remote can control any device that has an infrared receiver. Its color LCD screen can be customized to personal preferences, and it’s rechargeable ‘ no more changing batteries. No more juggling multiple remote controls ‘ the Harmony 880 remote can do it all.
Price
$249.95
In the box
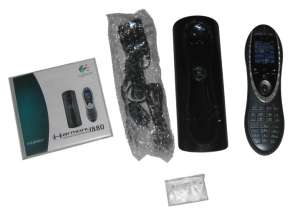
The Harmony 880 Advanced Universal Remote Control; recharger station; mini-USB cable; software CD; Installation guide; AC power adapter for charging station Compatibility Windows XP, Me, 2000, 98SE; Mac OS 10.2 and above.
- Product Specifications
- 2 MB flash memory
- USB communication
- Hardware: Color 64K LCD screen LCD 84 x 48 pixels*, 53 buttons, Infrared sensor, USB communication.
- Power: Rechargeable Lithium-ion batteries; included charging platform
- Dimensions: 8.1x 2.3 x 1.3 inches
- Weight: 5.8 oz
*84×48 is the specified LCD resolution in the manual, however the resolution is actually 128×160
Warranty
Logitech offers the following warranty for new product purchased directly from Logitech, or from a Logitech Harmony Authorized Dealer (with proof of purchase): A one-year repair/exchange warranty for factory assembly defects only, not normal wear and tear over time (including UV light), acts of nature (rain, animals as examples), buyer’s remorse, commercial or institutional use, or any user mishap or misuse.
- System Requirements
- Microsoft Windows 98SE/Me/2000/XP operating system
- USB plug-and-play support
- 10 MB free hard drive space
- CD Rom drive
- Internet connection (dial-up, cable, DSL, LAN, etc.)
- Mac with USB plug-and-play support
- Mac OS X 10.2 or later operating system
- 10 MB free hard drive space
- CD Rom drive
- Internet connection (dial-up, cable, DSL, LAN, etc.)
The minimum recommended Windows’ system configuration is:
The minimum recommended Macintosh system configuration is:
Support our efforts! With ad revenue at an all-time low for written websites, we're relying more than ever on reader support to help us continue putting so much effort into this type of content. You can support us by becoming a Patron, or by using our Amazon shopping affiliate links listed through our articles. Thanks for your support!


