- Qualcomm Launches Snapdragon 4 Gen 2 Mobile Platform
- AMD Launches Ryzen PRO 7000 Series Mobile & Desktop Platform
- Intel Launches Sleek Single-Slot Arc Pro A60 Workstation Graphics Card
- NVIDIA Announces Latest Ada Lovelace Additions: GeForce RTX 4060 Ti & RTX 4060
- Maxon Redshift With AMD Radeon GPU Rendering Support Now Available
Social & RSS Feeds
Latest Videos


Latest News
Maxtor OneTouch 4 Mini 320GB
by Rory Buszka on July 29, 2008 in Storage
Maxtor’s diminutive OneTouch 4 Mini pushes the capacity envelope again, packing a positively huge 320 gigabytes of storage into a tiny enclosure. It’s also one of the sexiest mini external drives we’ve seen. Is the OneTouch 4 Mini 320GB a portable storage slam-dunk?
Page 2 – Software Bundle
Maxtor’s OneTouch 4 Mini drive differentiates itself from its competition by a large, illuminated button on the drive’s front edge, which launches a variety of user-defined backup routines with a single press. However, to make this happen, you’ll need to make sure the drive’s included software bundle is installed on your PC. Here’s a brief overview of the software’s features.

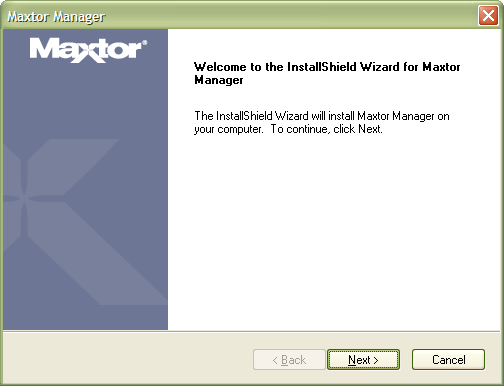
Upon connecting the drive for the first time, you’ll be allowed to install the drive’s software. The autorun application also allows you to access an electronic version of the drive’s instruction manual, or register the drive with Maxtor. This is just a good idea – it helps streamline your service experience in the case that you need to send your drive in for warranty repair or replacement.
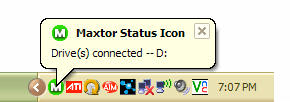
After restarting your system at the conclusion of the software installer, you’ll see an “M” icon in your system tray. This icon indicates the status of the drive. If an error occurred during the last scheduled backup run, a red icon will be displayed. But if everything’s fine, the icon will be green, like shown here. You can also access the Maxtor Manager software by double-clicking or right-clicking the icon. If you mouse over the icon, a balloon will pop up, displaying the connected OneTouch devices, which can become annoying sometimes, but the notification can’t be disabled.
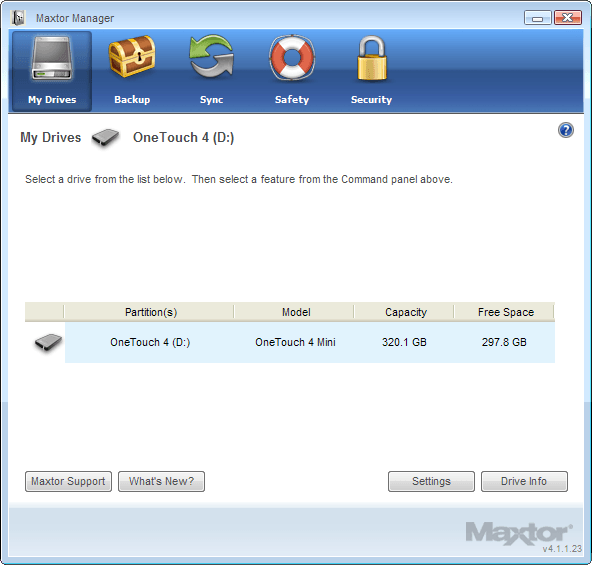
The main screen of the Maxtor Manager software provides access to the various backup and file synchronization functionality that can be mapped to the OneTouch button. The main page also displays all Maxtor OneTouch drives attached to the system and provides access to the settings pages. The list only lists Maxtor OneTouch devices attached to the system; a Seagate FreeAgent Pro drive connected to the system was not listed, even though both drives are made by Seagate, and the software for both drives is similar.
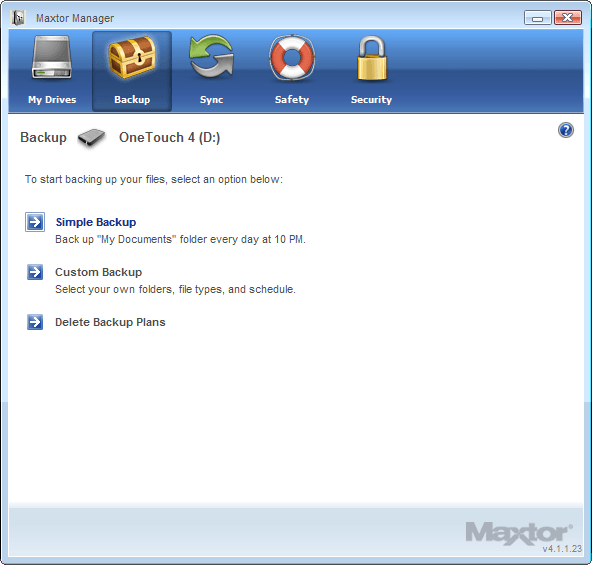
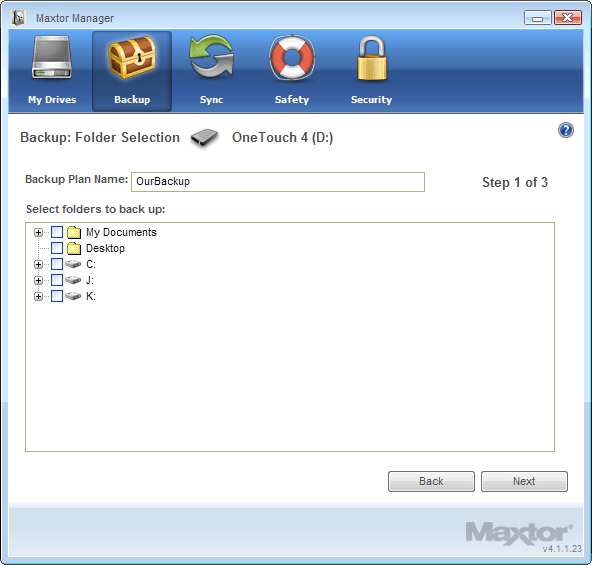
On the “Backup” page of the control program, you can set up a variety of different backup schemes. The “Simple Backup” option backup simply schedules a daily backup of your My Documents folder, while the “Custom Backup” lets you choose folders and individual files to back up, as well as specific files and folders to exclude from the backup plan.
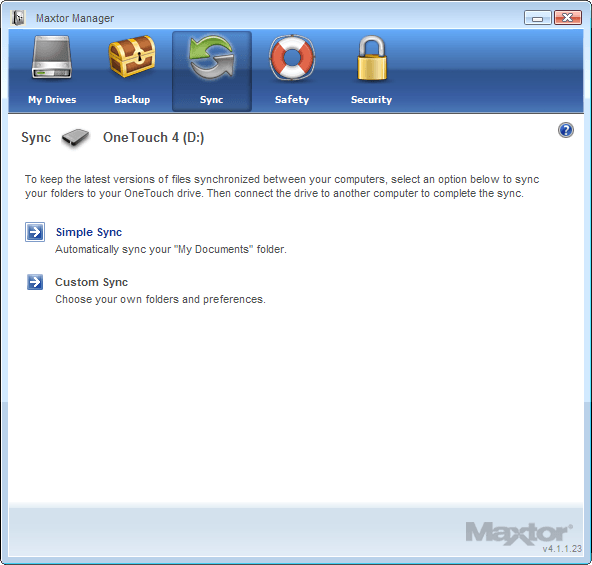
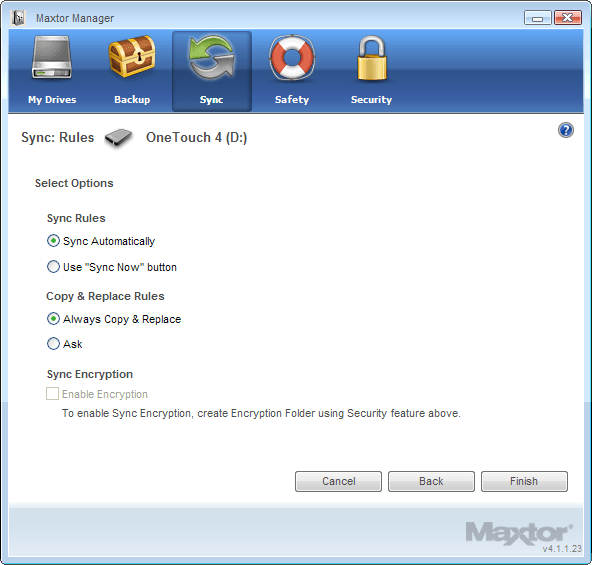
The “Sync” page of the control program lets you set up your drive to automatically synchronize files between your host PC and your OneTouch drive. This makes it simple to keep up-to-date versions of your files on the OneTouch drive, without needing to keep the drive plugged into your PC. As before, you can select specific files and folders to include or exclude.
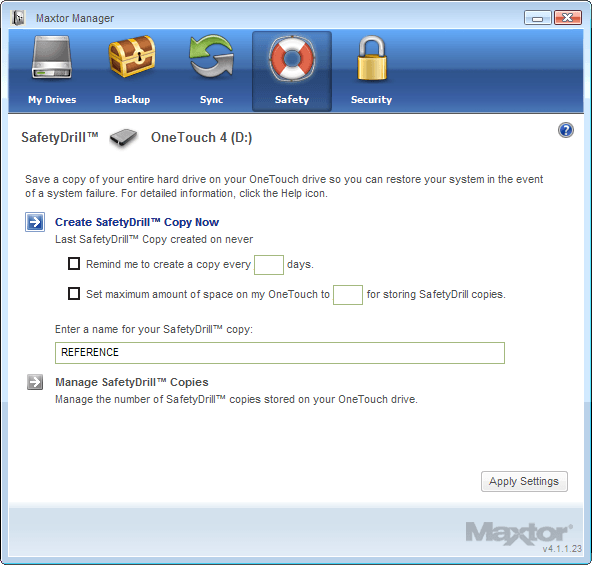
The Maxtor Manager software provided with the OneTouch 4 Mini includes a function called “SafetyDrill”, which uses a preset amount of space on the drive to copy your entire machine’s hard drive over to the OneTouch drive. Of course, if your PC has a hard drive larger than the capacity of the OneTouch Mini, you won’t be able to copy your entire hard drive to the OneTouch drive, which may limit its usefulness for many well-equipped desktop machines (where hard drives in excess of 500GB are common).
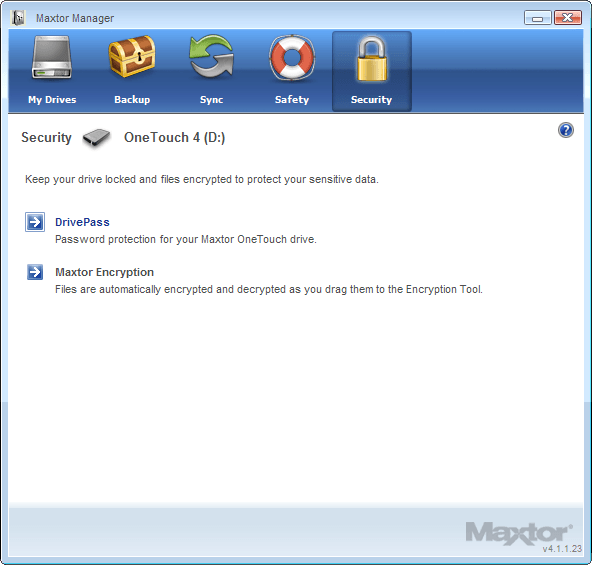
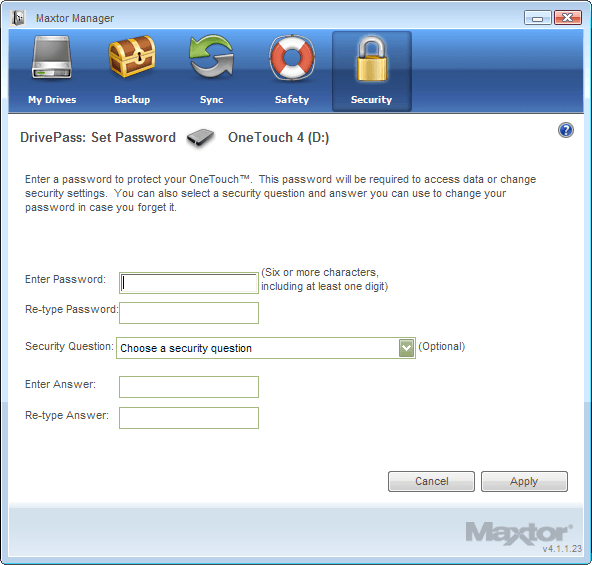
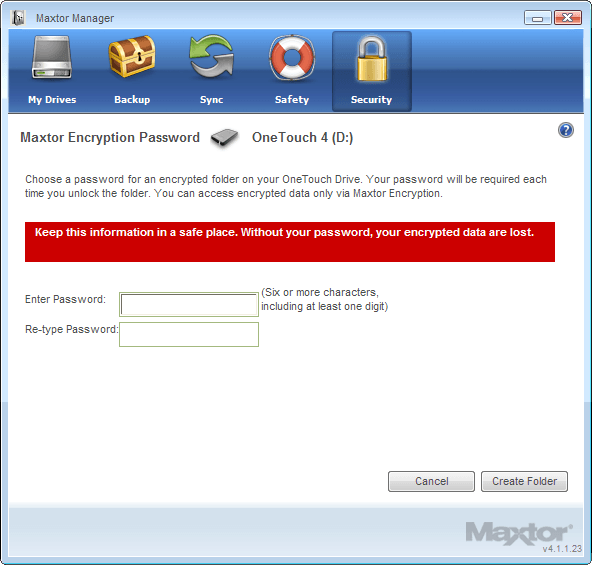
The Maxtor Manager software provides two options for securing the data on the OneTouch 4 Mini. DrivePass sets a password over the entire drive, which must be entered before the drive’s data will be available to the PC. Maxtor Encryption creates a hidden, encrypted folder on the drive that can only be decrypted using the Maxtor Encryption Tool (also copied to the drive), using a password you set. This doesn’t go quite as far as the new Maxtor BlackArmor drive’s full-drive, hardware-based AES encryption, but it’s certainly enough to keep things like financial data secure.
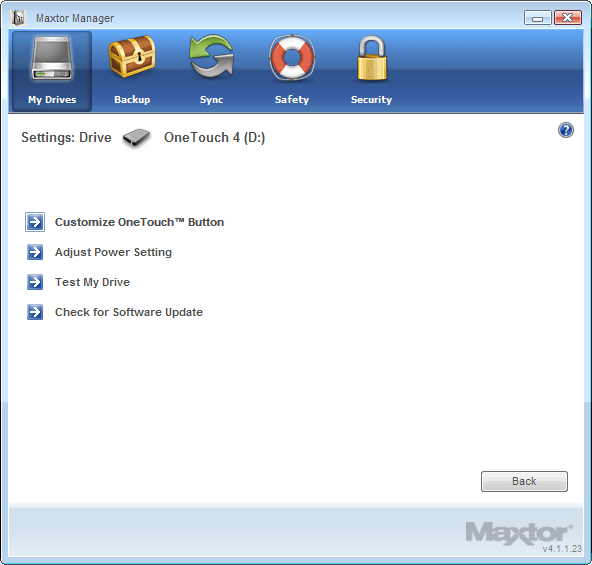
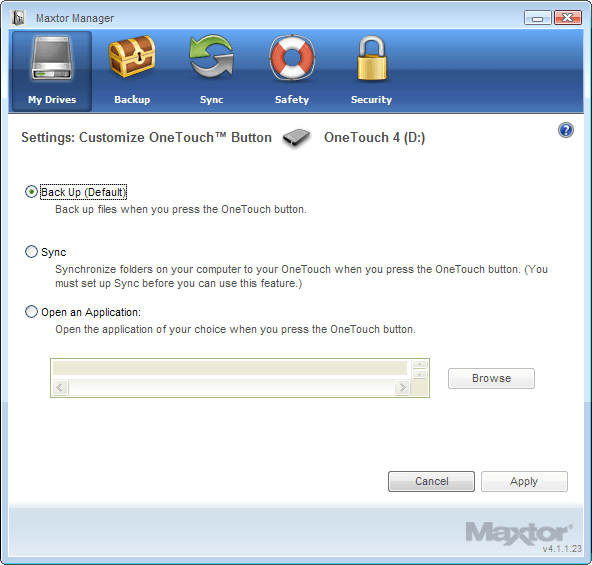
The settings page for the Maxtor OneTouch drive allows you to customize the function activated by the OneTouch button on the front of the drive, as well as adjust the time interval before the drive spins down automatically to conserve power and extend the drive’s life. The OneTouch button can be configured to automatically execute a backup plan, or synchronize the files you’ve selected on the “Sync” page of the program. Alternately, you can configure the button to launch an application on either the drive or the host PC.
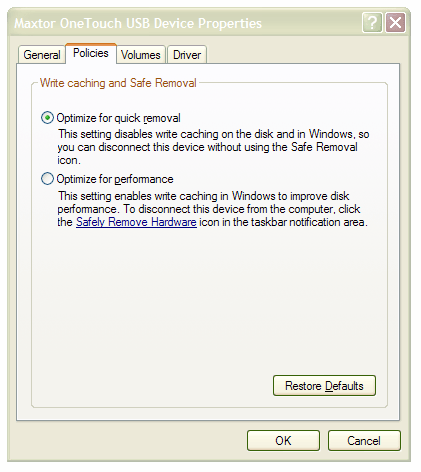
One final note: Windows automatically enables write caching on external hard drives, identifying them as fixed disks instead of external devices. Write caching improves hard drive performance by delaying certain ‘write’ operations and executing them during idle time. However, this can cause data corruption if the drive is unplugged before the “Safely Remove Hardware” command is chosen.
To change this, right-click on the external hard drive icon and select “Properties”. Under the “Hardware” tab, select the external drive you wish to reconfigure, and click the “Properties” button at the bottom of the dialog. This will bring up the Device Manager page for that drive. In the dialog that appears, choose the “Policies” tab, and select the “Optimize for Quick Removal” option. This will only have a slight impact on performance, and only if you launch storage-intensive applications directly from the drive. (Note: for our performance testing, write caching was enabled.)
Now that we’ve taken a detailed look at the included software package, it’s on to our performance testing and verdict.

Support our efforts! With ad revenue at an all-time low for written websites, we're relying more than ever on reader support to help us continue putting so much effort into this type of content. You can support us by becoming a Patron, or by using our Amazon shopping affiliate links listed through our articles. Thanks for your support!