- Qualcomm Launches Snapdragon 4 Gen 2 Mobile Platform
- AMD Launches Ryzen PRO 7000 Series Mobile & Desktop Platform
- Intel Launches Sleek Single-Slot Arc Pro A60 Workstation Graphics Card
- NVIDIA Announces Latest Ada Lovelace Additions: GeForce RTX 4060 Ti & RTX 4060
- Maxon Redshift With AMD Radeon GPU Rendering Support Now Available
Social & RSS Feeds
Latest Videos


Latest News
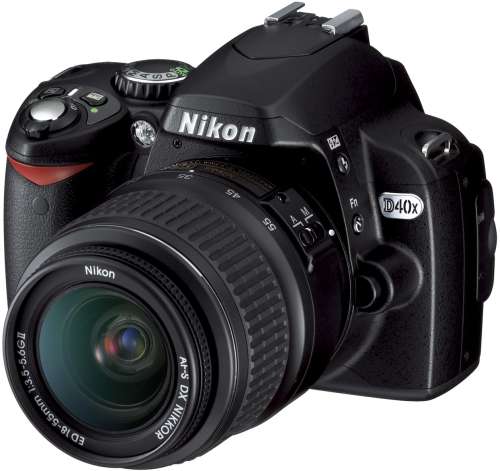
Nikon D40x 10.2MP Digital-SLR Camera
by Rob Williams on July 25, 2007 in Miscellaneous
Up until recently, Nikon’s line-up has had many gaps. This past March though, they released their P5000 advanced point-and-shoot camera alongside their D40x D-SLR. Today we are taking a look at the latter, which turns out to be a fantastic offering for those looking to take the plunge into high-quality photography.
Page 2 – Closer Look
How about a few more fun stats before we jump in on a tour of the camera? First, the power-on time is 0.18s, which is likely quicker than you’d be able to move your finger from the power to push the shutter-release button. The camera offers ISO 100 – 1600, plus HI-1 (equiv. to ISO 3200). The outputted 10.2MP images are at 3872×2592 resolution, perfect for printing out that billboard you’ve always been dreaming of.
According to Nikon, the battery should last up to 520 shots using JPEG fine, although I didn’t perform any tests to see if that was valid. I do believe it to be completely true, however, as the entire time I used the camera while reviewing it, I only had to charge it once and that was because I received it half-depleted. The camera also offers Nikon’s own 3D color matrix metering II, an improved processing engine and better auto white balance.
Equipped also is i-TTL, which produces smart flash, for those who don’t want to experiment with their speedlight settings. The camera will communicate with your speedlight and set the appropriate settings (hopefully), so that when you snap the photo, it should have an acceptable result.
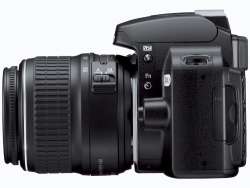
From the profile view below, you can see how small that lens really is. Small, but effective. The camera body design is similar to all other Nikon D-SLRs and is a proven formula. It fits like a glove, which is important for those long hikes. The mode dial is on the right-side of the camera, beside the shutter release and power button. This is different than the higher-end D-SLRs, where it’s located on the left. This is all due to the fact that the camera body is smaller then the others, so they had to get creative.
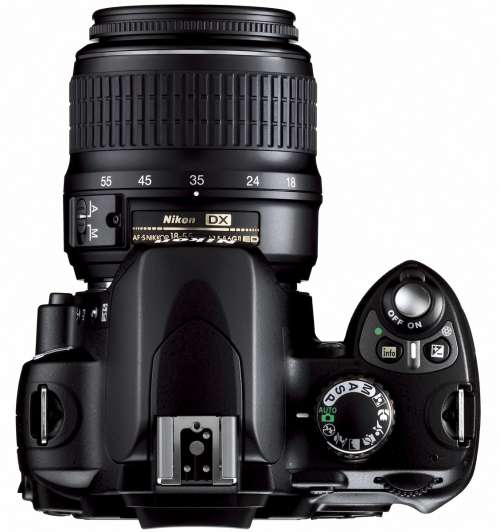
Top-down, you can see the large array of buttons available to you. First is the mode dial which offers all of the usual options, such as Programmed Auto, Shutter-Priority, Aperture Priority, Manual, Night Portrait, Close-Up, Sports, Child, Landscape, Portrait, Auto (Flash-Off) and of course, Auto. I am unsure why there is both an Auto and Auto Flash-Off, as you can switch the flash off while using Auto. Regardless, the option is there should you need it.
Also here is the shutter-release button, which is surrounded by the power on/off toggle. Below that is Info, which triggers information on the LED screen. Because of the smaller build, Nikon had to cut the small LED screen that’s found on the larger models. Instead, all of the information you need is found on the screen. We will get more into this in a few minutes. Beside the info button is the exposure compensation which doubles as the aperture button in Manual mode.
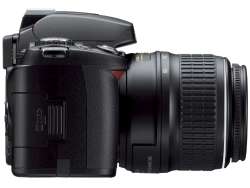
On the left-side of the camera you will find the door for the video-connector, camera hard-reset switch and also the USB connector to off-load your pictures onto your computer. Also here, closer to the lens, is the flash mode and self-timer button which can be configured for another action. Lower, there is the lens-release button.
On the opposite end is the door for the memory-slot… and that’s it. Not pictured is the underbelly of the camera, which has the tripod mount and battery chamber. All of the fun happens in the back. To the right of the 2.5″ LCD is the directional button, used in the menus and when viewing images. The “OK” button is self-explanatory, as is the Delete button.
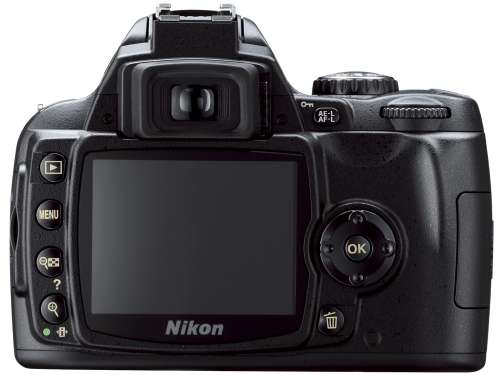
At the left, from top to bottom is the Playback, Menu, Thumbnail and Zoom buttons. Some of these buttons will vary in function depending on what you are doing. Lastly, the eyepiece is found at the top, and the speedlight mount is found directly above it.
|
|

Support our efforts! With ad revenue at an all-time low for written websites, we're relying more than ever on reader support to help us continue putting so much effort into this type of content. You can support us by becoming a Patron, or by using our Amazon shopping affiliate links listed through our articles. Thanks for your support!

Rob Williams
Rob founded Techgage in 2005 to be an 'Advocate of the consumer', focusing on fair reviews and keeping people apprised of news in the tech world. Catering to both enthusiasts and businesses alike; from desktop gaming to professional workstations, and all the supporting software.


