- Qualcomm Launches Snapdragon 4 Gen 2 Mobile Platform
- AMD Launches Ryzen PRO 7000 Series Mobile & Desktop Platform
- Intel Launches Sleek Single-Slot Arc Pro A60 Workstation Graphics Card
- NVIDIA Announces Latest Ada Lovelace Additions: GeForce RTX 4060 Ti & RTX 4060
- Maxon Redshift With AMD Radeon GPU Rendering Support Now Available
NZXT HAVIK 140 CPU Cooler Review
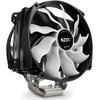
With NZXT having expanded its product portfolio on multiple occasions throughout the years, the introduction of its first-ever CPU cooler, HAVIK 140, almost didn’t even come as a surprise. But, how good is it? Well, it’s big, has dual fans, aims for silence, and looks aesthetically-pleasing, so it holds a good chance of impressing.
Page 2 – Installation & Testing
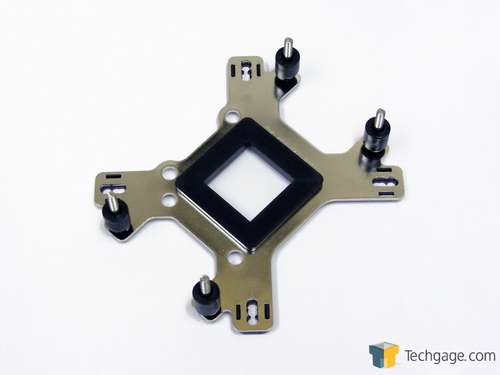
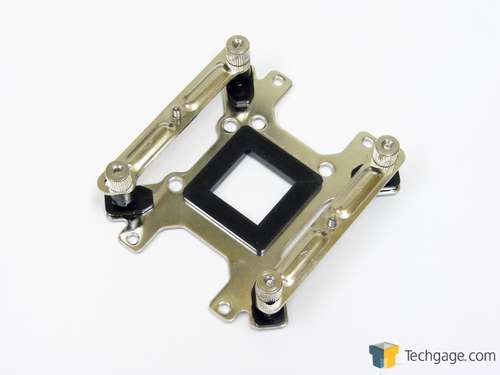
AMD users will have a few extra steps once the stock mounts have been removed from the motherboard. The back plate is flipped so that the “AMD side” is facing up before pressing a plastic spacer that goes into the center hole. A thin, white insulator pad is placed in each corner with the hole placed directly over the hole in the back plate where the long bolts thread through (but were not used during the mock up since our test system is Intel-based). The bolts are then threaded through the now open holes in the motherboard and a plastic spacer is slid over each one.
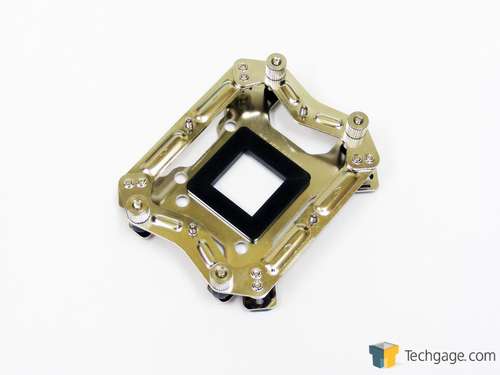
Next, the Intel and AMD clips need to be assembled to form a frame by using two small screws in each corner. The assembled clips then thread over the bolts and are secured in place by metal nuts. Each nut should be tightened the same amount of turns to ensure all corners are at the same height for proper contact between the cooler and CPU.
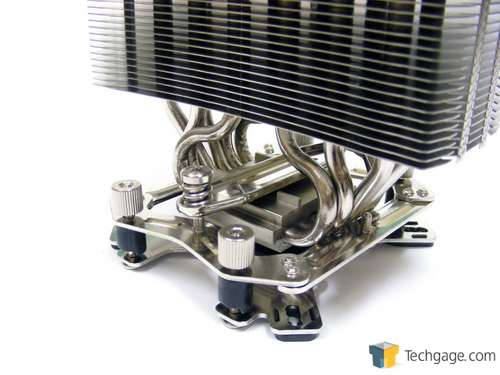
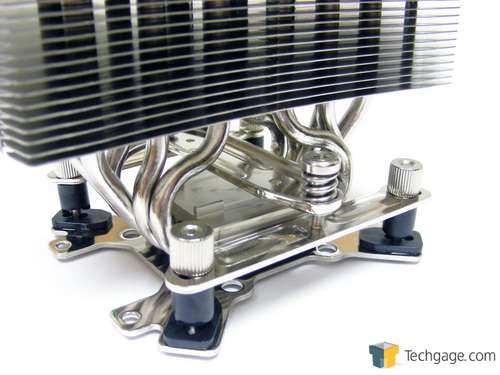
Before the cooler is moved into position, some thermal interface material (TIM) is applied to the CPU. With the cooler placed on top of the CPU the last piece of the puzzle is to slip the crossbar between the heatpipes and secure it to the AMD clips by tightening the spring-loaded screws.
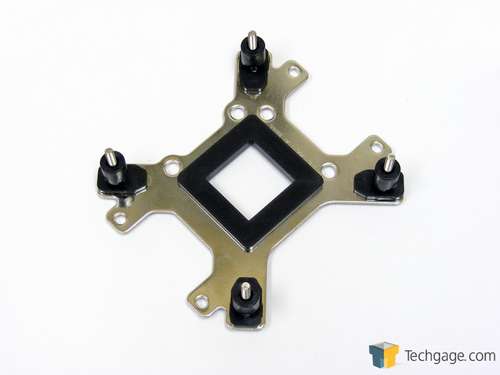
Intel users start with the back plate flipped over so that the “Intel side” is facing up. The same long bolts thread up through one of three holes in each corner depending on the socket of the motherboard being used. The bolts then thread through the holes in said motherboard where the plastic spacers are thread over them.
This time around there is no frame needed, so the Intel clips simply thread over the bolts in one of three positions that again depends on the socket. This all held in place by the metal nuts that thread over the bolts, much like in the AMD installation.
Once the thermal interface material is applied to the CPU, the crossbar is secured to to the Intel clip. I wasn’t sure exactly how much to tighten the spring-loaded screws but ended up going as far as they would allow without any issues. All in all, installation was a breeze and not as scary as the many pieces would lead our readers to believe.
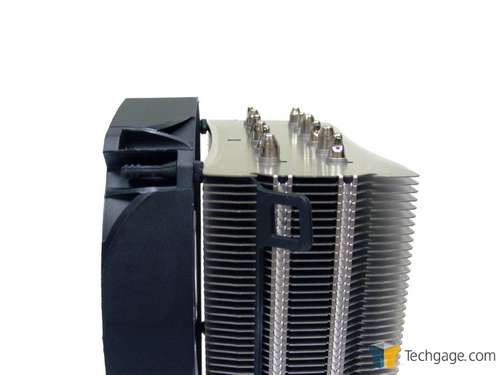
Fan installation on the HAVIK 140 will likely be different than what most are used to and this is both good and bad. The process starts off with inserting the mounting pegs of the rubber fasteners through the corners of each fan to form a loop. The fan is put into place and the fastener is stretched so it becomes thin enough to slip between the top and bottom two fins to the point where it can be tucked into the groove that runs from top to bottom on the side. This is where I started to fumble the heatsink a little so I found the installation method a bit clunky the first few times due to the constant resistance from the fasteners.
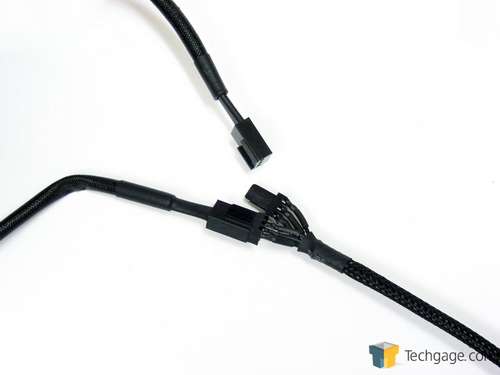
With the fans attached and the cooler installed, the last thing to do is to connect the fans to the sleeved Y-cable that allows both to be powered by a single header directly from the motherboard. Two 3-pin to 4-pin Molex adapters could also be used if a spare header on the motherboard is not available.
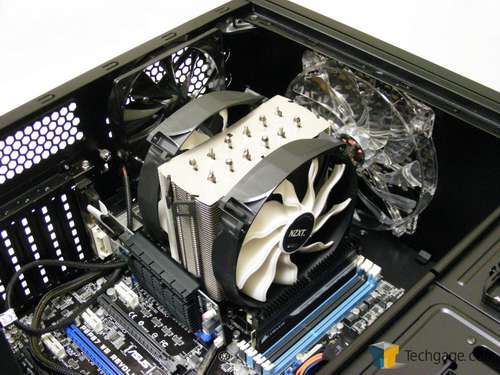
Regardless of the platform, users can expect to see something that looks like this. This cooler takes up a lot of real estate and blocks off the first DIMM slot on our test motherboard. If I recall correctly, AMD AM3+ users will have their DIMM slots even closer to the socket so this may cause additional issues. Even standard height memory modules with no heatsink will run into clearance issues if installed into the slot closest to the cooler so be sure to do some homework on the optimal memory configuration for the motherboard being used.
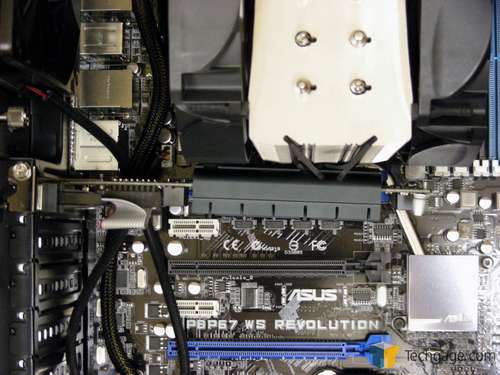
Another problem was that the cooler is so wide that it nearly made the top PCI Express slot inaccessible. Luckily our test system has a ton of spare slots but for those who only have one and it is the top most slot, this may not work for you. The GPU could be installed but there was more pressure being put on the card and the slot than I would have liked. In fact, I was so wary of the strain that as soon as the photos were taken, the card was moved down to another slot.
Testing
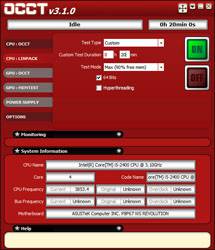
Stock CPU settings were obtained by setting the AI Tweaker option within the BIOS to Auto. and the maximum stable overclock frequency of 3.85GHz was obtained after setting the base clock to 107 and the multiplier to 36. Our locked CPU was able to do this on stock voltage so the vcore was raised to 1.25V to generate additional heat.
All of our testing is performed in a near steady 20°C ambient environment with readings taken before and after with a standard room thermometer. AIDA64 Extreme Engineer is used for monitoring and recording all system temperatures throughout the testing process. All fans are run at 100% during testing and all coolers have any pre-applied thermal interface material replaced with Zalman’s ZM-STG1 Super Thermal Grease due its ease of application that virtually eliminates the possibility of skewed temperatures due to poor surface contact.
Windows is allowed to sit idle for 10 minutes after startup to ensure all services are loaded before recording the idle CPU temperature. CPU load temperatures are generated by performing a 20 minute run of OCCT LINPACK using 90% of the available memory.
The components used for testing are:
|
Component
|
Techgage Test System
|
| Processor |
Intel Core i5-2400 – Quad-Core (3.10Ghz)
|
| Motherboard |
Asus P8P67 WS Revolution – P67-based
|
| Memory |
Corsair Dominator 1x2GB DDR3-1600 7-8-7-20-2T
|
| Graphics |
AMD Radeon 5450
|
| Audio |
On-Board Audio
|
| Storage |
Kingston/Intel SSDNow M Series 80GB SATA II SSD
|
| Power Supply |
Corsair HX650 650W
|
| Chassis |
Thermaltake Armor A90 Mid-Tower
|
| CPU Cooling |
Corsair H50
Corsair H60 Corsair H70 NZXT Havik 140 Zalman CNPS7X |
| Et cetera |
Windows 7 Ultimate 64-bit
|
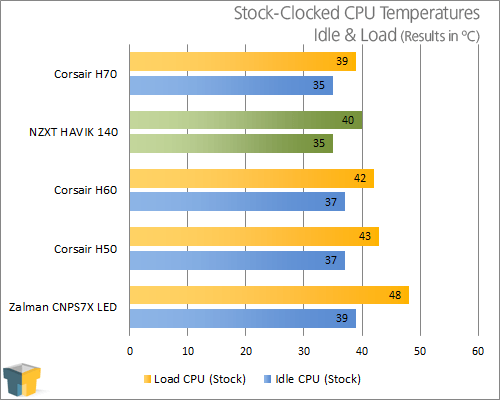
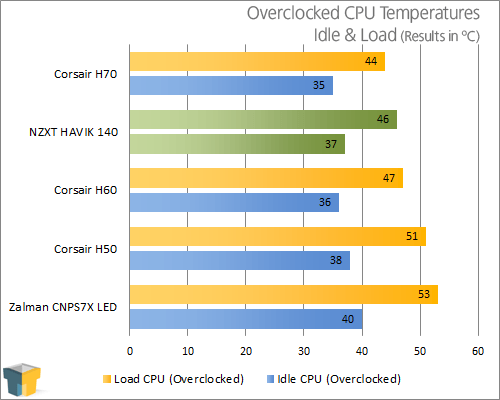
If I didn’t know as much as I do about NZXT’s line up of products I would think that the company has been releasing coolers for years. These results are exceptional for a first attempt and not far off of the current king of the cooler hill in our database, the Corsair H70. Coming up only a couple of degrees short of a liquid cooler with an overclocked CPU shows that there is still plenty of life left in the air cooler market, although it seems as if the footprint needs to become bigger and bigger in order to keep up.
From a sound perspective the HAVIK 140 is very quiet. Thanks to the use of 140mm fans there is a significant amount of air moved while keeping the revolutions per minute low along with the extra sound added to the system. I cannot vouch for the fan blade design increasing the amount of air that is moved but this is easily one of the quietest coolers I have used. It’s not on par with the CNPS7X but then again that’s aimed at a different market segment.
It all boils down to great cooling performance and low noise but the draw backs need to be taken into account when deciding to buy one or leave it on the shelf.
Support our efforts! With ad revenue at an all-time low for written websites, we're relying more than ever on reader support to help us continue putting so much effort into this type of content. You can support us by becoming a Patron, or by using our Amazon shopping affiliate links listed through our articles. Thanks for your support!


