- Qualcomm Launches Snapdragon 4 Gen 2 Mobile Platform
- AMD Launches Ryzen PRO 7000 Series Mobile & Desktop Platform
- Intel Launches Sleek Single-Slot Arc Pro A60 Workstation Graphics Card
- NVIDIA Announces Latest Ada Lovelace Additions: GeForce RTX 4060 Ti & RTX 4060
- Maxon Redshift With AMD Radeon GPU Rendering Support Now Available
NZXT M59 Mid-Tower
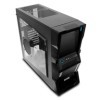
The value in PC components today is fantastic, with the chassis being no exception. With its M59 mid-tower chassis, NZXT proves that value doesn’t have to mean cheap, as this one is packed. It features a cool design, LED lighting, features usually only seen on higher-end models, and of course, a $59.99 USD price-tag.
Page 1 – Introduction
Perhaps the most difficult item to up-sell when designing a computer is the chassis. When you ask about processors and graphics cards, the sky is often the limit, while the venerable case is often delegated to the cheapest one possible. Even worse is the far-too-common mentality that they are all the same. Time and time again I hear this and I could not disagree more. What is under the skin is quite often far more important than physical beauty.
I have had the pleasure of reviewing many different styles and brands of computer cases. Each company puts their unique spin on their designs and overall functionality. No two brands go for the same set of qualities, which in turn gives us a large range of choices. High-end brands stick to high-end finishes and accessories, while the more budget minded companies try to pack as much bang for the buck into their products. Just when you think they are going to run out of ideas, you are again surprised or even amazed at the latest and greatest releases.
NZXT was founded with the enthusiast squarely in their crosshairs. Since 2004 they have been designing and building products with this group in mind and they have done very well indeed. After having reviewed some of their many products, they have proven to put out quality merchandise at a cost that is hard to beat. Their commitment to quality and their desire to please shows just how dedicated they are to this role. Their strong presence in the gaming market has definitely earned them a solid reputation for quality at a competitive price.
Up for our reviewing pleasure today is the M59 Classic series chassis. Coming it at a very strong $59.99 US, there is a lot to be said in terms of value per dollar. Featuring an all black interior as well as a highly versatile cooling arrangement, there is no doubt NZXT has done their homework. In this price range we often see key features overlooked as well as less-than-stellar performance. Quantity, not quality, is too common when comparing models in this price-range. Let’s take a closer look and see just how well the M59 stands up against the rest of the pack.
Closer Look
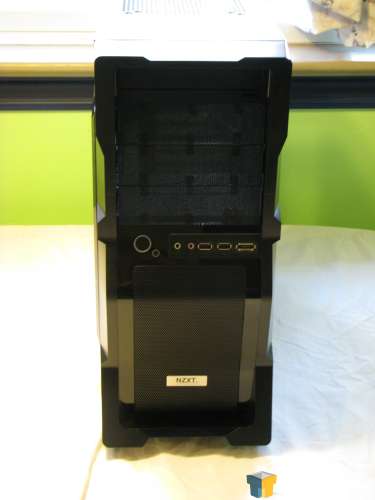
The M59 arrived in a customary silk-screened box with all the ingredients listed as well as high-quality pictures. The chassis itself was wrapped in protective plastic and the foam encasings were solid and did their job well against the brutes at UPS who never seem to tire from testing protective packaging materials to the fullest. Once unwrapped and on my table I got my first impression and I have to say it was a very good one indeed. Paint finish and quality is excellent and overall fit is very good as well. The gaps in the various panels are straight and true. Most of the front area is vented with mesh to allow for good airflow characteristics.
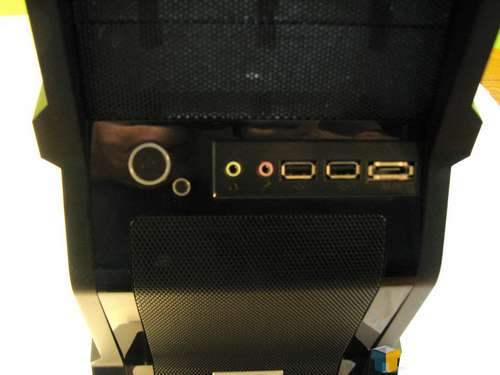
The I/O panel is situated roughly in the middle of the front panel. From left to right we have the power button, reset button, headphone/microphone jacks, dual USB ports and an eSATA port. There is a decent amount of spacing between the USB ports so there should be no issues when using wider-than-standard USB devices.
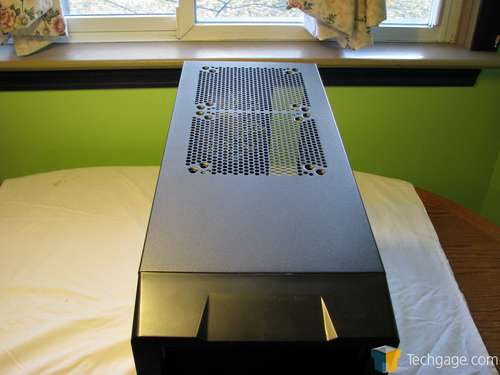
The top panel is somewhat plain but does sport dual fan openings which can house dual 120mm or even dual 140mm fans. This arrangement opens up quite a few different cooling possibilities including the ability to mount a 120.2/140.2 water cooling radiator. Even with no included top fans, the grills allow for heat to escape with its natural desire to flow upwards. I personally always desire the top panel to be at the minimum vented and making it fan friendly is just that much better for us all.
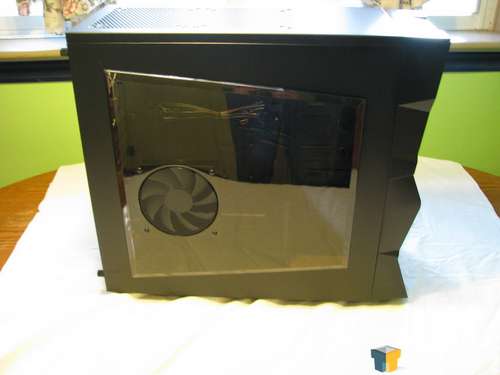
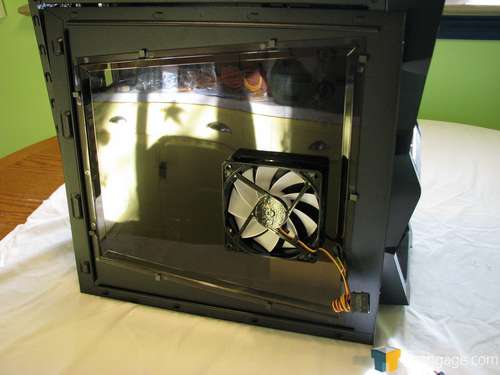
The left side panel incorporates a very large tinted window. I am also happy to report they have included a blue LED 120mm intake fan as well hovering over the VGA area of the motherboard. This is one area that can never have too much fresh air being drawn through it. Many times there is neither a fan nor a grill placed in the side window especially in units of this price range.
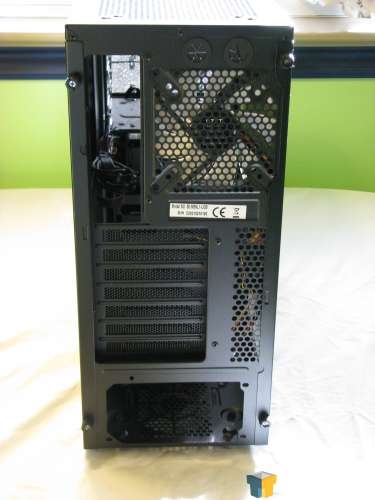
The backside also shows off more extensive use of grilling. All the PCI slot covers as well as the area above them are grilled. The rear exhaust fan can support 80mm, 92mm and the included 120mm fan. Above the intake fan are dual pre-drilled holes with grommets for external water cooling lines to run through. The power supply is delegated to the bottom where it can also draw in fresh outside air in. Both side panels are affixed with thumbscrews making it a snap to get them off for any service needs.
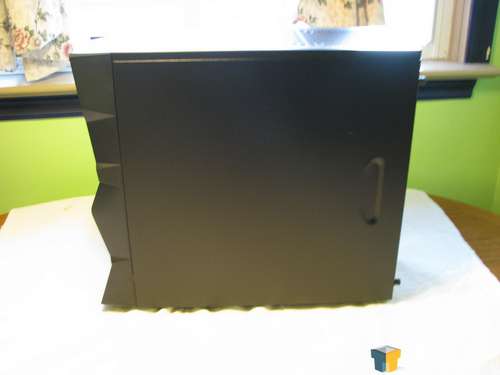
The right side panel is a plain affair with the standard handle indent stamped into it. It is worth noting that the fit is excellent and the seams were straight and true. As with the left panel, all edges are double rolled for strength and rigidity. I found nearly no flex in it when removed as well.
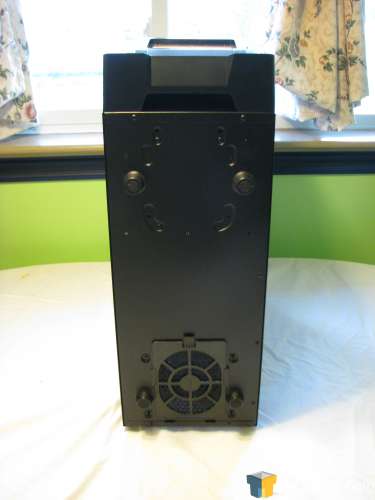
On to the belly of the beast. Down below, we find the filtered venting for the power supply and oversized plastic feet which are tipped with rubber for traction. Many times I have seen standard sized feet down here even with the power supply trying to intake fresh air, so it is another little detail that has been properly addressed. Up towards the front we see there is an additional slot for the front fan (not included) to get even more airflow from the bottom as well.
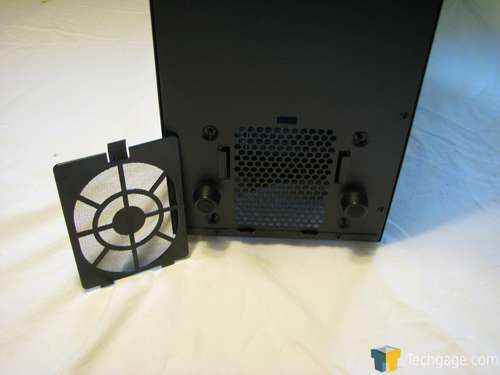
Taking a closer look at the power supply intake we see just how simple it is to remove the filter for cleaning. A quick push of the tab and the filter can be slid forward for easy removal. You also get a better look at the feet and just how large they are coming in at just over 5/8 of an inch in size.
I wanted to also showcase the fan used on the side panel. I was delighted to see that instead of the usual loud 6-bladed type fans found in this price-range that instead we are given a 9-bladed turbine style fan. Add to that the blue LED lighting and the value is remarkable. Both included fans are wired for not only 4-pin Molex use but also 3-pin motherboard headers.
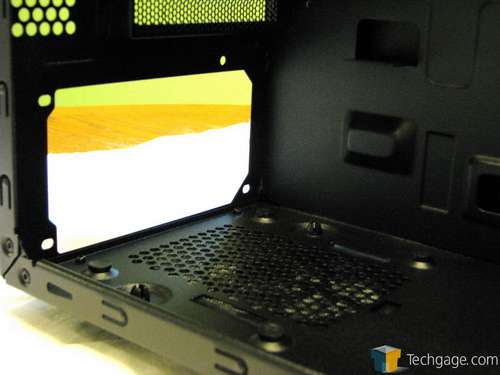
Looking inside we start out examining the power supply area. The grill area is plenty large for even the biggest power supplies. I also like the four rubber tipped supports that are pressed into the floor as well which will not only support the power supply but also help absorb and extra vibration and noise that could occur.
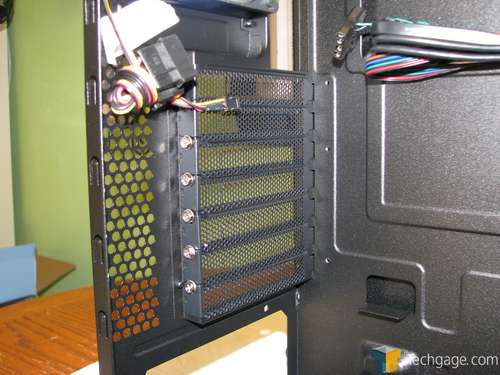
Up above we get a better look at the PCI slot area and just how well they are vented. This may not seem that important but be rest assured this is a zone that can hold in hot air against your graphics cards as well as any other expansion cards you may require.
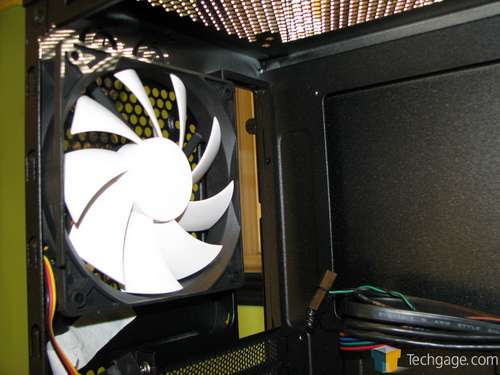
Up top we see the same style fan is used as the side panel. These fans flow very well and are very quiet. I have seen even high-end cases using a cheaper and far louder design. You also get a glimpse into the venting of the top panel as well. One cannot help but get an airy open feeling when looking inside and we all know that will equate into good cooling ability.
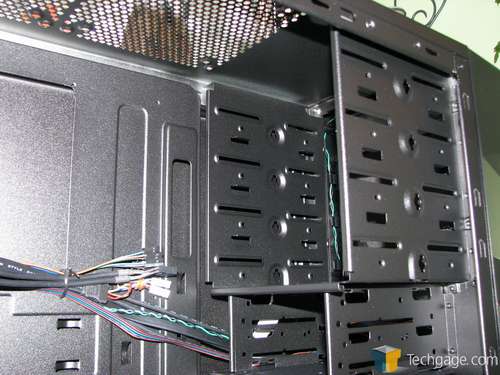
The ODD area consists of four slots for your ODD needs. There is plenty of room for drives and any other accessories designed to fit into this area. With the twist of the included thumbscrews installation is a snap. NZXT also included an easy to use front panel that fits in front of pretty much any CD/DVD drive so you don’t need to worry if your current drive is black. Here again is a feature that is almost unheard of on a mid-range chassis.
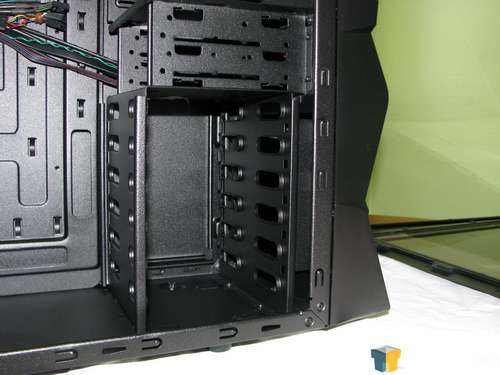
When it comes to storage there is room for up to seven hard drives to be mounted internally. Five can be quick mounted with tool-less rails while two more can be hard mounted between above. There is no provision for mounting any 3 1/2″ devices externally so you would need to acquire the proper adapter for one of the 5 1/4″ bays to use such a device. Considering there is little need for the old floppy drive I feel this is insignificant in the grand scheme of things.
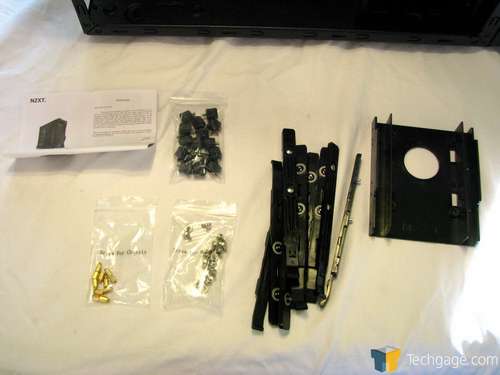
While the included accessories are somewhat on the lean side, we do get everything needed for the installation of your gear. A quick install guide, thumbscrews for the four ODD bays, motherboard standoffs/screws, tool-less rails for hard drives as well as an adapter that gives you the ability to mount dual 2.5″ drives into a single 3.5″ drive space.
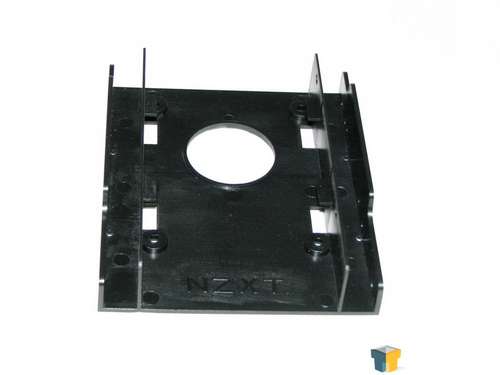
A closer look at this adapter shows just how this is done. A small plastic tab is used for separation of the drives. I really like this design as most I have seen so far have only allowed a single drive to be adapted to a single bay. Considering the ever growing popularity of SSD drives, this style of an adapter has to be considered a must have if there are no other provisions for mounting these drives internally.
All in all we are presented with a solid design for our hard earned money. Now that we have looked it all over it is time to get down to business and get some hardware installed.
Support our efforts! With ad revenue at an all-time low for written websites, we're relying more than ever on reader support to help us continue putting so much effort into this type of content. You can support us by becoming a Patron, or by using our Amazon shopping affiliate links listed through our articles. Thanks for your support!


