- Qualcomm Launches Snapdragon 4 Gen 2 Mobile Platform
- AMD Launches Ryzen PRO 7000 Series Mobile & Desktop Platform
- Intel Launches Sleek Single-Slot Arc Pro A60 Workstation Graphics Card
- NVIDIA Announces Latest Ada Lovelace Additions: GeForce RTX 4060 Ti & RTX 4060
- Maxon Redshift With AMD Radeon GPU Rendering Support Now Available
NZXT Rogue SFF Gaming Chassis
If on the search for a great-looking gaming chassis that’s also portable, NZXT might have you covered. Their “SFF” label might be a bit of an understatement though – this case is far from being small. Despite that, it looks good, offers a whack of functionality and is definitely worth a look.
Page 2 – Interior, Installation
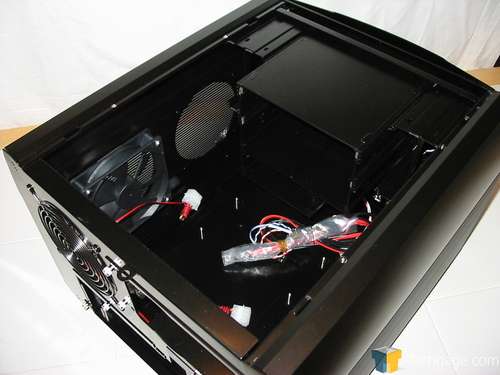
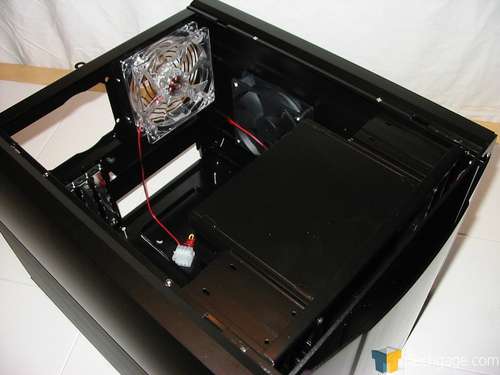
Most MicroATX cases are content with giving you a single hard drive bay, a single floppy bay, and two 5.25″ bays if you’re lucky. The Rogue laughs in the face of other MicroATX cases, touting four hard drive bays, a floppy bay, and two 5.25″ bays.
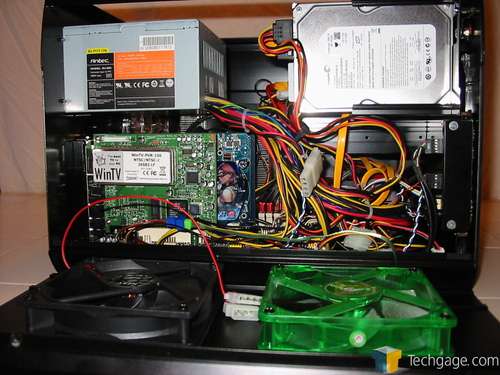
As I said before, the Rogue comes with three 120mm fans installed. The fans on either side are black, with a lighted fan in the rear. The fans on the intake side of the case are equipped with dust filters, a nice touch considering how porous the sides of the case are.
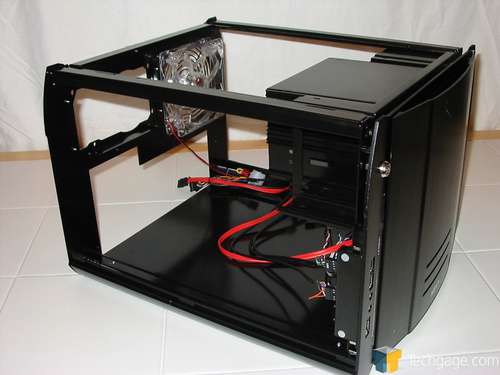
At first glance, this case looked like it would be hard to work in, and I must admit I was a little stumped until I opened the manual. It turns out that nearly every side of the case can be removed from the frame. This makes working in the case much easier, and is actually necessary in order to mount everything properly.
Once I figured out how to remove the sides everything became much clearer, and working inside the case was actually rather enjoyable.
While having the sides off makes the case easier to work in, there is definitely an order to putting things in the case. My recommendation is to follow the instruction manual included with the case. I’m usually one to throw the manuals directly in the trash but I found this manual to be quite helpful. I won’t bother with re-writing NZXT’s manual here, but I will give you a few pointers, especially when it comes to putting PCI cards in, and a few other oddities.
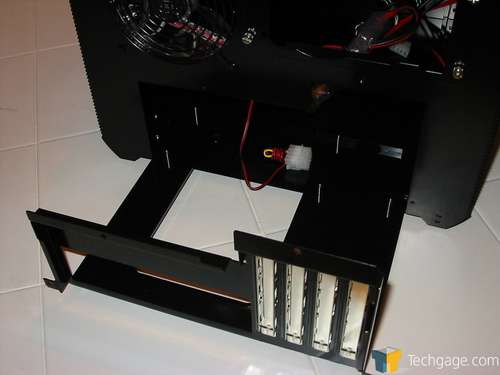
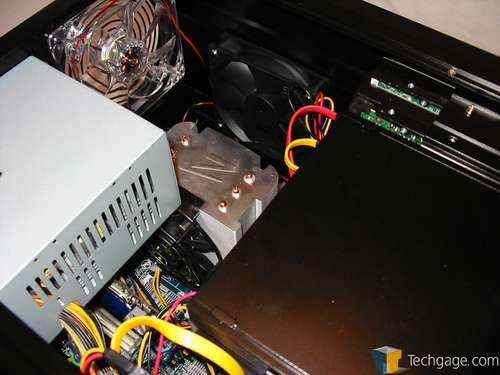
The first thing to do is mount the motherboard on the tray. Don’t put the CPU or CPU Cooler on yet though. Slide the tray back in, then drop in the CPU and mount the cooler, but don’t put the tray screws back in. You’ll notice in several of the previous pictures, there is a lip to support the PSU above the PCI slots. You’ll have to put your PCI cards in from the side, then slide the tray back out a bit to put the mounting screws for the cards in. Unfortunately the tray cannot be taken in or out with PCI cards in place.
An annoyance I have with MicroATX cases is cabling. As you can see above, I had an excessive amount of cabling inhibiting the airflow in the case. Fortunately the eSATA cable is removable; it was extremely long, longer than most of my standard SATA cables. Unless you’re using eSATA you might want to think about removing it.
I’m starting to believe the “Enormous Power Within” slogan. This is the first MicroATX case that has legitimately fit all 4 of my hard drives. You might also notice in the photo above, I was able to fit the OCZ Vanquisher we reviewed a few months ago. It just barely clears the PSU, but it fits. That means you should be able to slide just about any cooler into the Rogue.
|
|
Support our efforts! With ad revenue at an all-time low for written websites, we're relying more than ever on reader support to help us continue putting so much effort into this type of content. You can support us by becoming a Patron, or by using our Amazon shopping affiliate links listed through our articles. Thanks for your support!


