- Qualcomm Launches Snapdragon 4 Gen 2 Mobile Platform
- AMD Launches Ryzen PRO 7000 Series Mobile & Desktop Platform
- Intel Launches Sleek Single-Slot Arc Pro A60 Workstation Graphics Card
- NVIDIA Announces Latest Ada Lovelace Additions: GeForce RTX 4060 Ti & RTX 4060
- Maxon Redshift With AMD Radeon GPU Rendering Support Now Available
QNAP TS-109 Pro NAS
Network storage if growing more popular each day, and thanks to that, there are countless NAS boxes to choose from. We take our first look at a QNAP offering, that proves you do get what you pay for. This single-bay NAS offers pure silence, a great feature-set and simple setup.
Page 2 – Packaging and Initial Thoughts
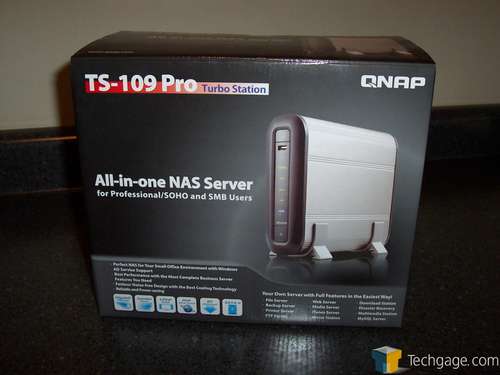
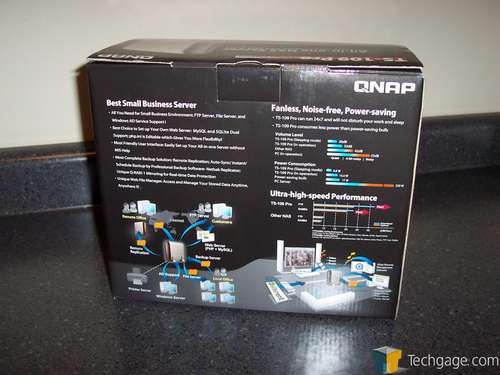
As with most products worth the paper they are written on, the TS-109 Pro comes in a simple but informative box providing most of the major features that the NAS has to offer. Giving those examples the quick one over, it’s obvious who QNAP is marketing this device towards.
With its support for active directory, built in MySQL server and web server, TS-109 Pro is aimed directly at those who operate in small business environments. While this doesn’t mean that home users like you and I wouldn’t be able to get a lot of great uses out of the TS-109 Pro but with multiple users connecting to the device on a daily basis, a NAS like this one would be right at home in any SOHO environment.
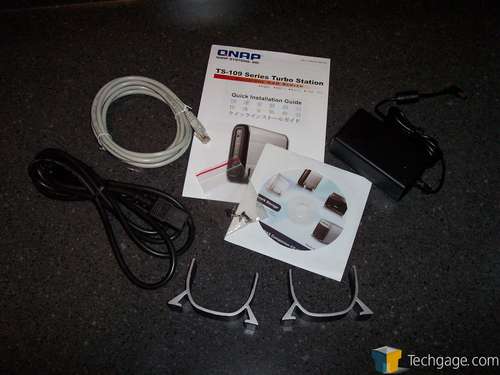
QNAP has taken a simplistic approach to the bundle included with the TS-109 Pro and from the looks of it, have hit that nail directly on the head. Shipping with the bare essentials, the TS-109 Pro comes with a small length of Cat5, a power supply and cable, a driver/setup disk, a small bag of screws, a manual and a pair of aluminum stands to allow the NAS to be setup vertically.
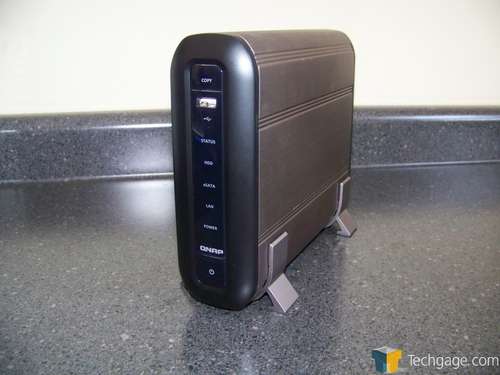
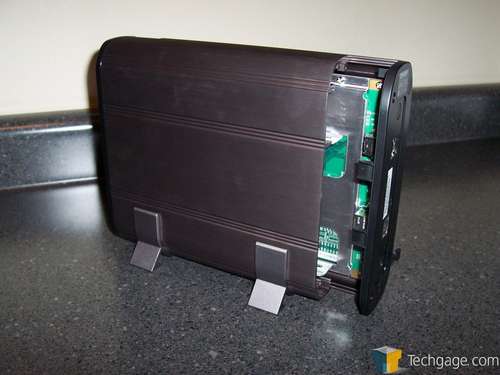
Once out of the box, the TS-109 Pro stands vertically with the help of the two included all aluminum stands. These pieces have soft rubber on the bottom of their feet to not only dampen any vibrational noise that the NAS might create but also protect the surface that it is sitting on from scratches. This soft rubber also lines the inside of the stands to protect the TS-109 Pro itself from damage caused by hot metal on metal action.
As with most other NAS devices, there is a slew of indicator lights and buttons running the entire face of the TS-109 Pro. Starting at the top and working our way down, we see a copy button, a USB port, a status, HDD, eSATA, LAN and power indicator lights and at the bottom sits the power on/off button.
Moving back up to the top, the copy button controls whatever device is plugged into the USB port. By plugging in your thumb drive (or even a digital camera!) and pressing the copy button, the TS-109 Pro automatically copies the contents of the attached device in its entirety to a pre-setup folder on the hard drive itself. In our testing, we found this to be a welcome feature on the TS-109 Pro. While not unique to the QNAP device, the ability to quickly backup your USB based hardware is a wonderful addition to any NAS.
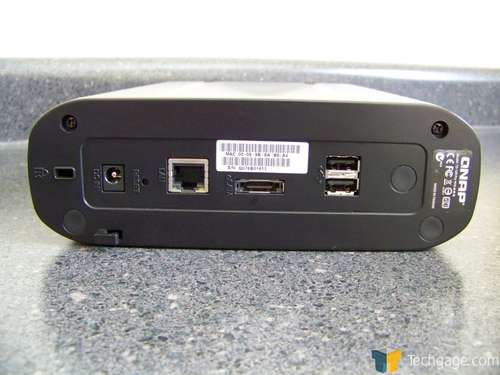
Turning the TS-109 Pro around and laying it on its side for a better view, we can see a multitude of connections available on the NAS. Starting from left and working our way right (from the bottom up if the unit is standing vertically) we can see a spot for a Kensington lock, a power in port, one gigabit Ethernet port, a eSATA connection and a pair of USB 2.0 ports.
While somewhat unnecessary on many devices, I can see the Kensington lock being a perfect fit for a NAS box. With so much sensitive data and the realistic approach that a device like the TS-109 Pro will rarely be moved, the added security of a physical lock is a logical choice. I have never liked them for notebooks as they limit the extreme mobility that I have come to expect out of my notebooks.
Turning our attention to the eSATA port, this is for the addition of an eSATA HDD as added storage capacity and not to connect the TS-109 Pro to your PC and use as an external drive. The USB ports can be used to connect a USB drive and used in the same fashion that an eSATA drive would be. You can also setup the TS-109 Pro to be a print server and connect a USB printer to one of the rear USB ports as well.
Notice the pair of screws that flank the I/O ports on the back of the TS-109 Pro. These are all that need be removed to access the interior of the QNAP NAS and install or uninstall your hard drive.
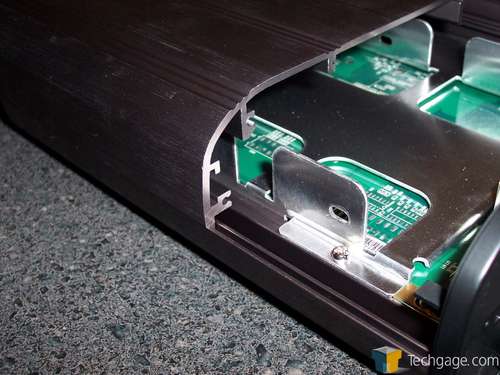
As stated above, all that is needed to install a disk drive into the NAS is to remove the two screws that sit on either side of the back end of the TS-109 Pro. With these removed the sides of the NAS slide is opposite directions, similar to that of the DS107e. If you’re looking at the front of the TS-109 Pro, the right side of the device will come towards you while the left side will withdraw backwards.
As shown in the following picture, the ends of each side fit into grooves in the adjoining side. This makes access to the hard drive a simple procedure.
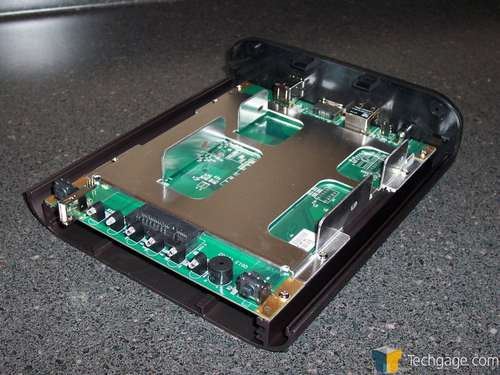
Once open, we can see that unlike the DS107e (and the DS207 that we also looked at) the TS-109 Pro uses a single data and power strip that the drive’s connections slide into. The hard drive itself fits in between the two vertical sides and is held in place with four mounting screws. Installation of a drive into the TS-109 Pro is absolutely painless and has a difficulty factor of something like a 2.
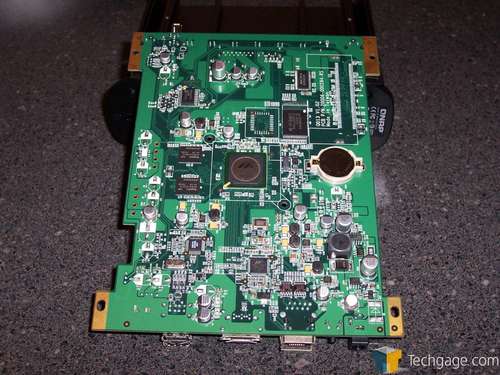
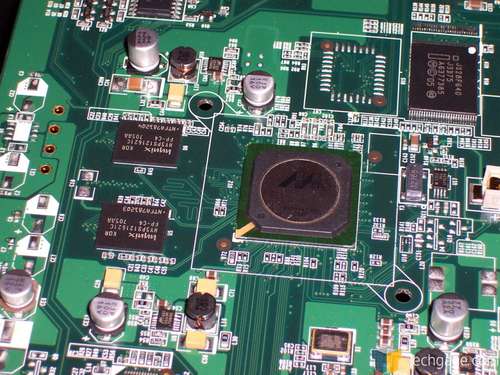
For further evaluation, we removed the motherboard of the TS-109 Pro and examined it closely. We can see that the TS-109 Pro uses a pair of Marvell chips. One of these chips controls the gigabit Ethernet port while the other one is the device’s CPU. Using the Marvell 5182, the TS-109 Pro is powered by the 500 MHz ARM based RISC processor.
Directly to the left of the CPU is a pair of Hynix DDR2 chips for the onboard memory. Unlike the Thecus N2100 that we looked at last year, the onboard memory is not expandable so what you see here is what you get. 128MB of DDR2 memory is provided on board and should prove to be more than enough for virtually all users.
Also onboard is a small 8MB flash chip that handles the basic bootstrapping needed to get the TS-109 Pro up and running. The operating system of the TS-109 Pro is housed on the installed hard drive rather than on any individual on-board chip. This takes up such little space and offers a great deal of practicality as if an install goes awry, you can simply reformat the drive and try again.
With my physical look out of the way, let’s next check out software features and the setup process.
Support our efforts! With ad revenue at an all-time low for written websites, we're relying more than ever on reader support to help us continue putting so much effort into this type of content. You can support us by becoming a Patron, or by using our Amazon shopping affiliate links listed through our articles. Thanks for your support!


