- Qualcomm Launches Snapdragon 4 Gen 2 Mobile Platform
- AMD Launches Ryzen PRO 7000 Series Mobile & Desktop Platform
- Intel Launches Sleek Single-Slot Arc Pro A60 Workstation Graphics Card
- NVIDIA Announces Latest Ada Lovelace Additions: GeForce RTX 4060 Ti & RTX 4060
- Maxon Redshift With AMD Radeon GPU Rendering Support Now Available
Sentey Arvina Full-Tower Chassis Review
Sentey is a name you may not heard of before, but the company has been around for quite a while. It’s recently been focusing on its chassis line-up, and with its full-tower Arvina, it hopes to deliver gamers and enthusiasts a feature-packed offering for around $150. Let’s take a look and see if it can compete with other well-established models.
Page 3 – Installation & Testing
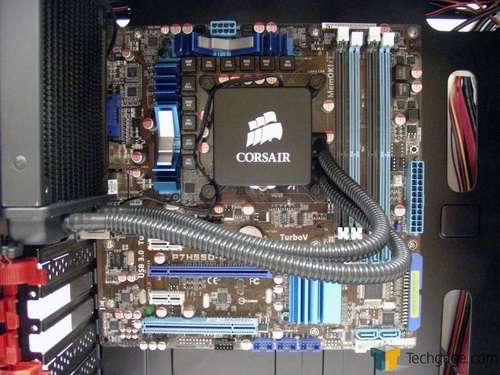
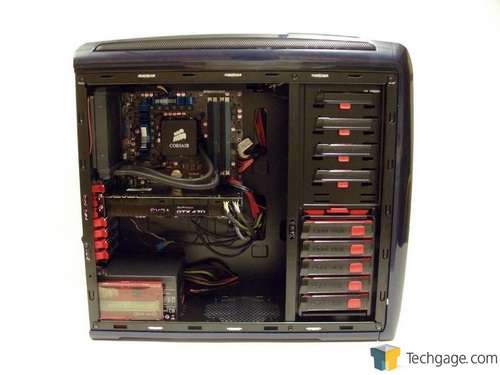
Starting with the motherboard, only one brass standoff was installed in the top left corner from the factory but the rest went in by hand. On some cases with painted interiors the paint makes the holes too tight but these could easily be installed by hand. The motherboard went in cleanly and looks tiny inside the spacious interior.
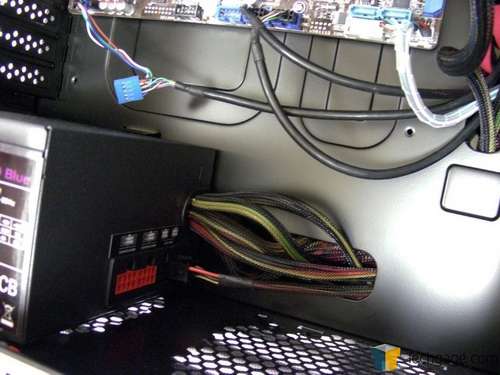
Installing the power supply was also easy enough as it slid into place and secured without issue. The opening at the bottom of the motherboard tray directly in front of the power supply allowed all cables to be run through without any space problems and that is even after having to add an additional SATA lead.
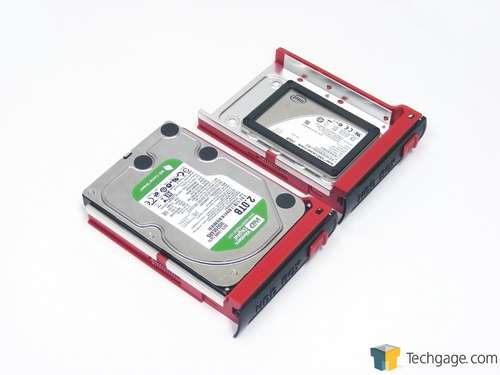
When it came time to install the hard drives, the 3.5″ one popped into the tray and secured in place without tools and there is absolutely no movement when the tabs are in place. A solid-state drive used for mock up purposes only and not in the final build was secured from the bottom of the tray. For some reason Sentey chose not to include screws for this so I had to steal a few from my own personal stash.
Another thing that I’m not a fan of is the fact that 2.5″ drives mount in the middle of the tray instead of with the back edge with the connections flush against the edge of the tray. Not everybody will have a spare power connection at the end of a lead and using one in the middle requires the wires to be bent back harshly. Even then still puts strain on the connection on the drive.
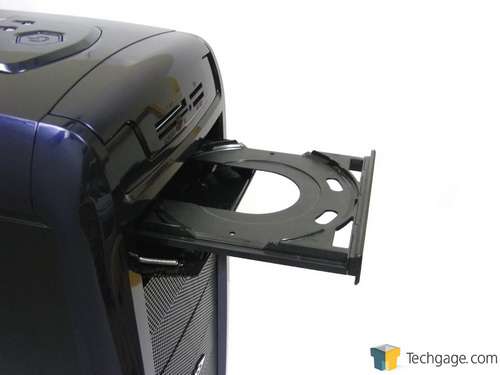
The optical drive used for mock up purposes also installed cleanly once the front panel was removed. When locked in place, there was a very small amount of movement front to back but nothing that users should be concerned about. When the system was powered on, the drive covers did exactly what they were designed to do and flipped down and up when the drive was opened and closed. When the drive is opened the button to close it is covered over so the tray needs to be pushed in before the motor takes over and finishes the job.
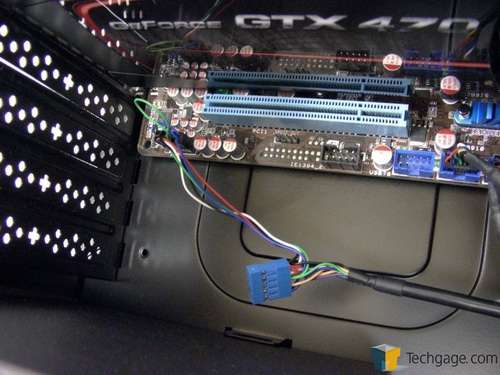
All of the wires from the top panel were long enough with the exception of the audio, which needed to be run all the way to the back bottom corner of the motherboard. There was not enough slack to run it cleanly through the cable management areas so the AC ’97 connector was used to provide the extra distance. This cable could likely be run across the GPU and under the space near the SLI connector but that is not the ideal option – plus for those running full size ATX boards, there’s a good chance that this cable will not reach at all no matter how it’s routed if the connector is further than half way back on the bottom edge of the board.
Remember how I kept putting the word lock in quotations when I was talking about the mechanism that keeps expansion cards in place? It’s because I use the term very loosely due to the fact that it wouldn’t, well, lock. When the GTX 470 was installed, the plastic shroud that covers the heatsink and fan meant the end wouldn’t fit over. All modern reference cards, regardless of what team they come from will have plastic that runs all the way to the metal on the PCI bracket so this is a gross oversight. Using a good old fashioned screw to keep the GPU or any other expansion cards in place is recommended.
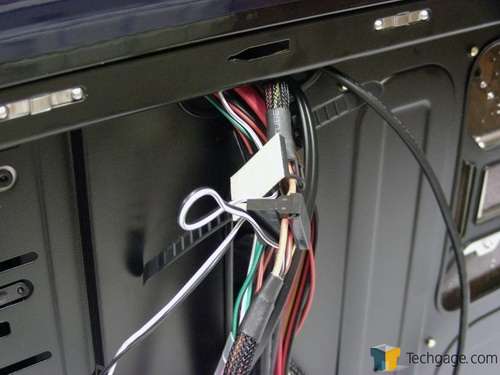
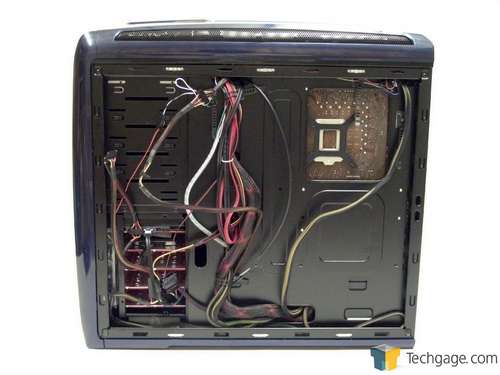
On the back of the motherboard tray there was an issue as well when a few of the included cable ties attached by adhesive pads pulled away from the tray when I was tucking cables into them. Going with the commonly found metal loops bent out of the motherboard tray and zip ties would have been far superior to this solution since the painted metal does not provide a good surface to form a bond. Another point to note is that the connectors leading to the fan controller cannot handle 4-pin connections so keep that in mind if switching out the stock fans is in the game plan.
While this case doesn’t allow for the level of cable management that some do, it does allow for a fairly clean build. It’s not perfect but there is nothing in this build that should affect airflow although the hard drive cage pretty much negates any air brought in by the front intake fan.
There felt like there was more room to hide cables on the back of motherboard tray than I originally thought after measuring how much room there would be. Normally I have to fight a little bit to get the right side panel in place but this one seemed to go on effortlessly. Part of the reason for this is likely because the case is so deep front to back that the cables can be spread out instead of lying on top of each other as well as having a ton of room to tuck cables behind the hard drives.
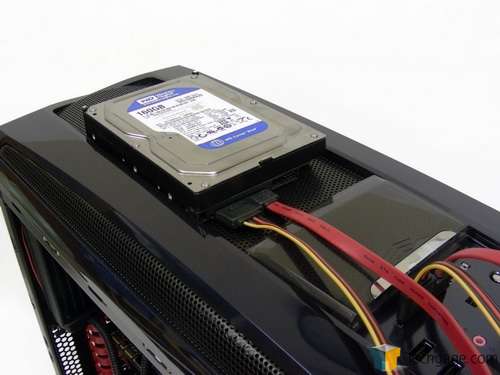
Unfortunately the motherboard that we use for testing doesn’t have the connector needed to fire up the card reader but we were able to test the top hot swap SATA connection. I’ll say right up front that I don’t like the implementation due to the fact that the drive isn’t secured as it would be in an actual hot swap bay and there’s nowhere that I would reliably rest the drive. With that said, drives are picked up automatically and there were no issues reading or writing data – so it does what it’s supposed to do.
Testing
All of our testing is performed in a near steady 20°C ambient environment with readings taken before and after with a standard room thermometer. AIDA64 Extreme Engineer is used for monitoring and recording all system temperatures throughout the testing process.
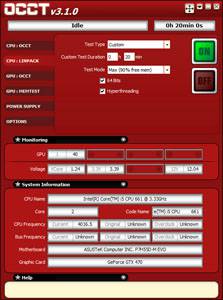
Windows is allowed to sit idle for 10 minutes after startup to ensure all services are loaded before recording the idle CPU and GPU temperatures. CPU load temperatures are generated by performing a 20 minute run of OCCT LINPACK using 90% of the available memory, while GPU load temperatures are generated by OCCT’s built in test, also for 20 minutes.
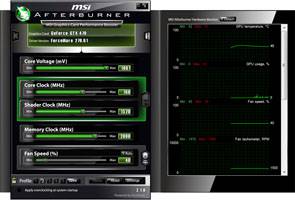
Stock CPU settings were obtained by setting the AI Tweaker option with the BIOS to Auto and the maximum stable overclock frequency of 4.0GHz was obtained after extensive testing to ensure stability. The final clocks for the GPU are 760MHz on the core and 1000MHz QDR (4000MHz relative) for the memory with the voltage increased to 1.087V using MSI’s Afterburner overclocking utility. As with the CPU overclock, testing was done prior to ensure full stability.
The components used for testing are:
|
Component
|
Techgage Test System
|
| Processor |
Intel Core i5-661 – Dual-Core (3.33GHz)
|
| Motherboard |
ASUS P7H55D-M EVO mATX – H55-based
|
| Memory |
Corsair Dominator 2x2GB DDR3-1600 7-8-7-20-2T
|
| Graphics |
EVGA GeForce GTX 470
|
| Audio |
On-Board Audio
|
| Storage |
Western Digital 2TB Green
|
| Power Supply |
Antec TP-750 Blue
|
| Chassis |
Corsair Obsidian 650D Mid-Tower
Corsair SE White 600T NZXT H2 Sentey Arvina SilverStone Raven 03 Full-Tower |
| CPU Cooling |
Corsair H60 (Exhaust Configuration)
|
| Et cetera |
Windows 7 Ultimate 64-bit
|
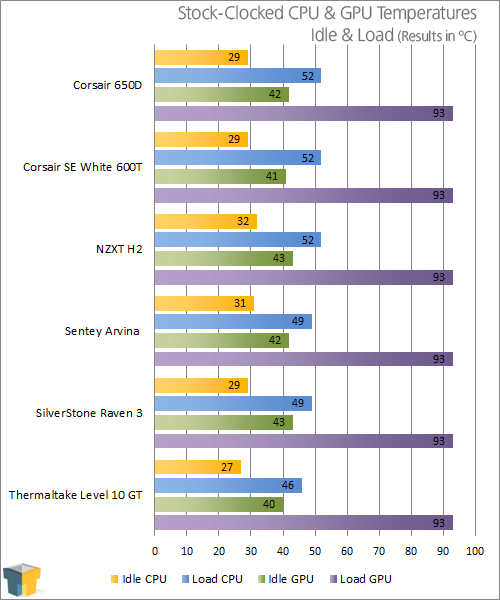
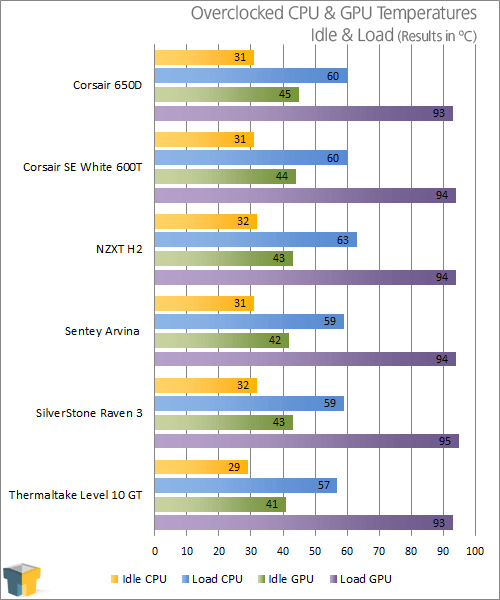
The Arvina case checks in with respectable results across the board although the CPU temperatures are a little higher than I would have thought given the cooling setup. The fans seem to move a good amount of air as well but with only 2 degrees difference between it and the Thermaltake Level 10 GT, which is the current king of the hill, I don’t see any reason to be upset.
GPU temperatures are well in line with the rest of the pack due to the fact that the stock cooler is so powerful when it cranks up to 90%+.
For having a large number of fans, two of which are 80mm that tend to be louder than the 140mm monster fans that we have today, I found this case to be pretty much on par with the amount of noise created by the Corsair 650D/600T Graphite. Seeing how both of the Corsair cases feature two 200mm and one 120mm fan, I’d say that this is an accomplishment in itself.
With middle of the road performance and lots of features, some of which work while others don’t, is the Sentey Arvina series worth your hard earned dollars?
Support our efforts! With ad revenue at an all-time low for written websites, we're relying more than ever on reader support to help us continue putting so much effort into this type of content. You can support us by becoming a Patron, or by using our Amazon shopping affiliate links listed through our articles. Thanks for your support!


