- Qualcomm Launches Snapdragon 4 Gen 2 Mobile Platform
- AMD Launches Ryzen PRO 7000 Series Mobile & Desktop Platform
- Intel Launches Sleek Single-Slot Arc Pro A60 Workstation Graphics Card
- NVIDIA Announces Latest Ada Lovelace Additions: GeForce RTX 4060 Ti & RTX 4060
- Maxon Redshift With AMD Radeon GPU Rendering Support Now Available
SilverStone Raven RV03 Full-Tower Chassis Review
With the major success SilverStone’s Raven series has experienced in the past, the RV03 has a lot to live up to. A full-tower on its side, the Raven 03 orients your motherboard to exhaust heat out the top, and as a result, makes installation an interesting process. Let’s take a look and see if this gold-trimmed $130 offering hits its mark.
Page 2 – Interior
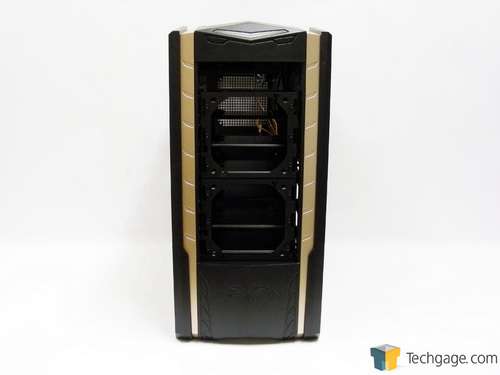
As usual, I always remove the drive bay covers and as many panels as possible to give an unobstructed view. Starting at the front, the 5.25″ drive bays are a bit of an onion. Stay with me now, Shrek fans. By referring to them as an onion, I mean there are layers upon layers of goodies to look at.
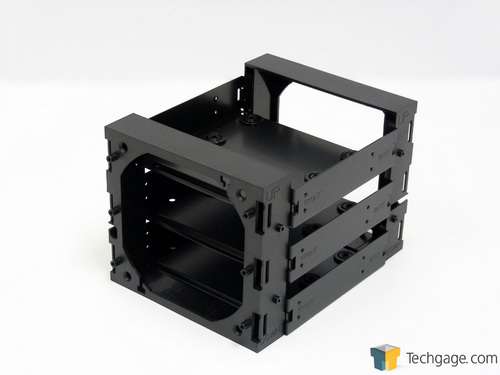
As mentioned earlier, six of the drive bays are taken up by two 120mm fan brackets that each hold three 3.5″ hard drive trays. These are capped off at the back with two more 120mm fan brackets for some serious cooling.
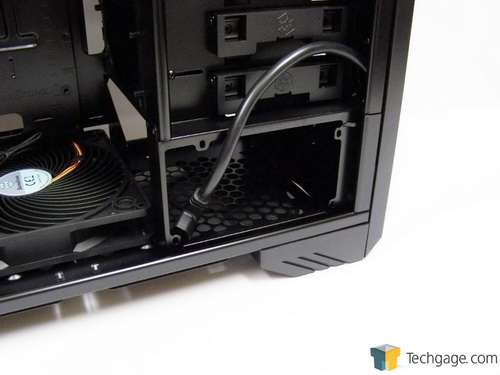
Moving around to the left side is where things get busy, so strap yourself in. At the bottom front of the case is where the power supply is installed. Power is delivered to the system by way of an extension cable that runs from the power supply to the bottom front of the case. A standard power supply cable is then connected to the port and run to the power source.
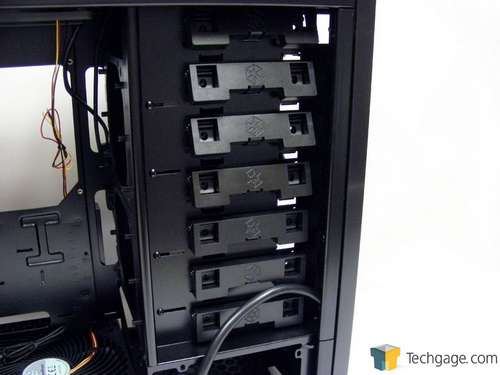
Above the power supply are the tool-less drive locks for the seven 5.25″ bays. On the bottom of each is a plastic catch. Squeeze up and the locking can be flipped up after it releases. Once the drive is in place, the lock can be pushed down until it clicks into place. SilverStone has also given users the option of securing drives in place with screws to ensure everything stays secure.
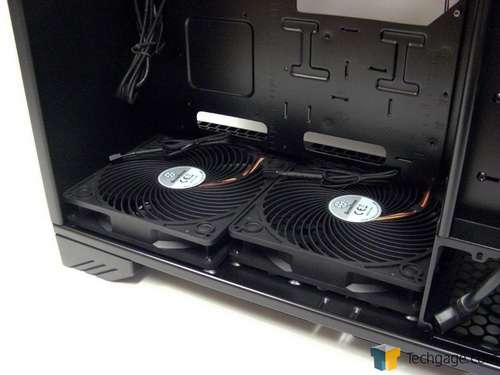
The bottom of the case features what will do the bulk of the cooling; the naughty sounding, double 180mm AP181 “Air Penetrator” fans. Capable of moving anywhere from 80 to 130 cubic feet of air per minute at as little as 700 or as much as 1200 revolutions per minute, both are controlled by the fan controller on the top of the case. If more cooling is needed, these can be swapped out in favour of up to three 120mm fans.
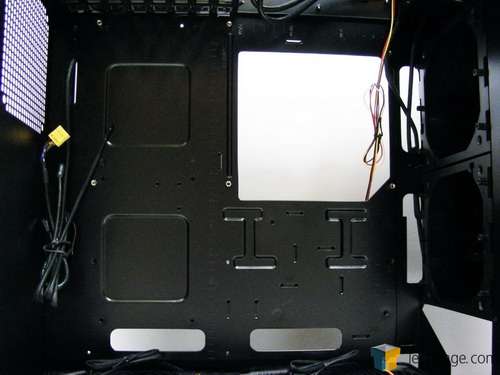
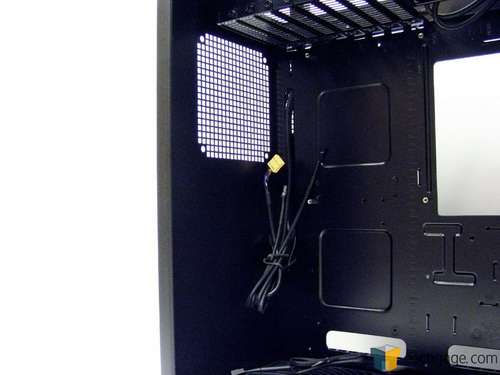
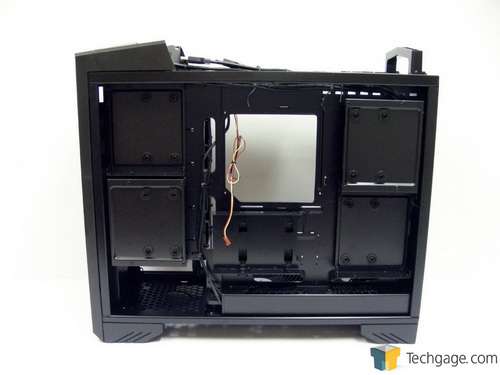
With the motherboard rotated clockwise 90 degrees, cable management is a little different than in most cases. There are two holes for running cables on the right, bottom and left side of the tray. In the upper right area of the tray is a huge cutout for helping to install or remove aftermarket heatsinks that feature a backplate. The pre-installed motherboard standoffs are setup to accept boards that make use of the first two vertical, or in this case horizontal rows of standoffs such as the GIGABYTE GA-P55-US3L. but there are extra standoffs included for those with standard width boards.
Seeing how the rear panel is bare except for the mounting area for a 120mm fan to push cool air directly towards the GPU, I’ll move on to the top.
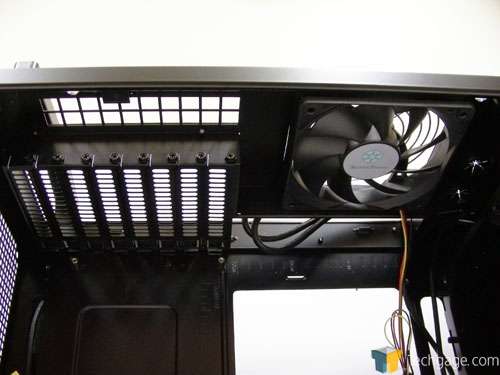
Since the back is now the top we see eight vented PCI slot covers, the motherboard I/O opening and a 120mm exhaust fan. With this many slot covers, this case is begging for some multi-GPU action.
Behind the motherboard tray on the right side is something that I was impressed by when looking at the Fortress FT03 earlier this year. Hidden here is room for four 3.5″ hard drives and two 2.5″ drives. In the bottom front corner there is enough room to hide any unused power leads by tucking them in by the power supply.
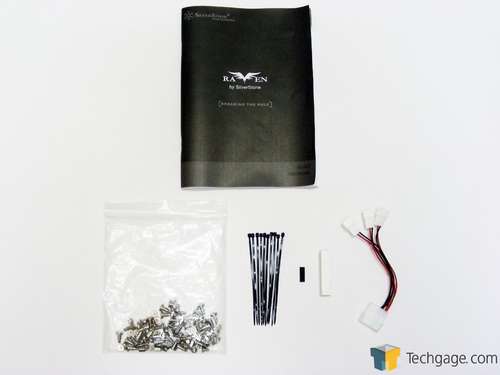
Included with the Raven 3 in a white cardboard box is everything needed to build a system. All thrown into one bag are screws to secure the motherboard, screws to secure devices in the 5.25″ bays and the 2.5″ drive tray, long screws to install 3.5″ drives, a three 3-pin to 4-pin molex connector to help power any additional fans added by the user, some cable ties and two pieces of adhesive foam that can be used to stealth an optical drive.
Eye candy aside, it’s time to load up the Raven 3 and see if it can soar above the competition. Ok, I’ll stop with the bird metaphors. It’s build time!
Support our efforts! With ad revenue at an all-time low for written websites, we're relying more than ever on reader support to help us continue putting so much effort into this type of content. You can support us by becoming a Patron, or by using our Amazon shopping affiliate links listed through our articles. Thanks for your support!


